
Bathroom Remodel - Part 2
Fresh off the heels of a successful (albeit lengthy) bathroom shower demo and install, I was ready to tackle the rest of the bathroom. The plan was to remove and redo everything including a new vanity and sink, new mirrors, wall sconces, toilet, flooring, and the bathroom fan even though it did play music (poorly). I knew there would be hidden surprises along the way, hiccups of course, and potentially more scope creep, but this time I felt better armored (and still naive).
Construction is a challenge no matter the scale, because something will inevitably go wrong, unforeseen existing conditions will require you to change course. That is also the fun of it, the constant problem solving and looking for ways to improve upon standard practices, but also realizing that if something’s been done a thousand times before then maybe it’s for good reason.
Being trained as an architect, I’m already thinking of multiple ways to accomplish the same task, though in some cases I do have to remind myself that I’m not reinventing the wheel. It’s just a bathroom I tell myself. Yes, that is true, however, if I give myself that freedom to question and explore construction means and methods, perhaps one day I may find a shortcut that works for me and potentially others. That’s the goal at least in the long run, but for now, it was time to demo and use muscles over brain.
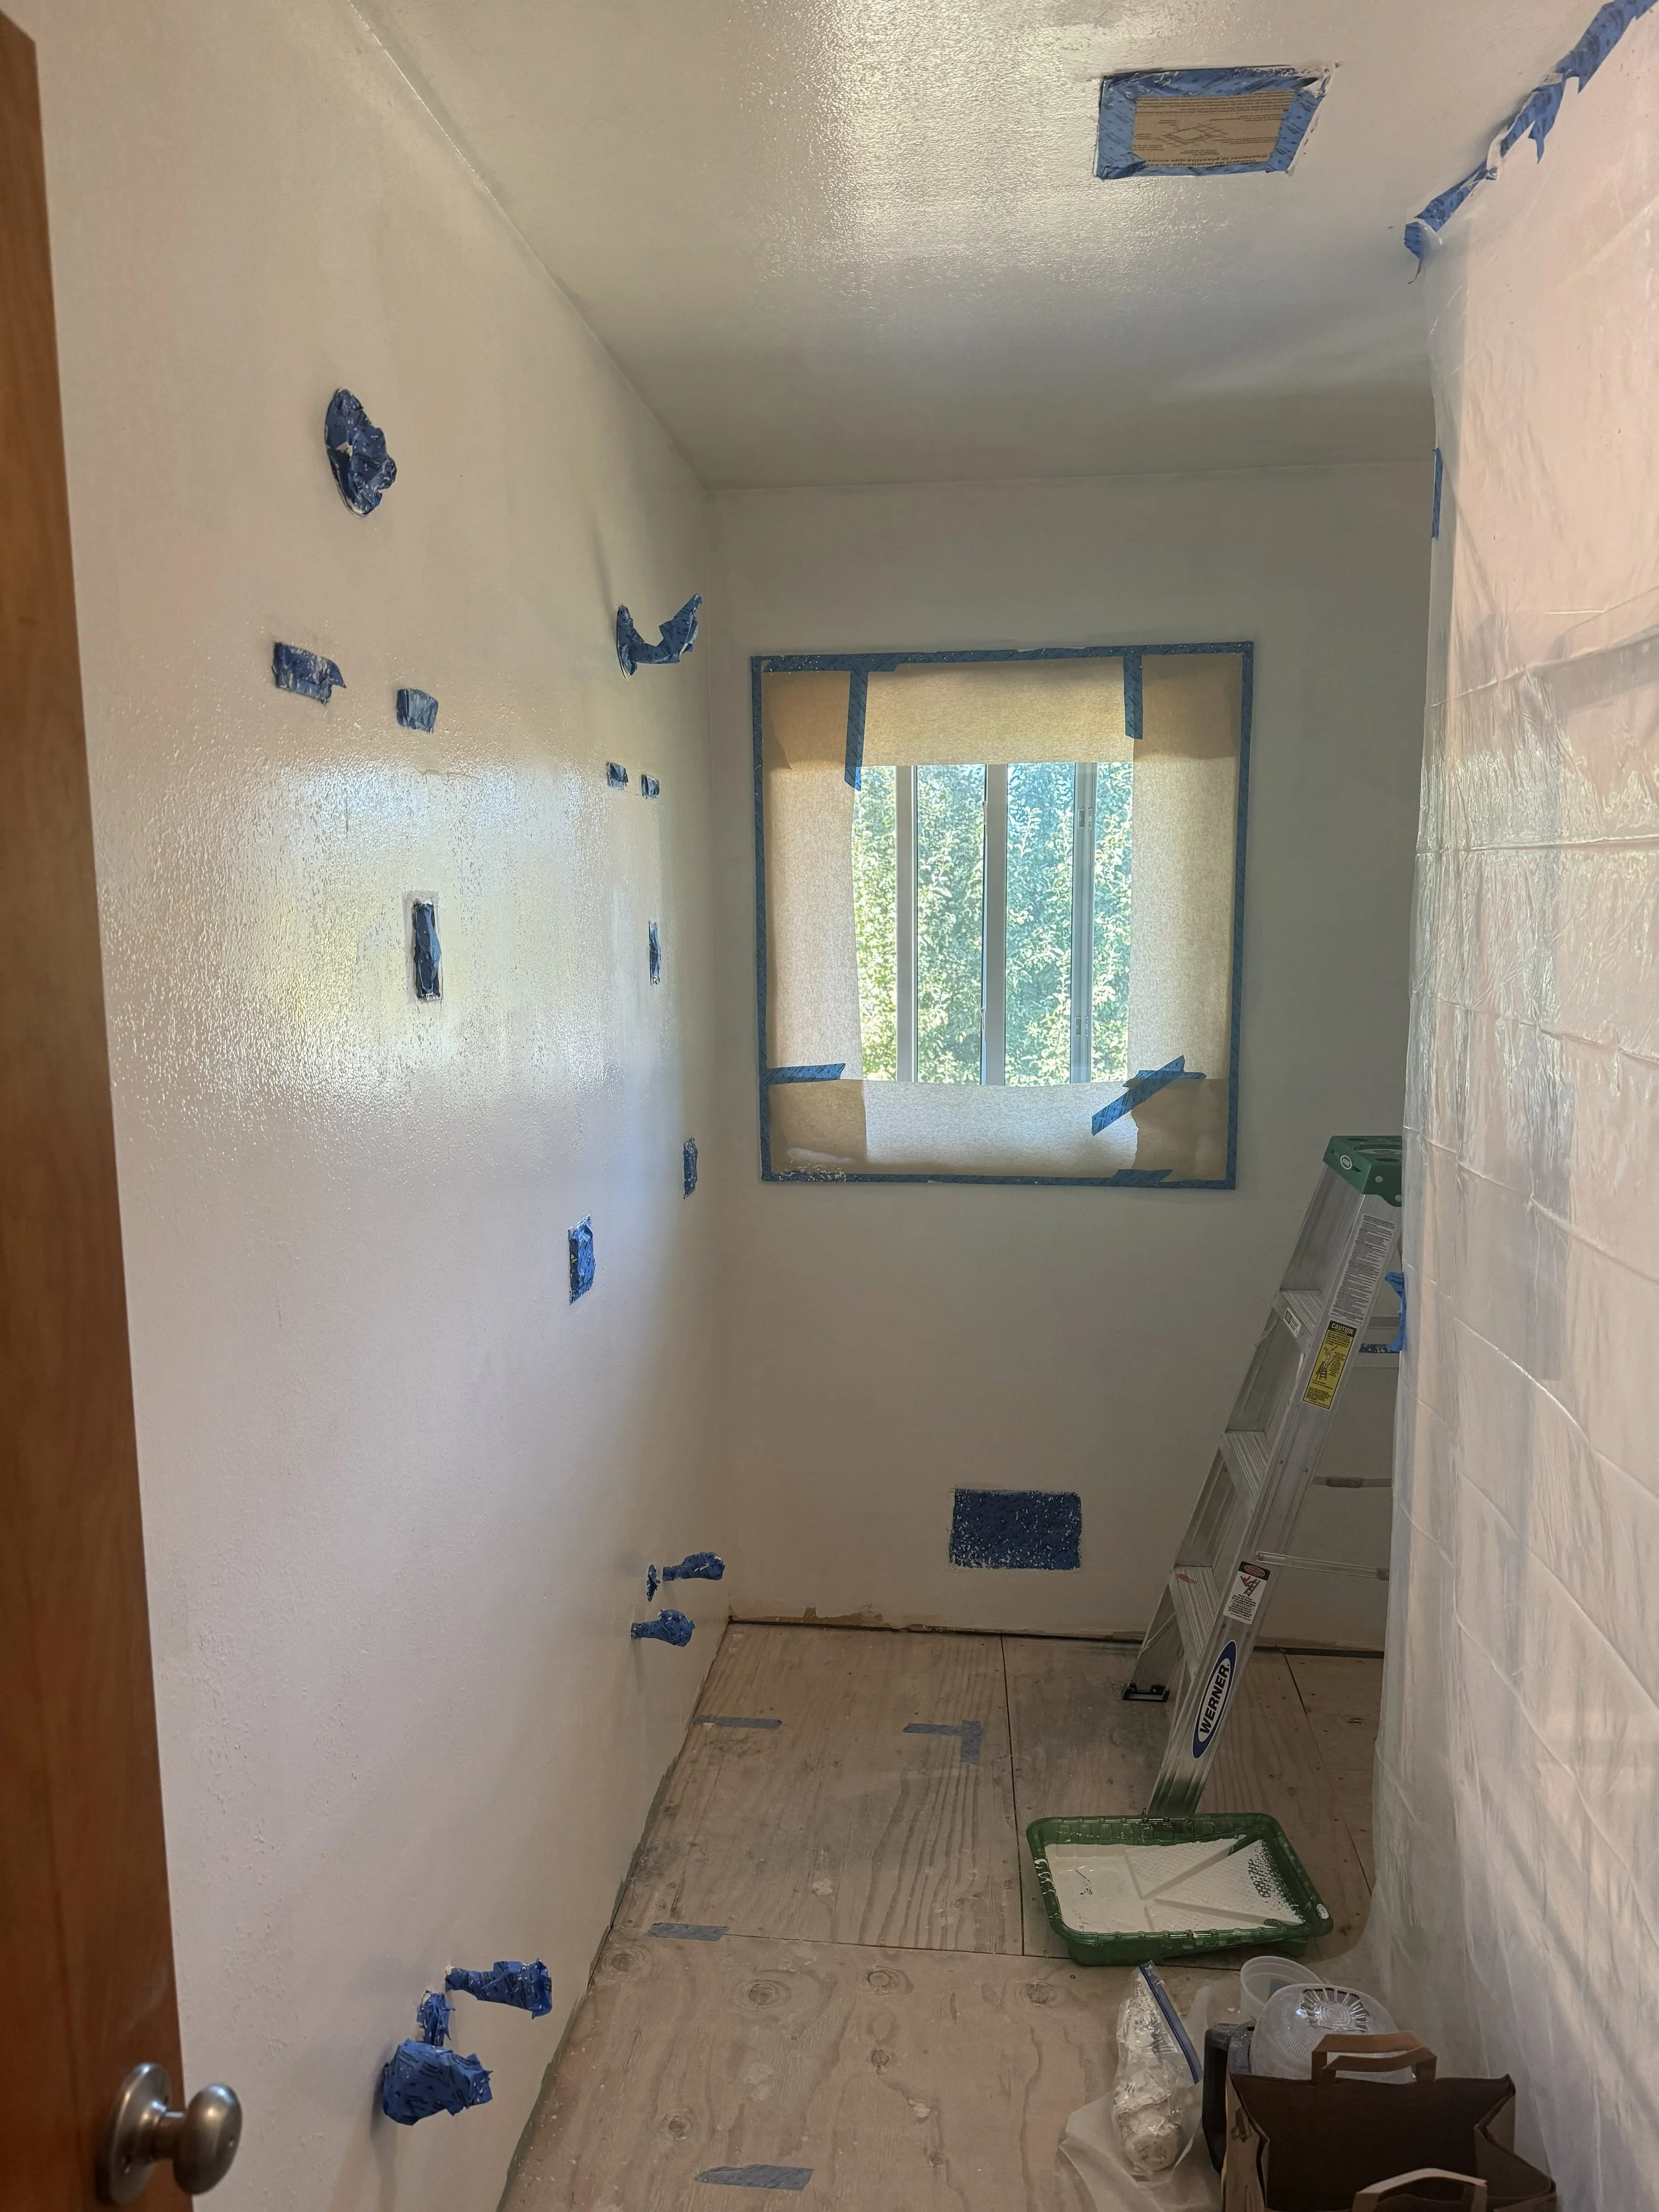
The two photos below show the existing condition of the bathroom before demo. The goal for the bathroom remodel was to be budget conscious and still considerate of my burgeoning construction skills. Eventually I will do tile installation - wall and floor - but for now I opted for materials that were durable, large format, and easy to install. For example, the shower tub installation used 3 fiberglass wall panels that snapped into place. Easy, quick, and super durable. If I had done tile installation for the walls I might still be in the midst of grouting. Choose your battles wisely, I would remind myself often. Other times, it doesn’t hurt to go with a professional or subcontractor if you feel in over your head. In this case, I had to call in an electrician for certain obstacles. Knowing your limit and what your comfortable with, and knowing what requires a permit and/or professional expertise are all important considerations when tackling your own project renovation.
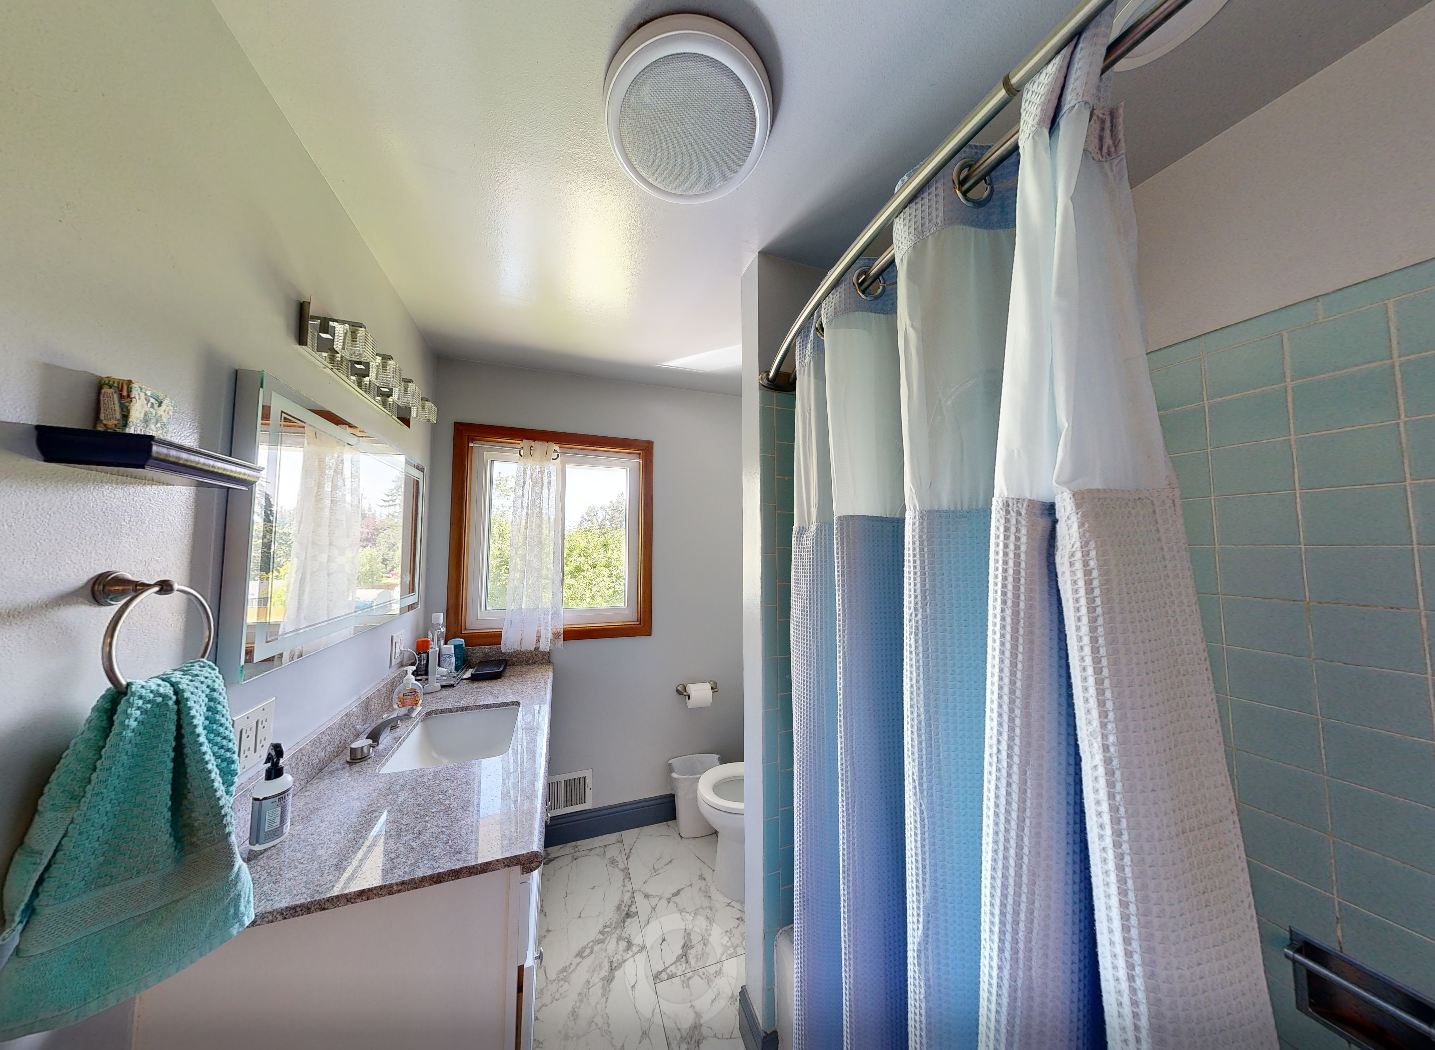
The existing bathroom as originally surveyed by our 3D scanner. Note the fish eye lens is making the countertop look extra long, this is not the case. It was about 4 feet in length and clashed in color and design with the rest of the bathroom. All surfaces were to be touched, except for the existing window trim (for now).
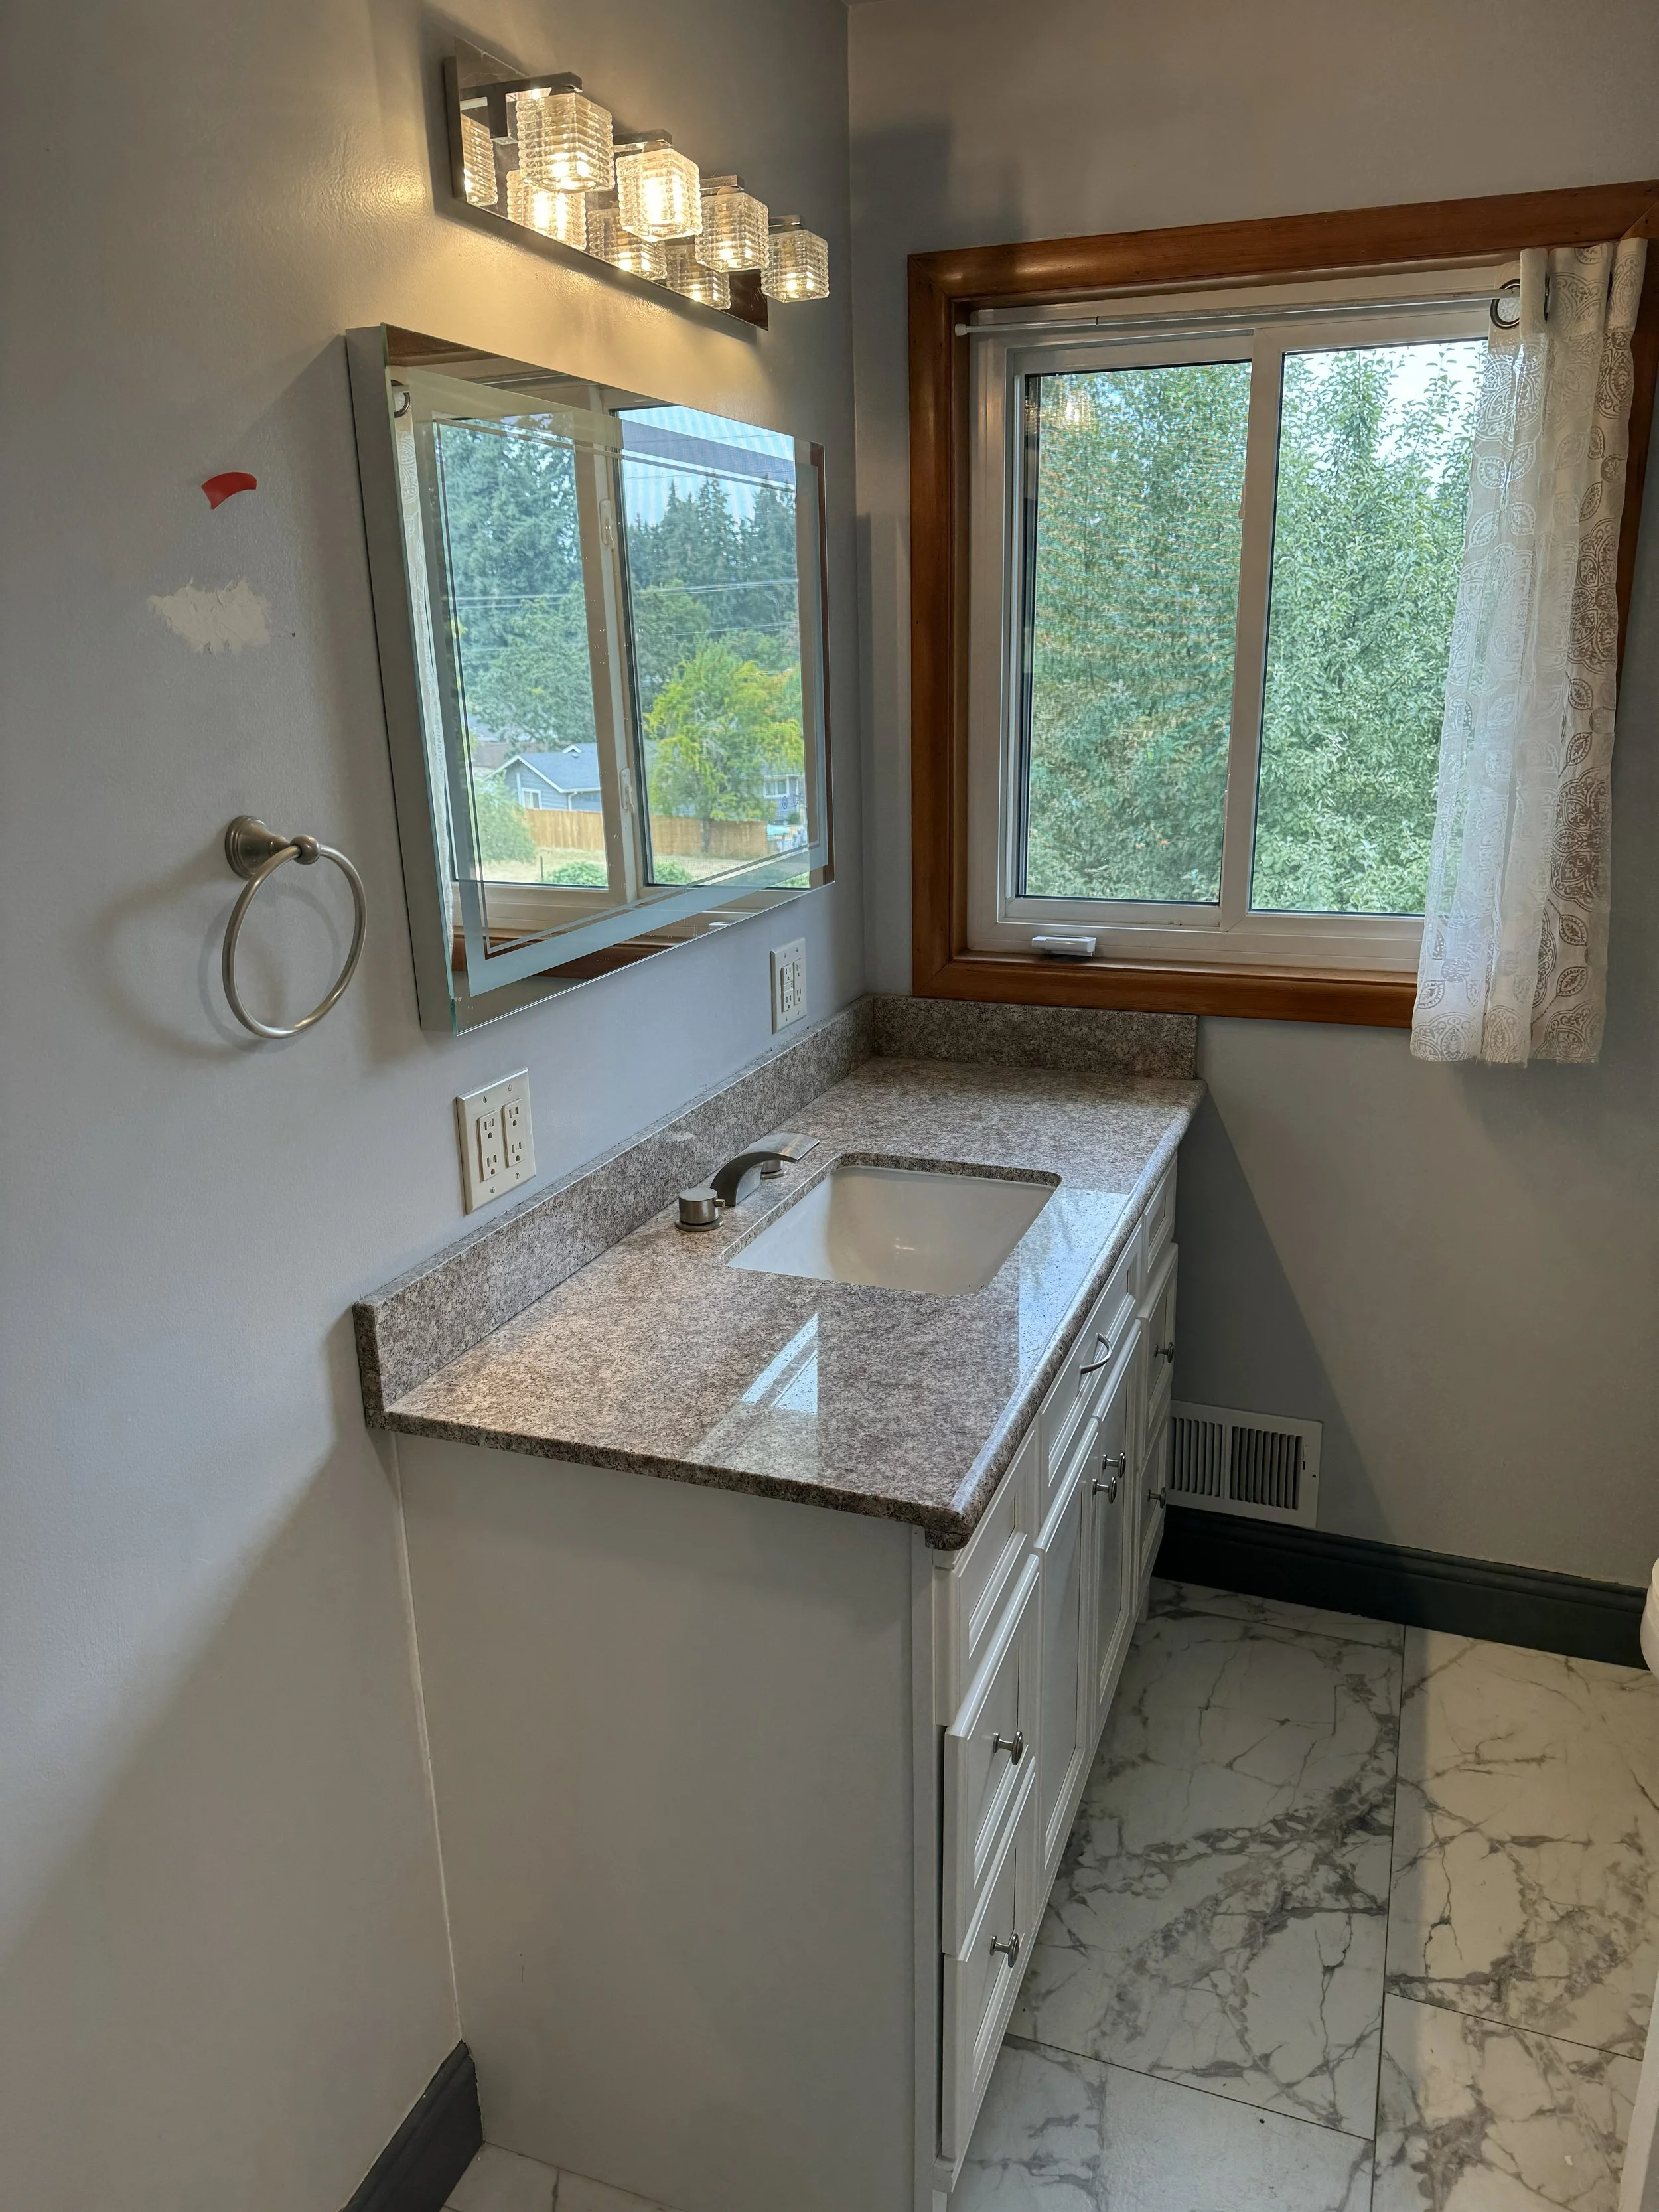
What this image doesn’t show is the 9 inch gap between the casework and the wall hiding holes and cracks in the gypsum. The gap was probably due to the overlap of the supply vent in the wall thus keeping the casework proud of the wall and extending the countertop to the wall. Not a great look in the field.
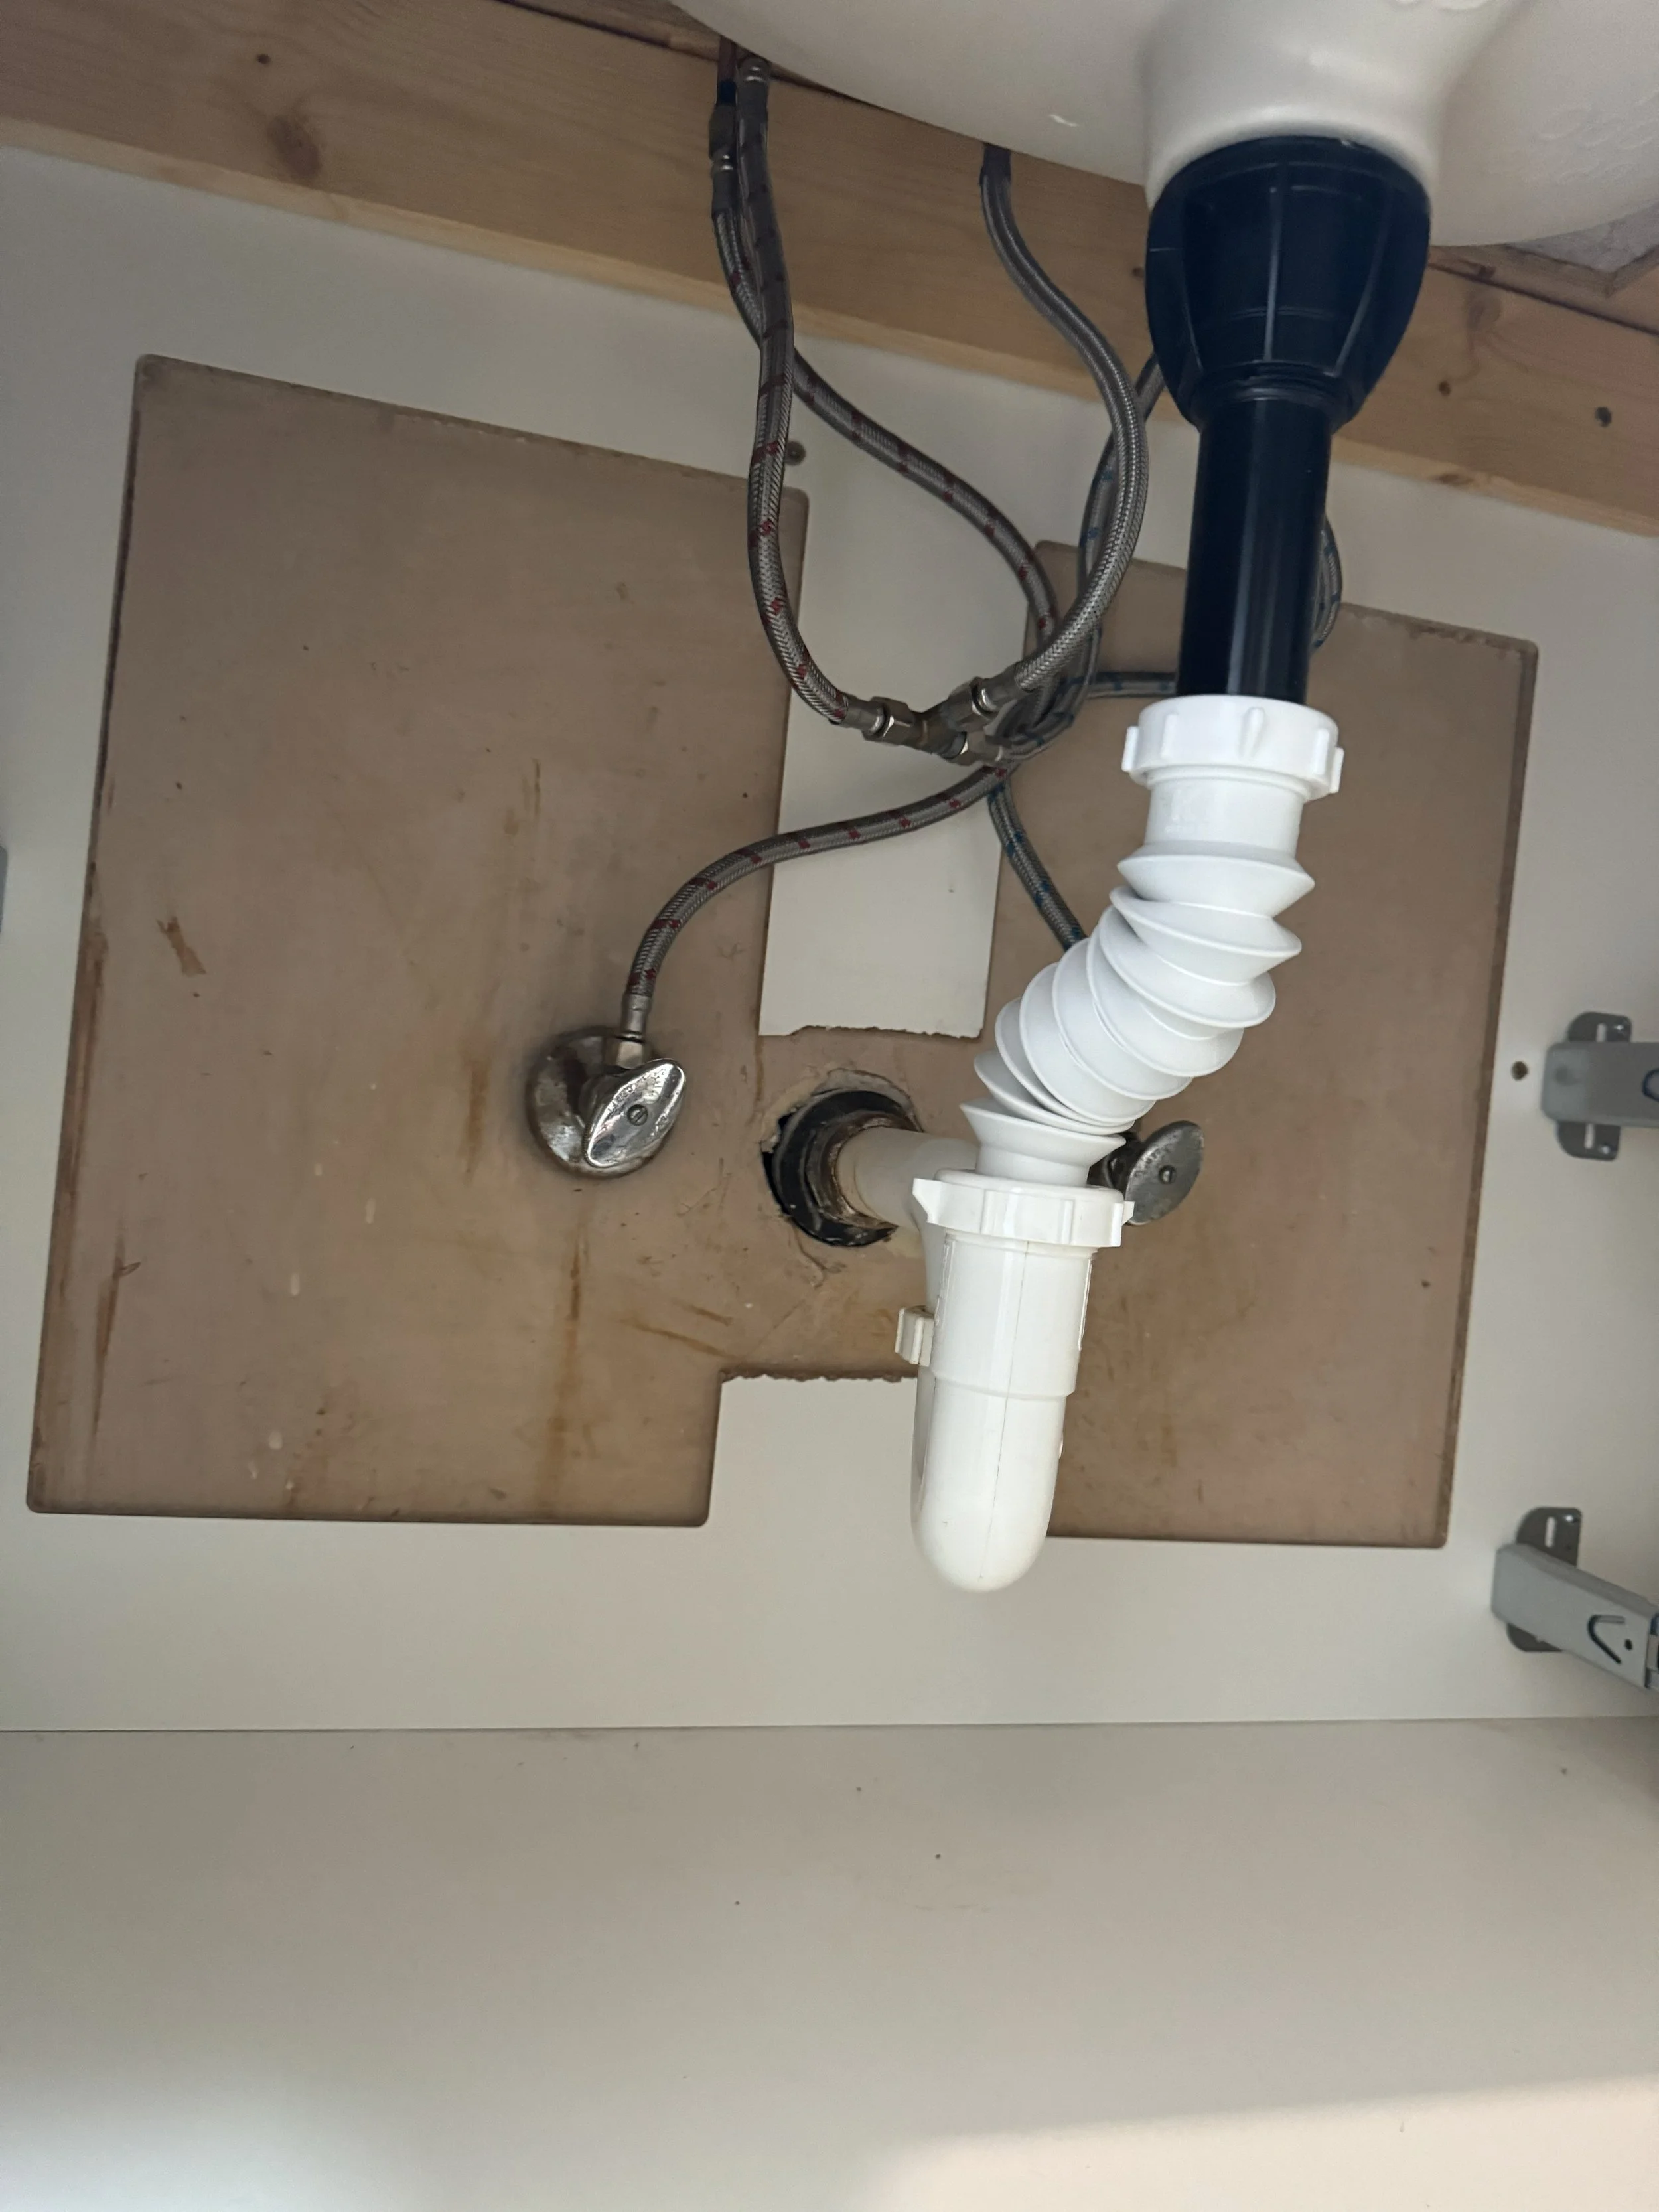
TURN OFF THE WATER
Before the demolition of the casework, first I had to turn off the water valve supply to the sink faucet. Unfortunately one of the valves didn’t full close leaving a small leak that could become troublesome. On my next trip to the hardware store I opted for a plug to be safe knowing how long the process would take.

REMOVE THE CASEWORK
The casework and counter were attached to the wall in every which way possible; nails, screws, glue, caulking, etc. It was probably overkill and ended up damaging more of the drywall than I had hoped for. In the end I ended up replacing most of the drywall anyway since I needed access to the plumbing.
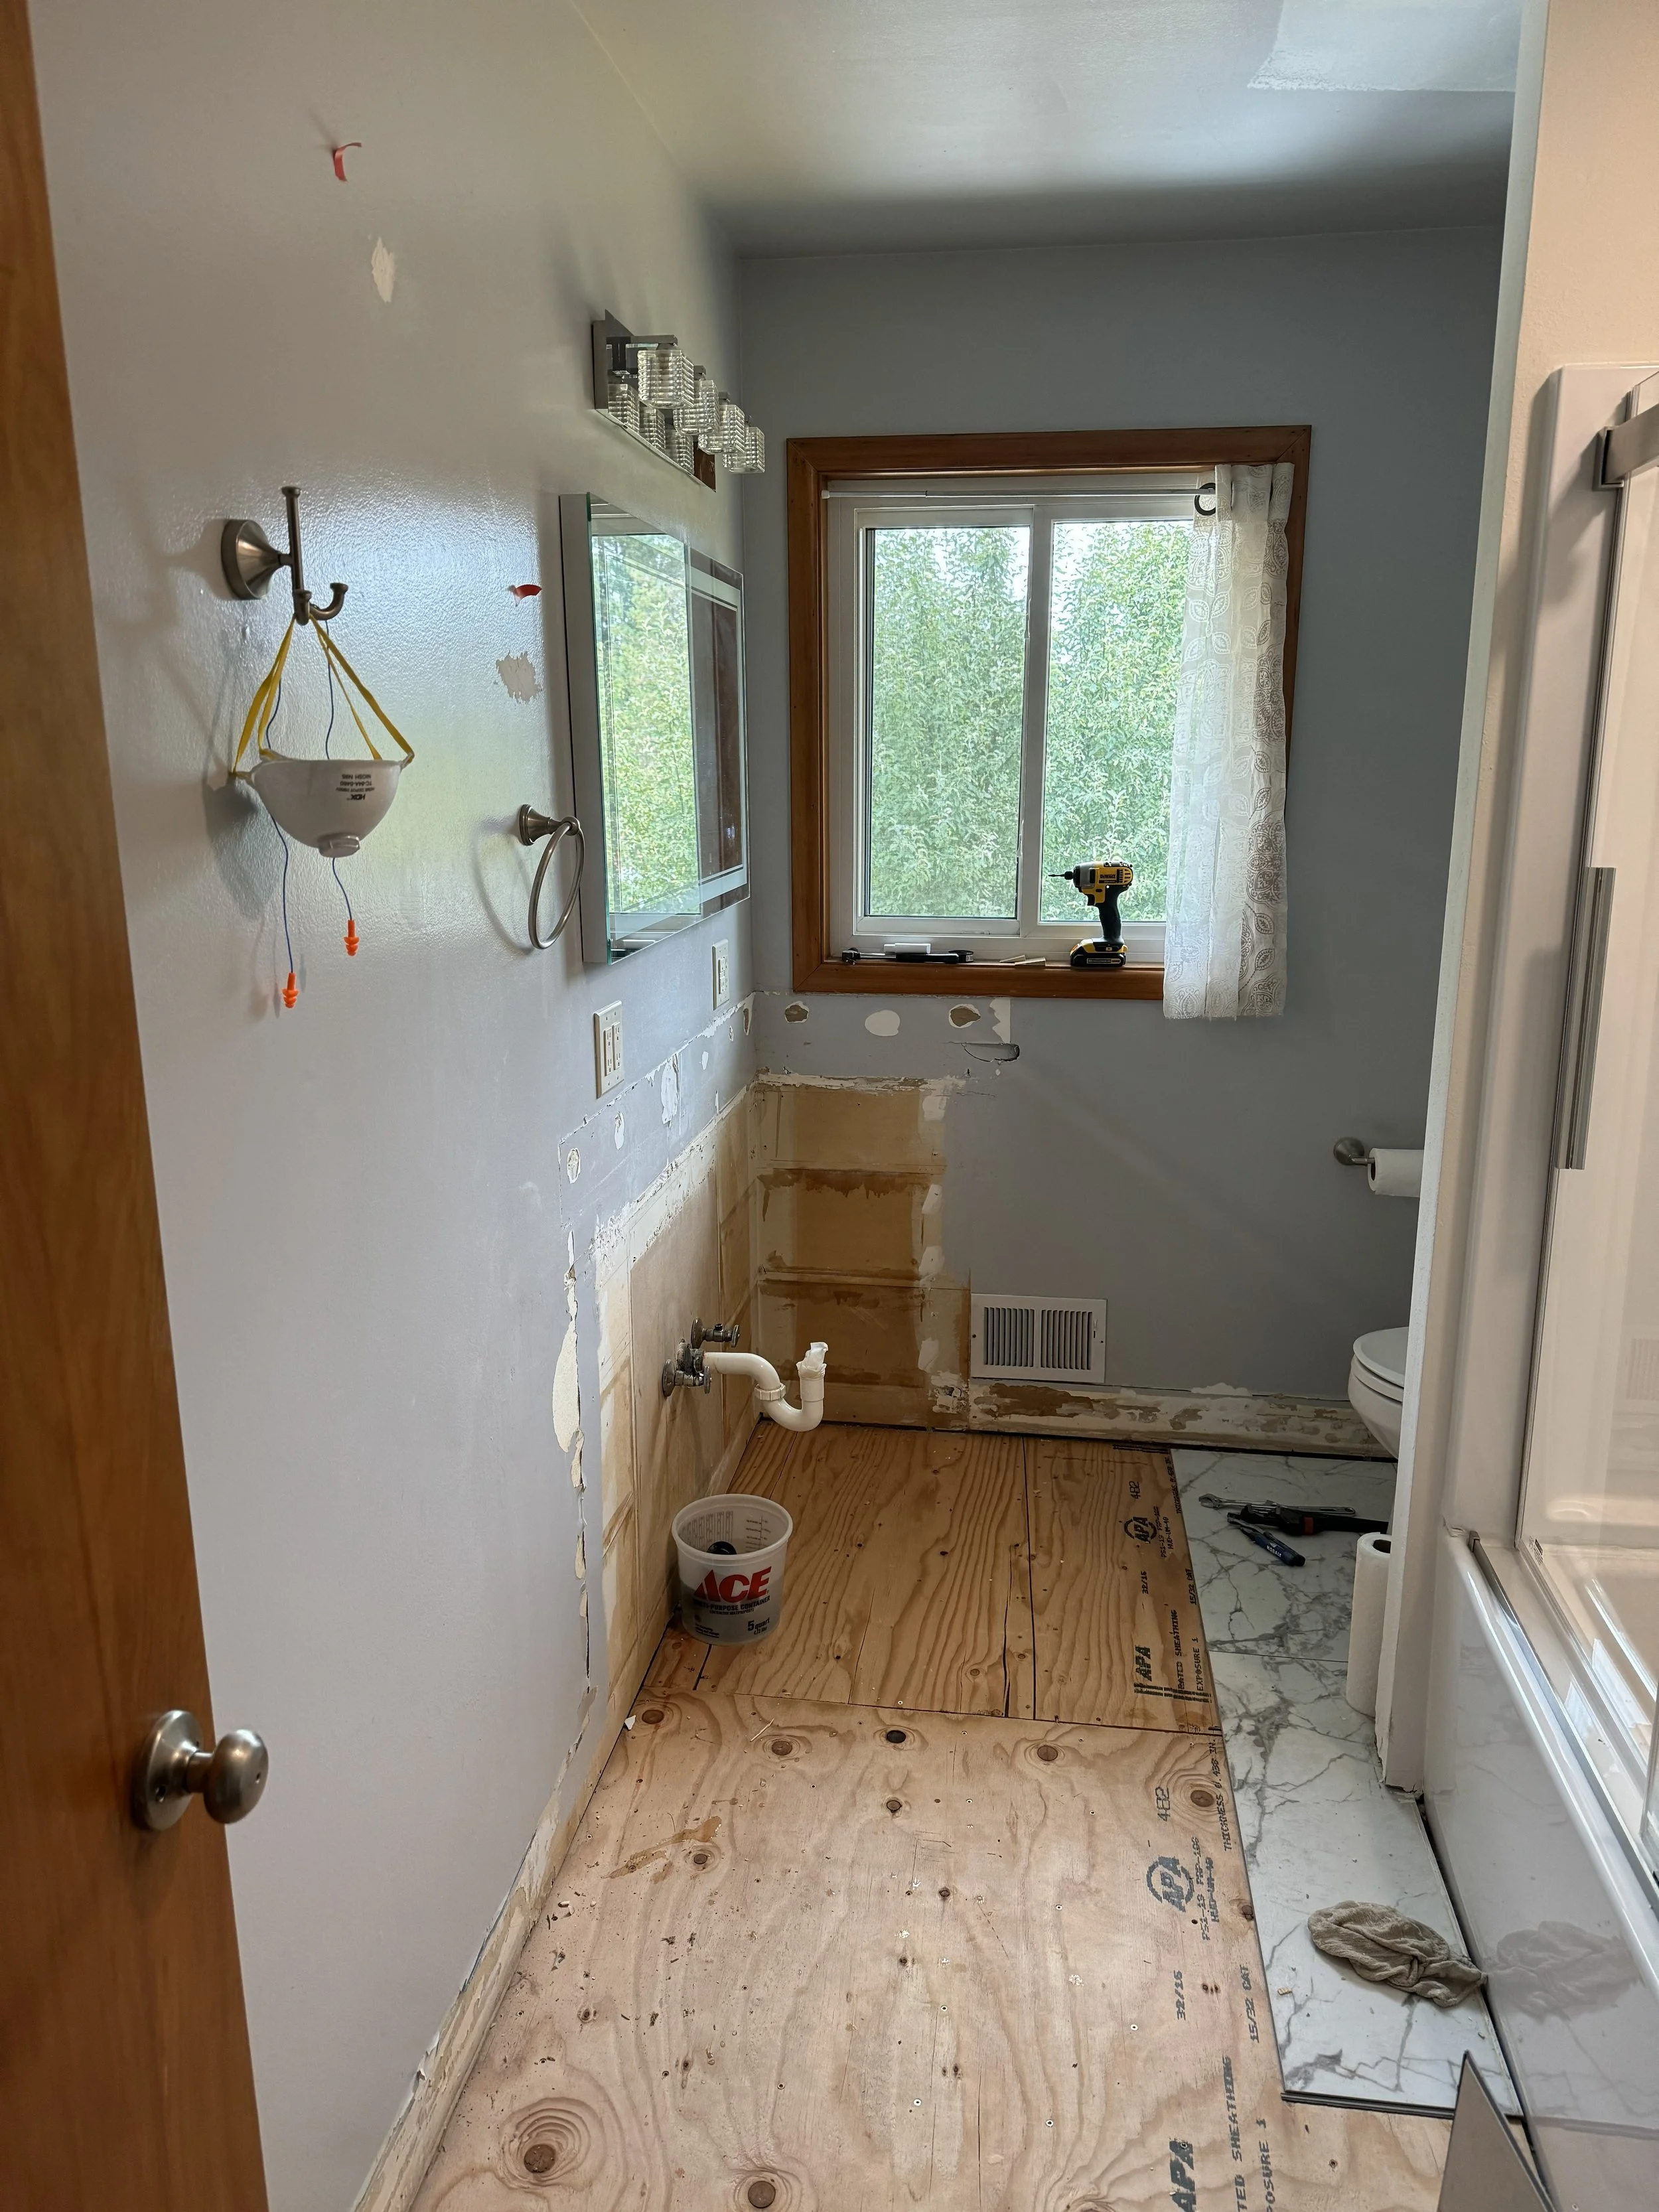
REMOVE THE FLOORING
Once the casework, counter, and sink were safely removed from the area, it was time to remove the flooring. The existing floor was a click-together LVT large format plank, similar to what would be installed down the road. This was easy and done in only a few minutes.
MEASURE AND CUT
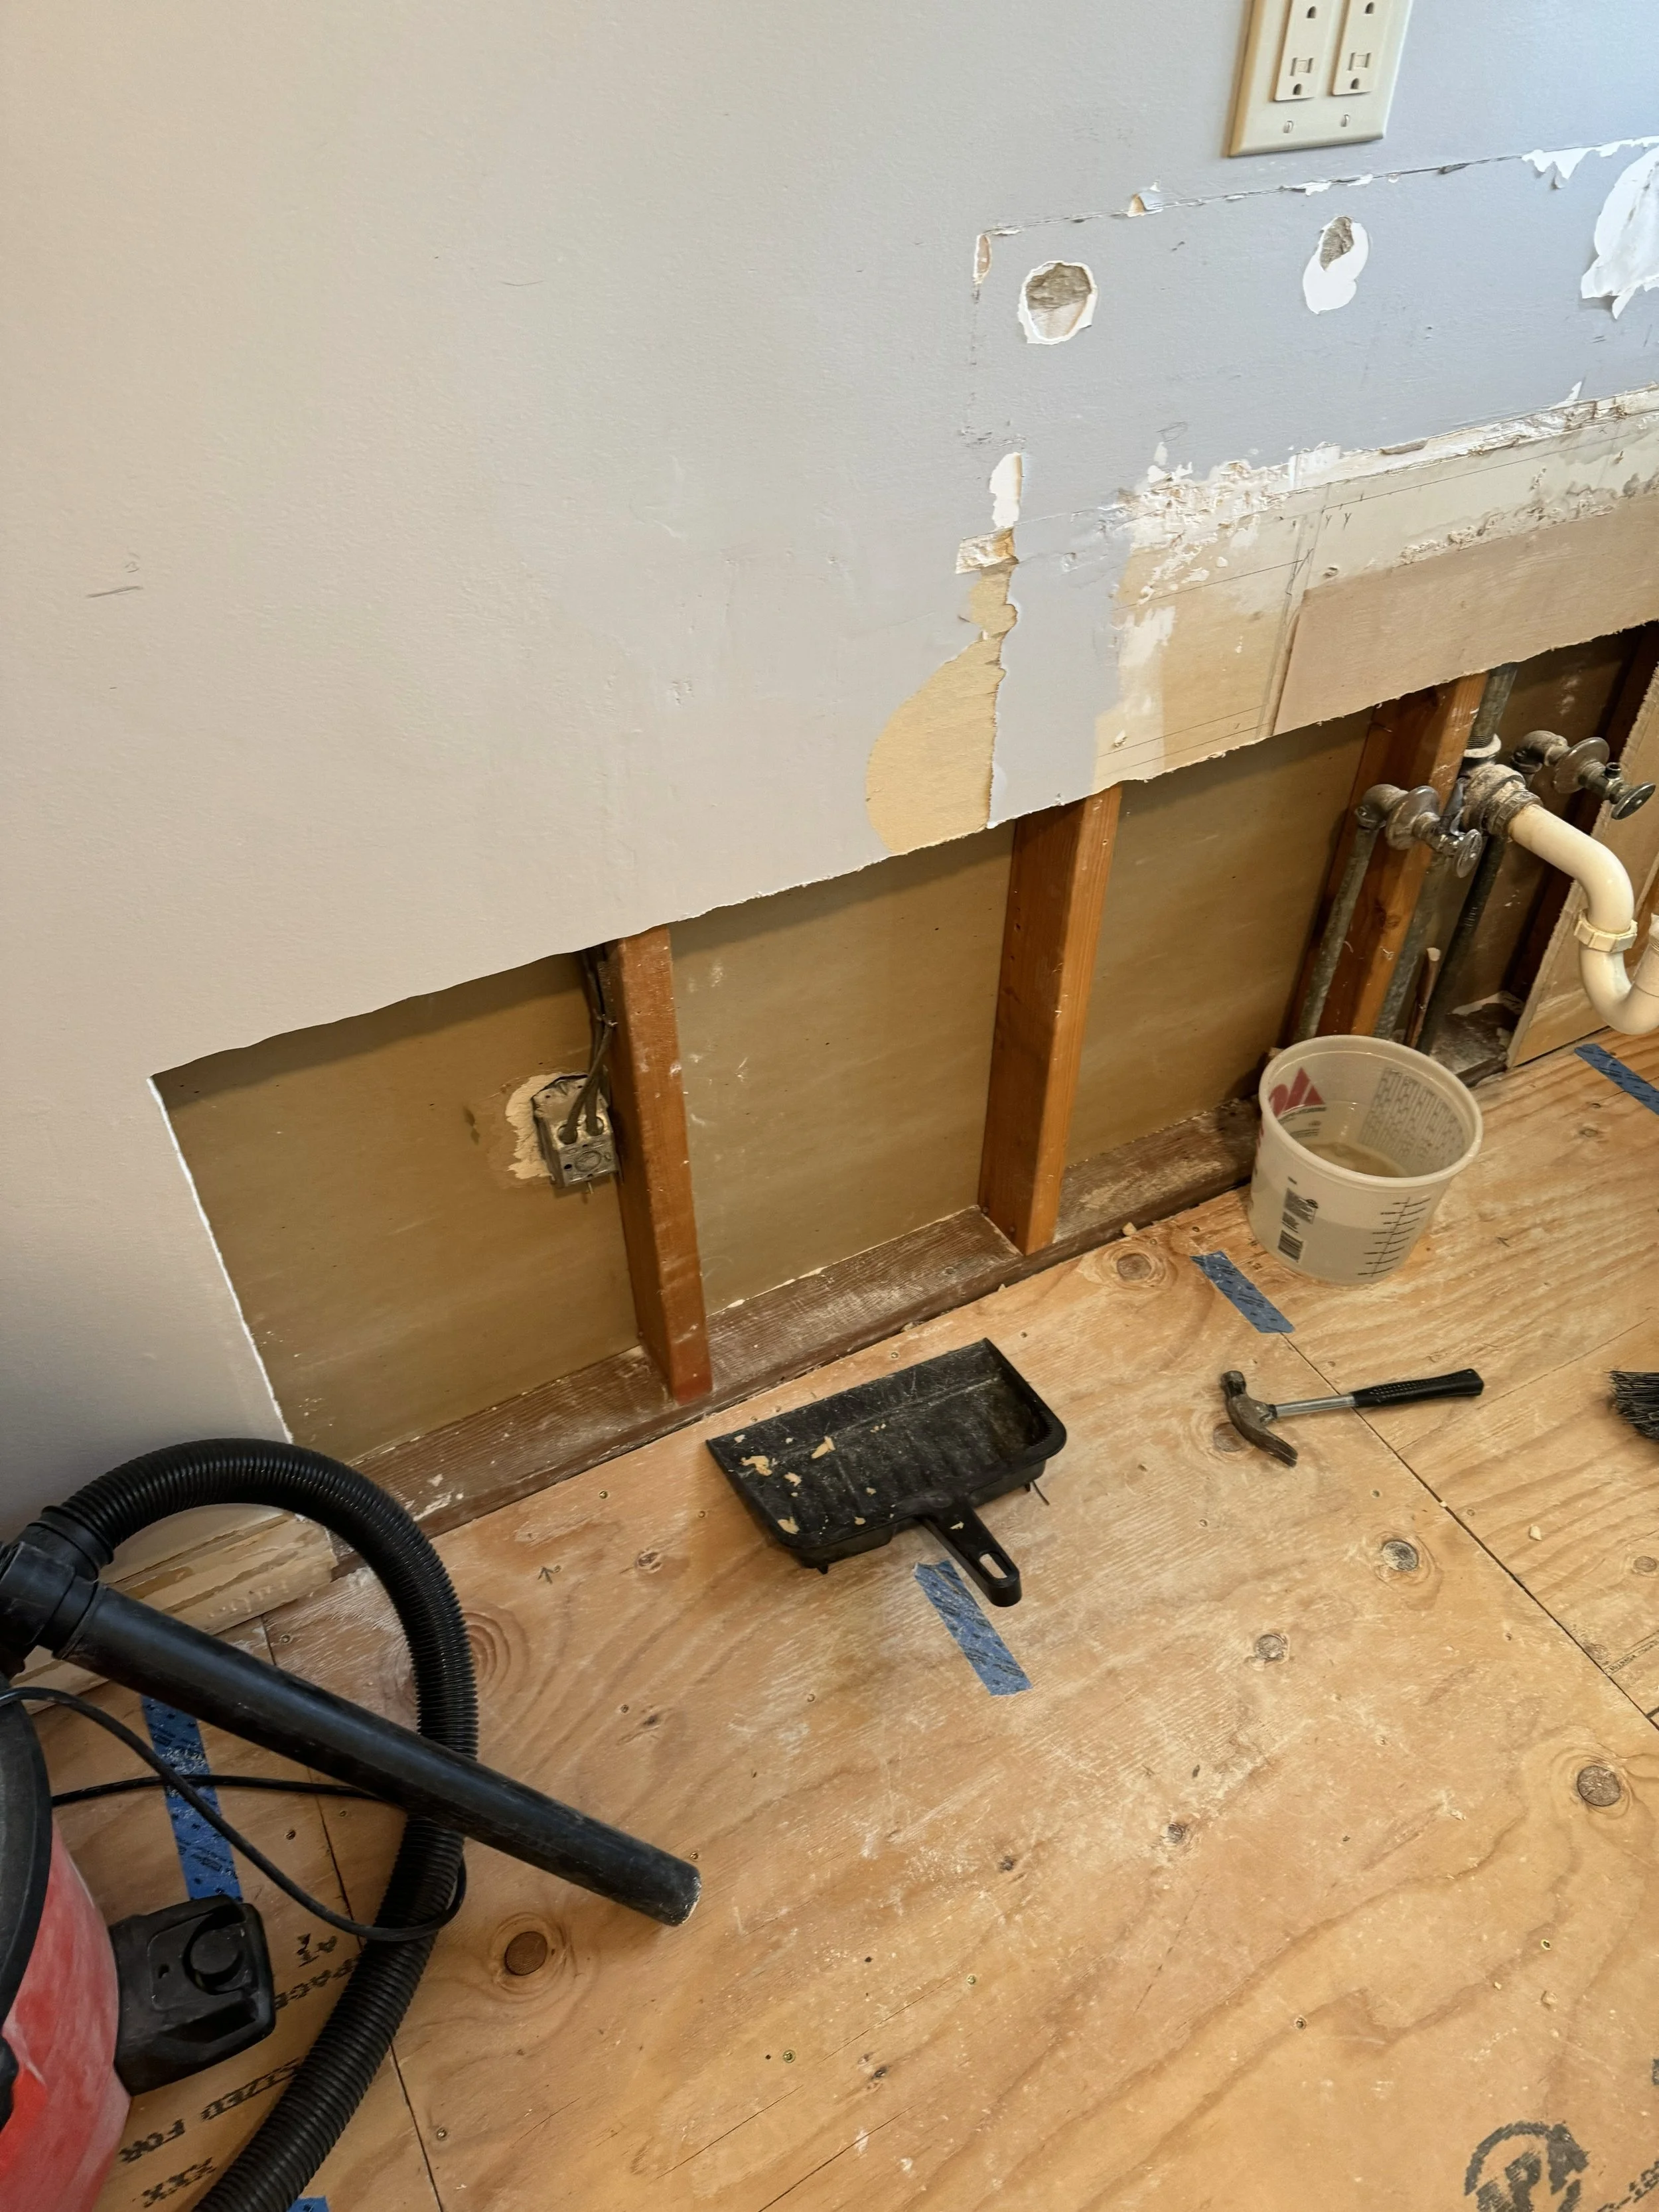
Before I cut into the drywall, I marked out where the existing plumbing line was and aligned this with the new casework. The casework had 3 separate cabinets that I marked on the floor so that I knew exactly where the new drainage and supply lines needed to go. Once cut, this revealed my first problem, an electrical box where the water supply and drainage needed to go.
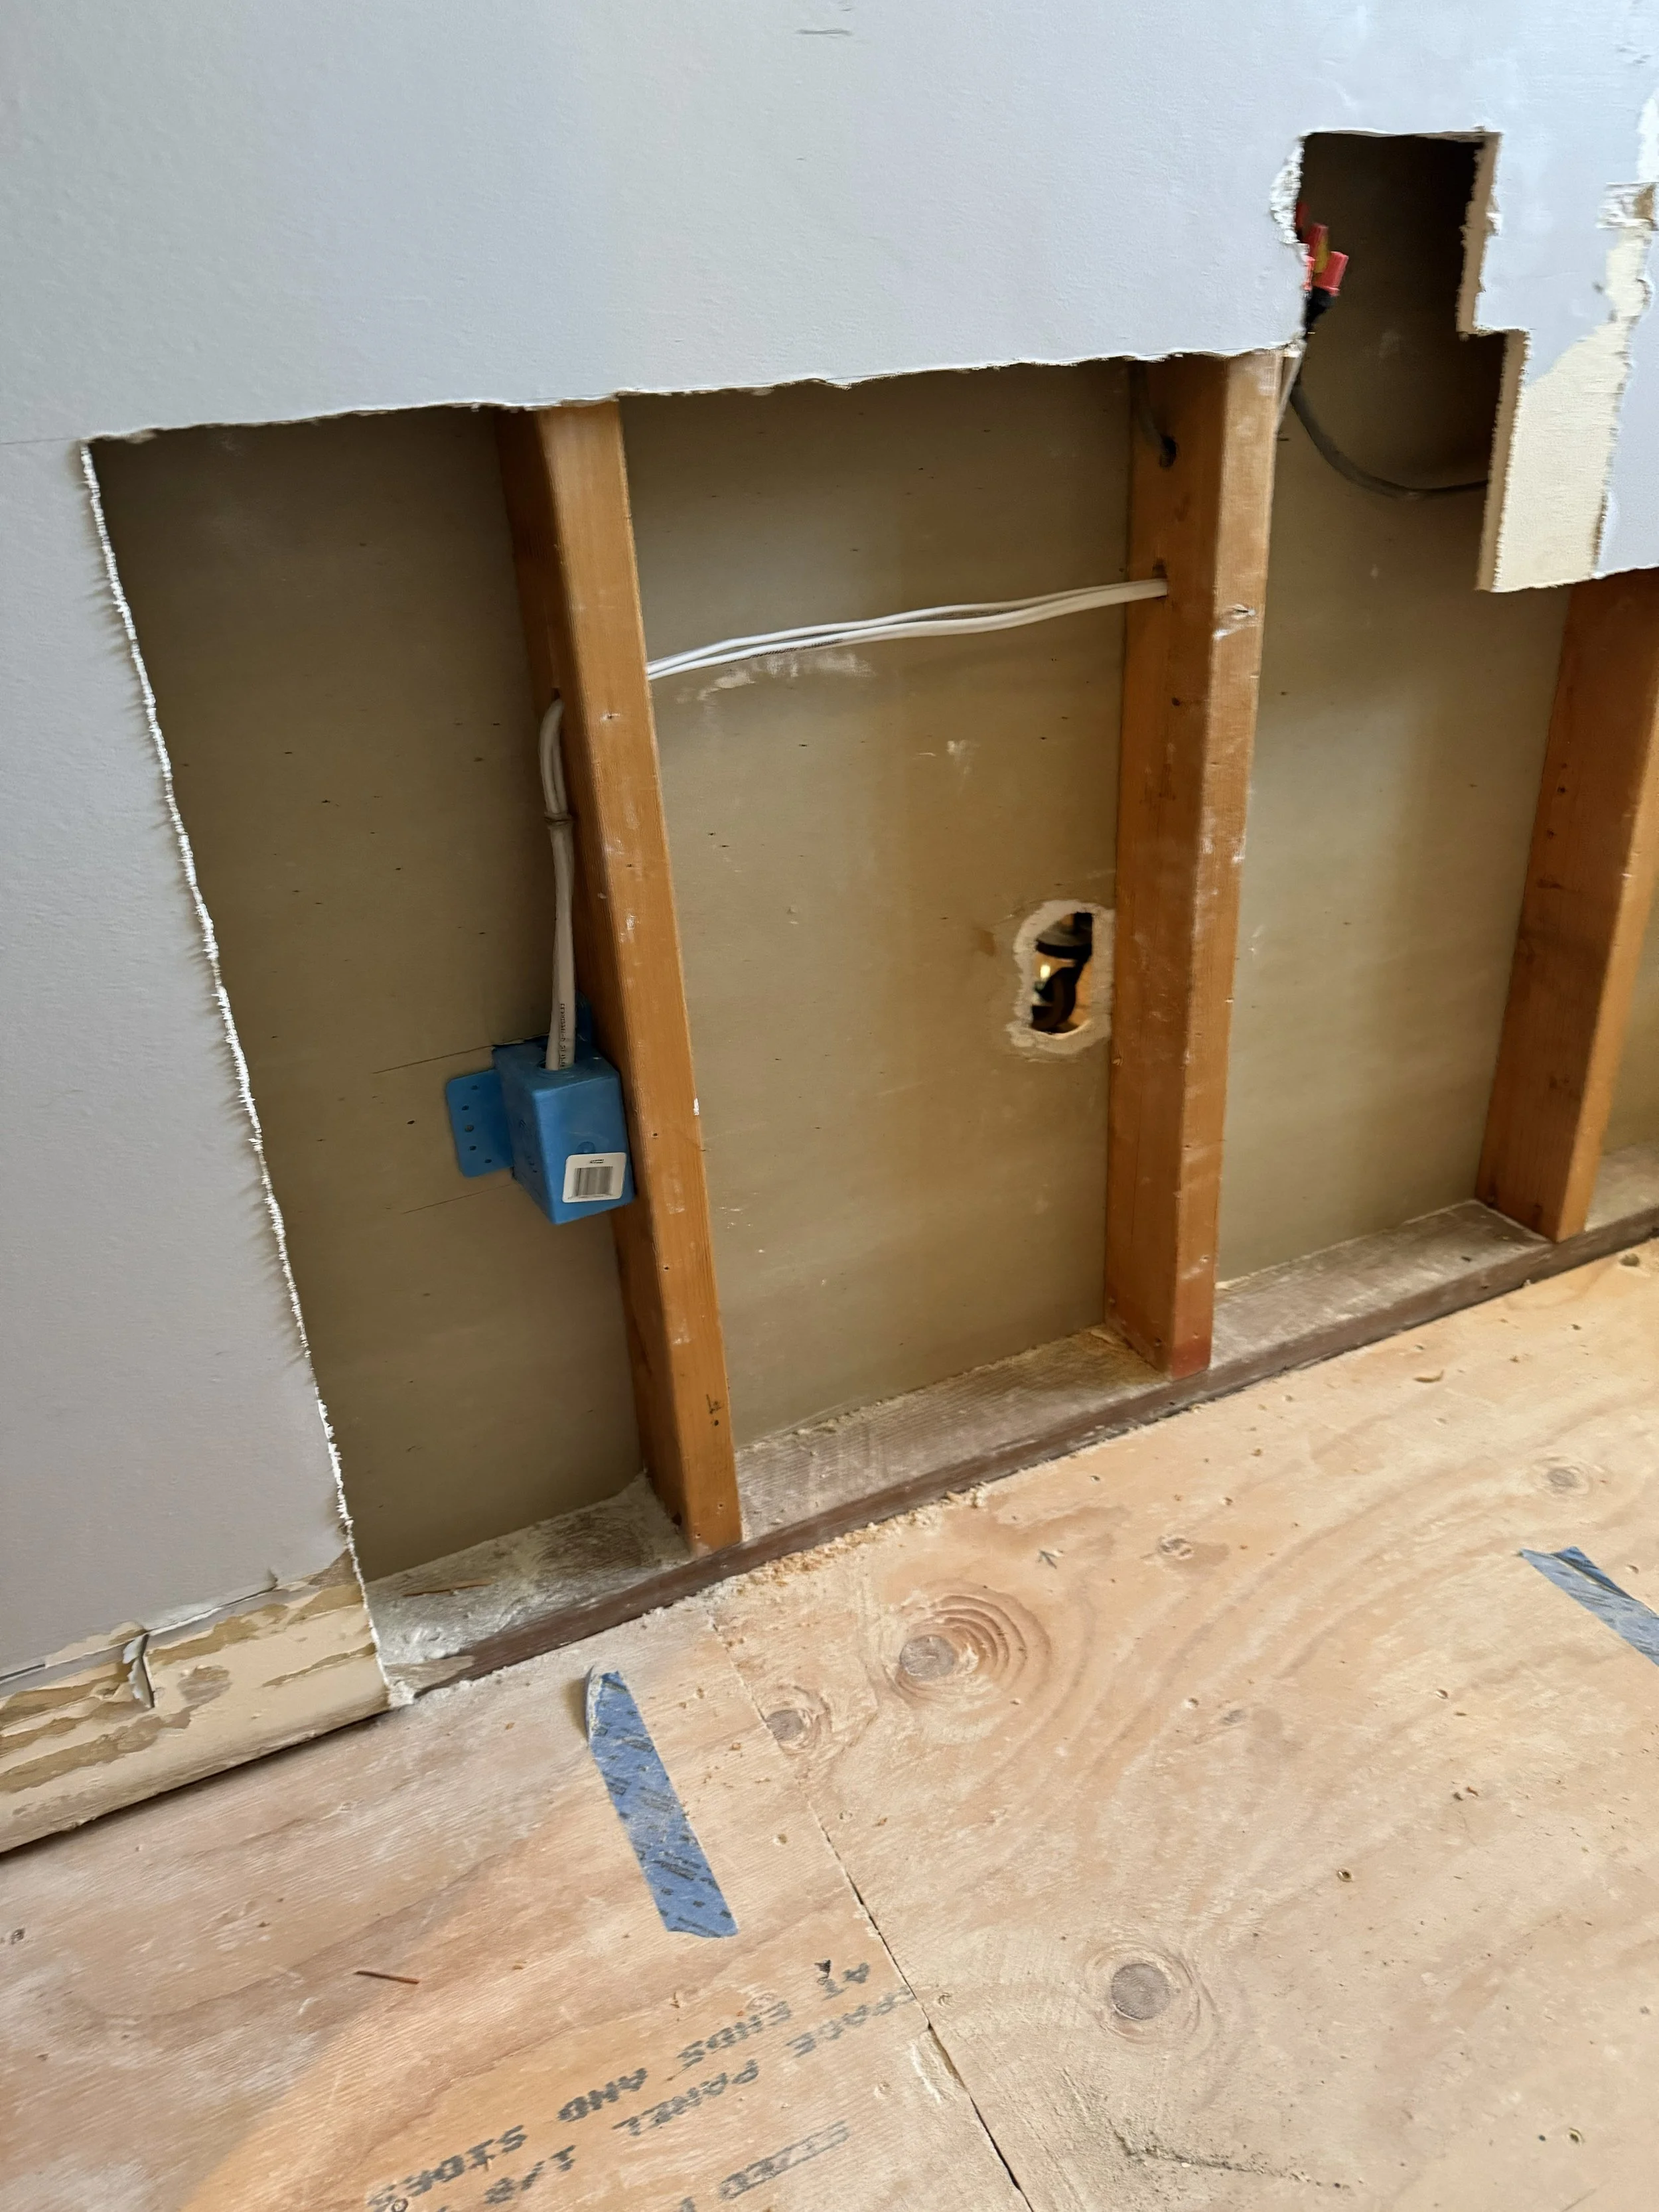
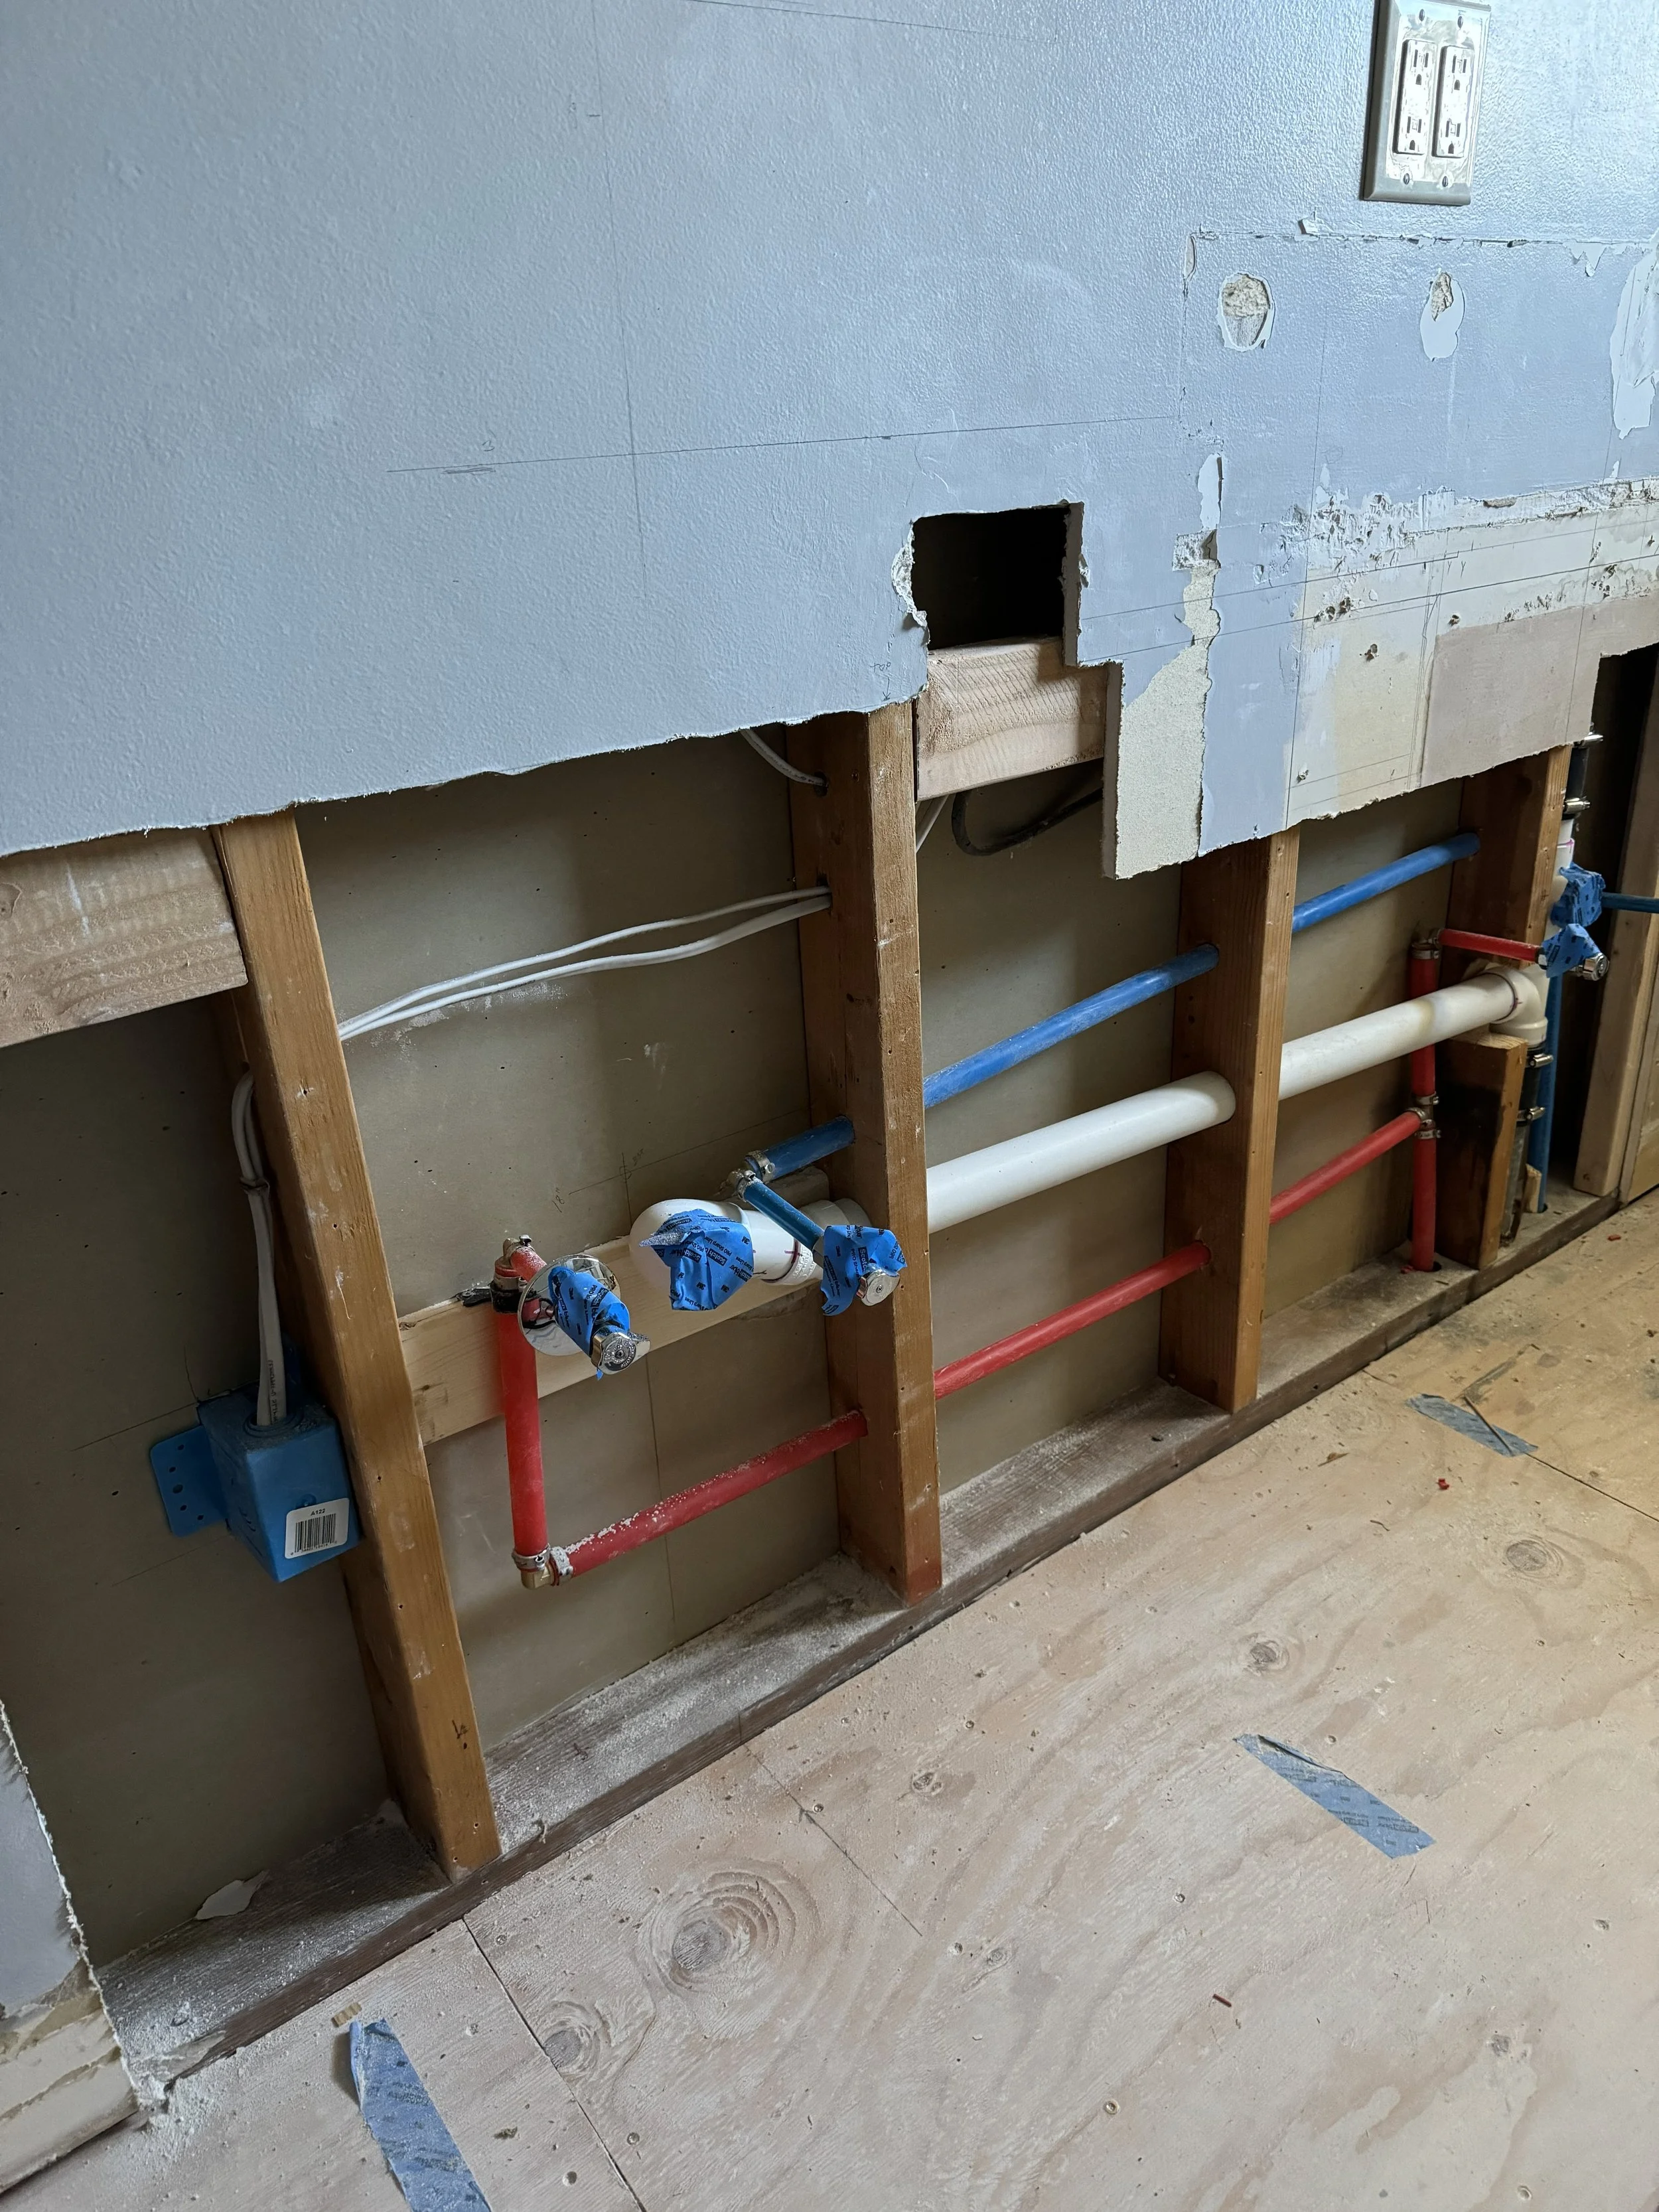
RELOCATED ELECTRICAL OUTLET
You can see where the existing electrical outlet is and how it was moved over one stud bay. On the other side of the wall is a bedroom, providing easy access.

PROBLEM #2: VENT STACK
All plumbing waste lines have to be connected to a vent stack for proper ventilation, and multiple waste lines can be connected to a single stack vent. In this case, there was absolutely no way to remove the galvanized pipe sections that came off the original sink. My only option was to cut the galvanized pipe for a new section.
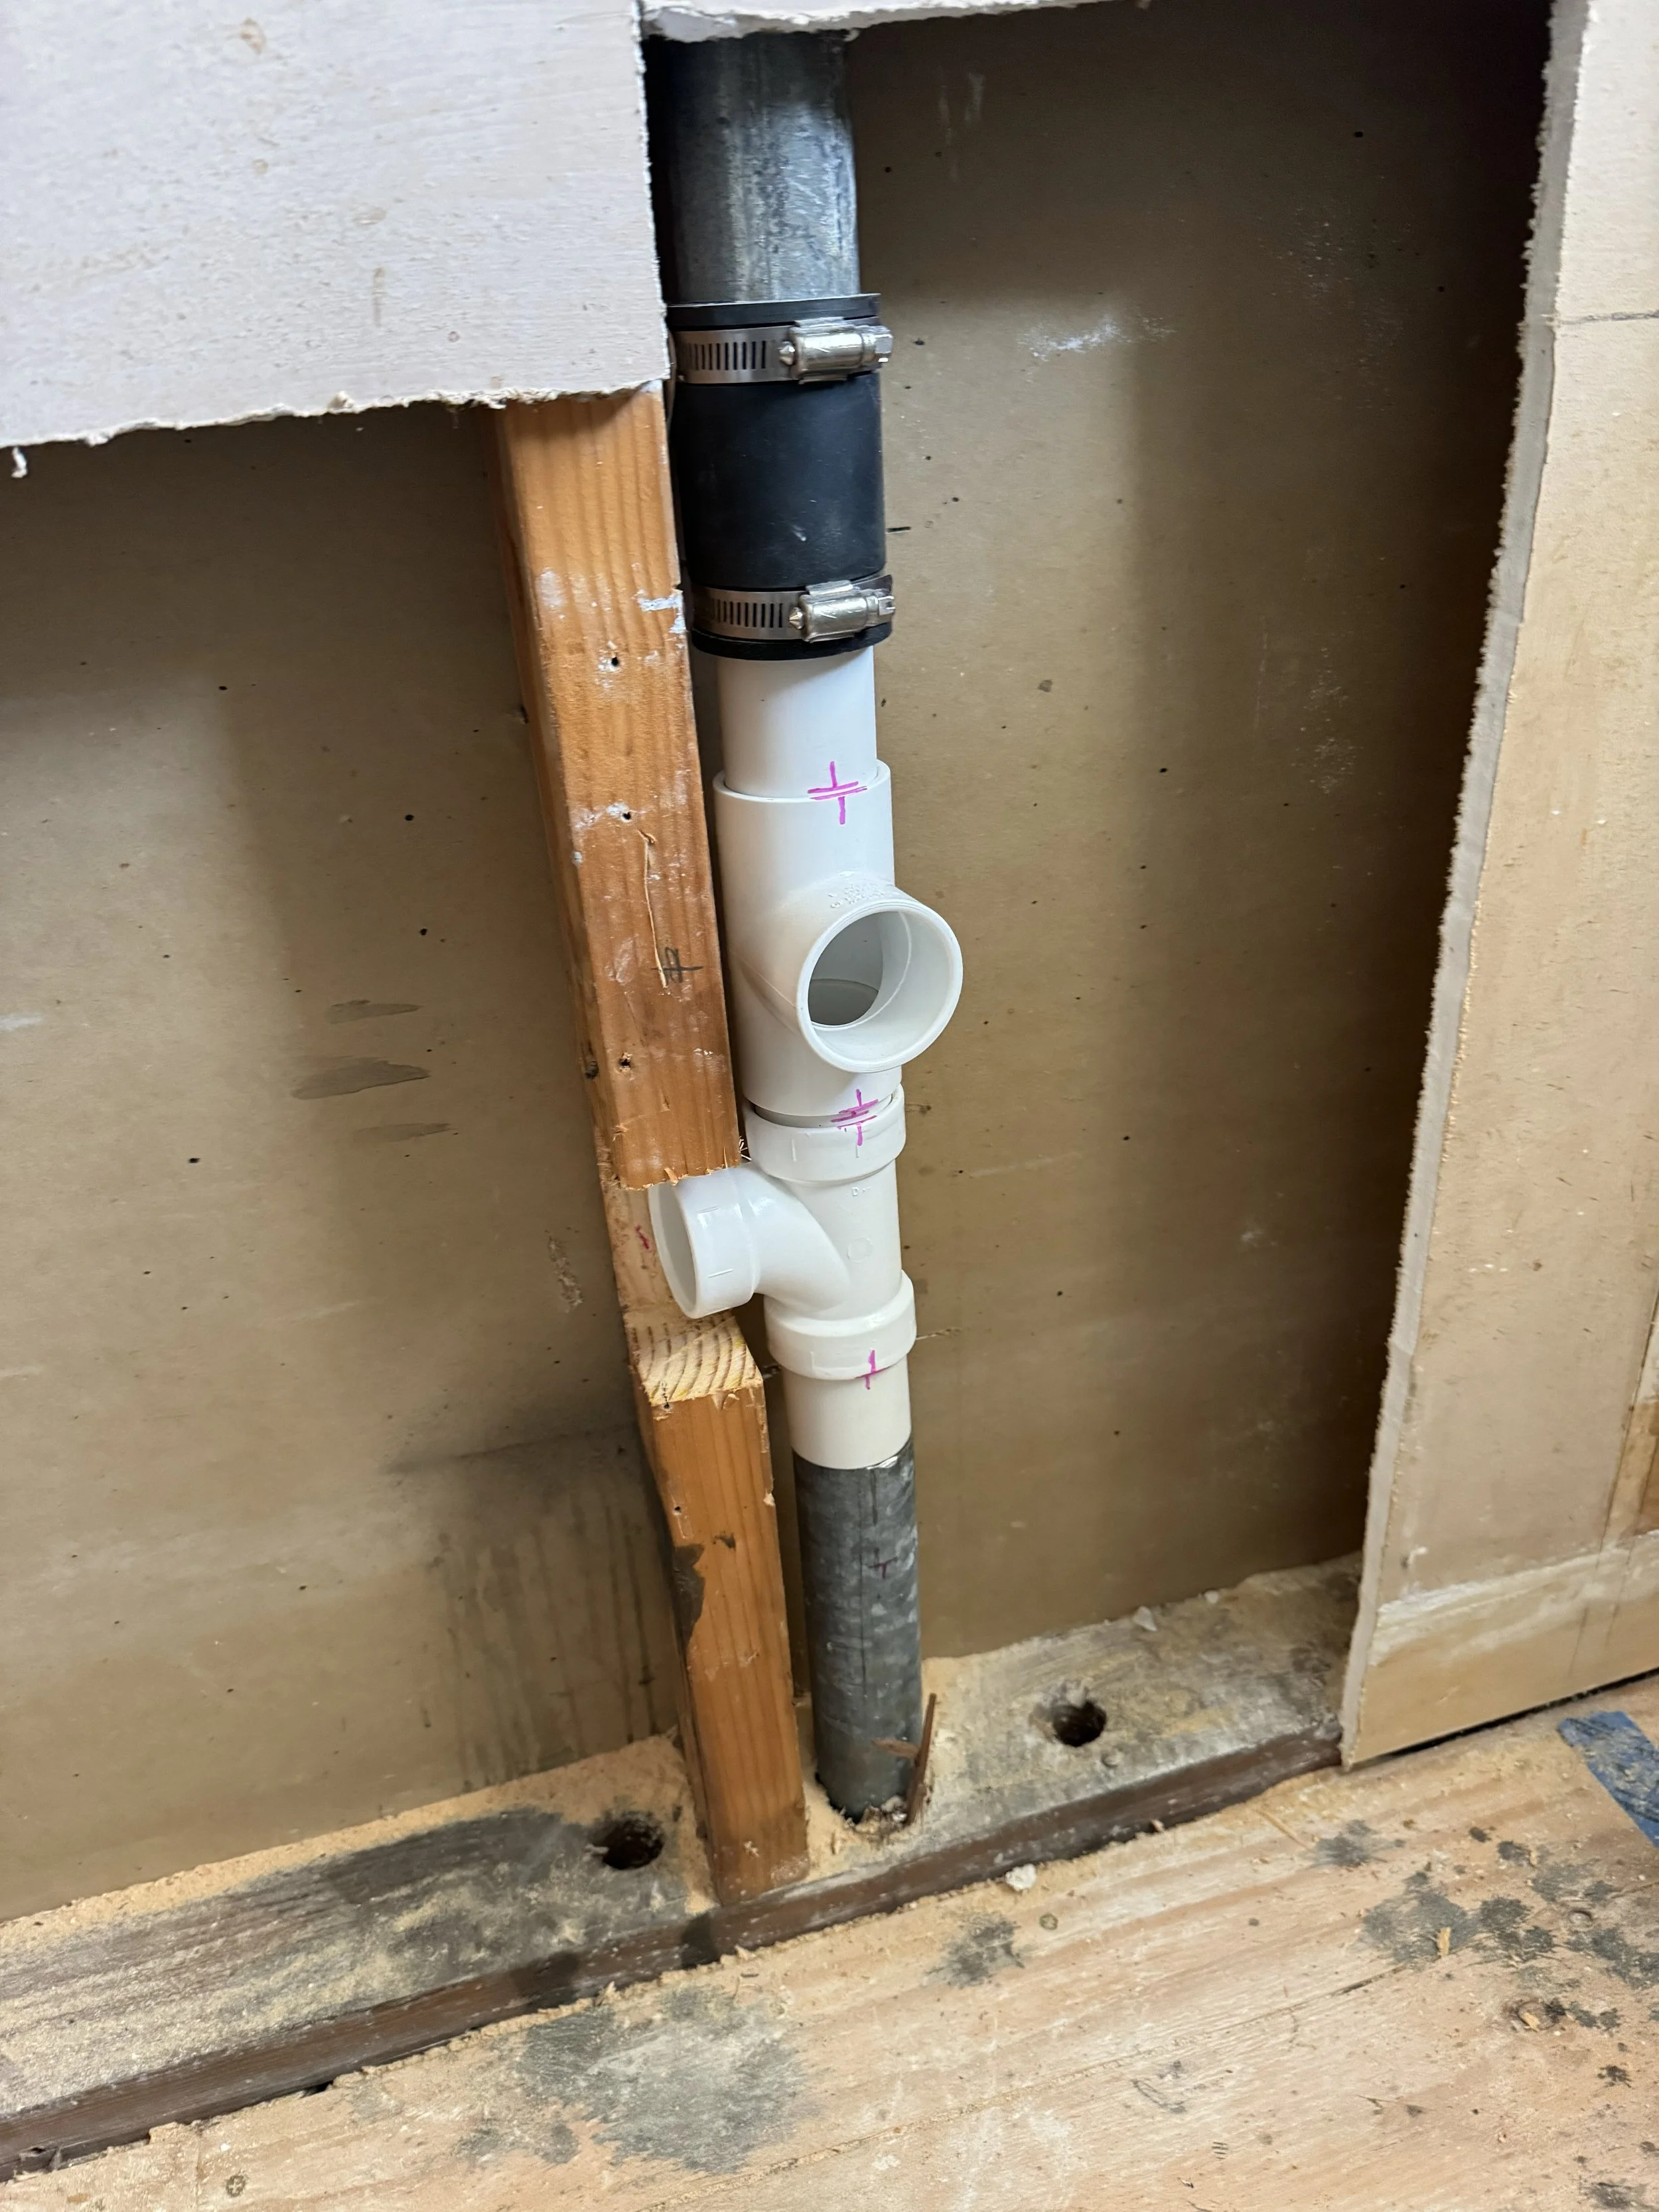
MODIFIED VENT STACK W/ SINK DRAIN
A test fitting for the new drainage PVC pipes and the rubber gasket seal for connection to the galvanized pipes. A secondary sink drain line also was incorporated into the new attachment.

MEASURE TWICE, GLUE ONCE
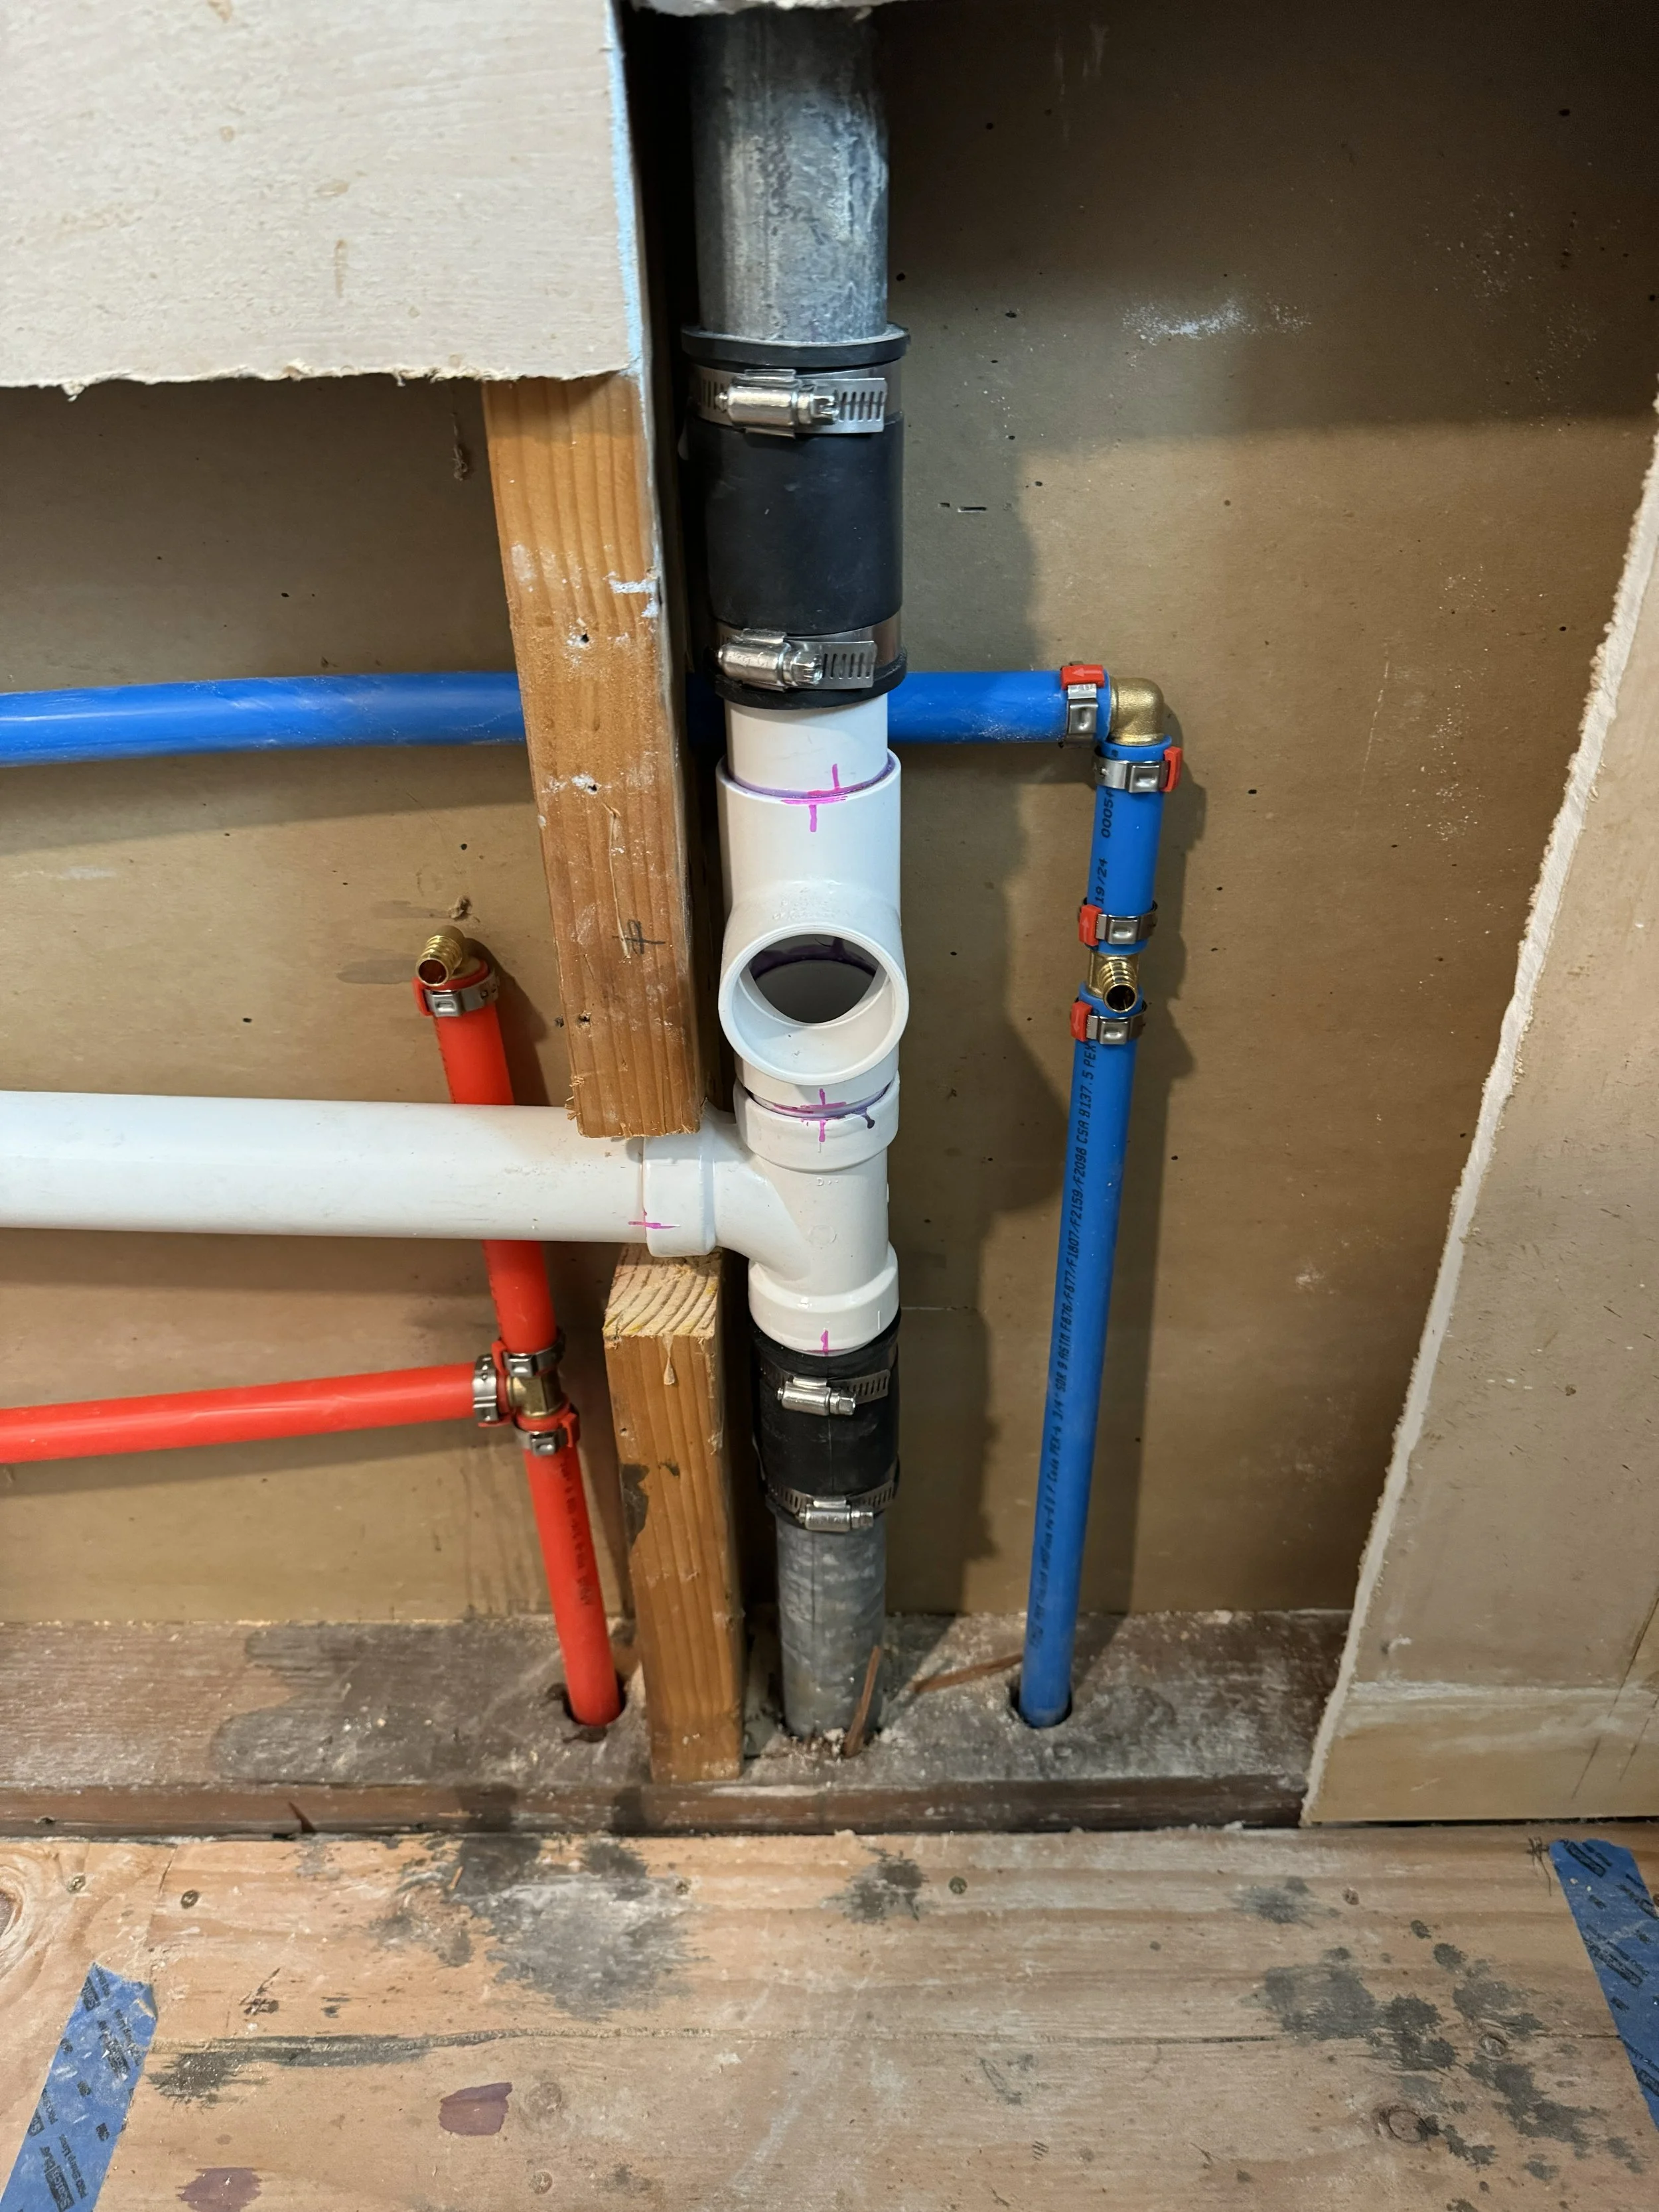
After test fitting all the PVC pipes including the new sink drain line, it was finally time to glue the pieces together using PVC cement. One trick I found was marking where the pieces would align with a marker so that upon completion of gluing you know where the quarter turn should end.
The new drain line with all pieces glued showing the integration with the existing stack vent.
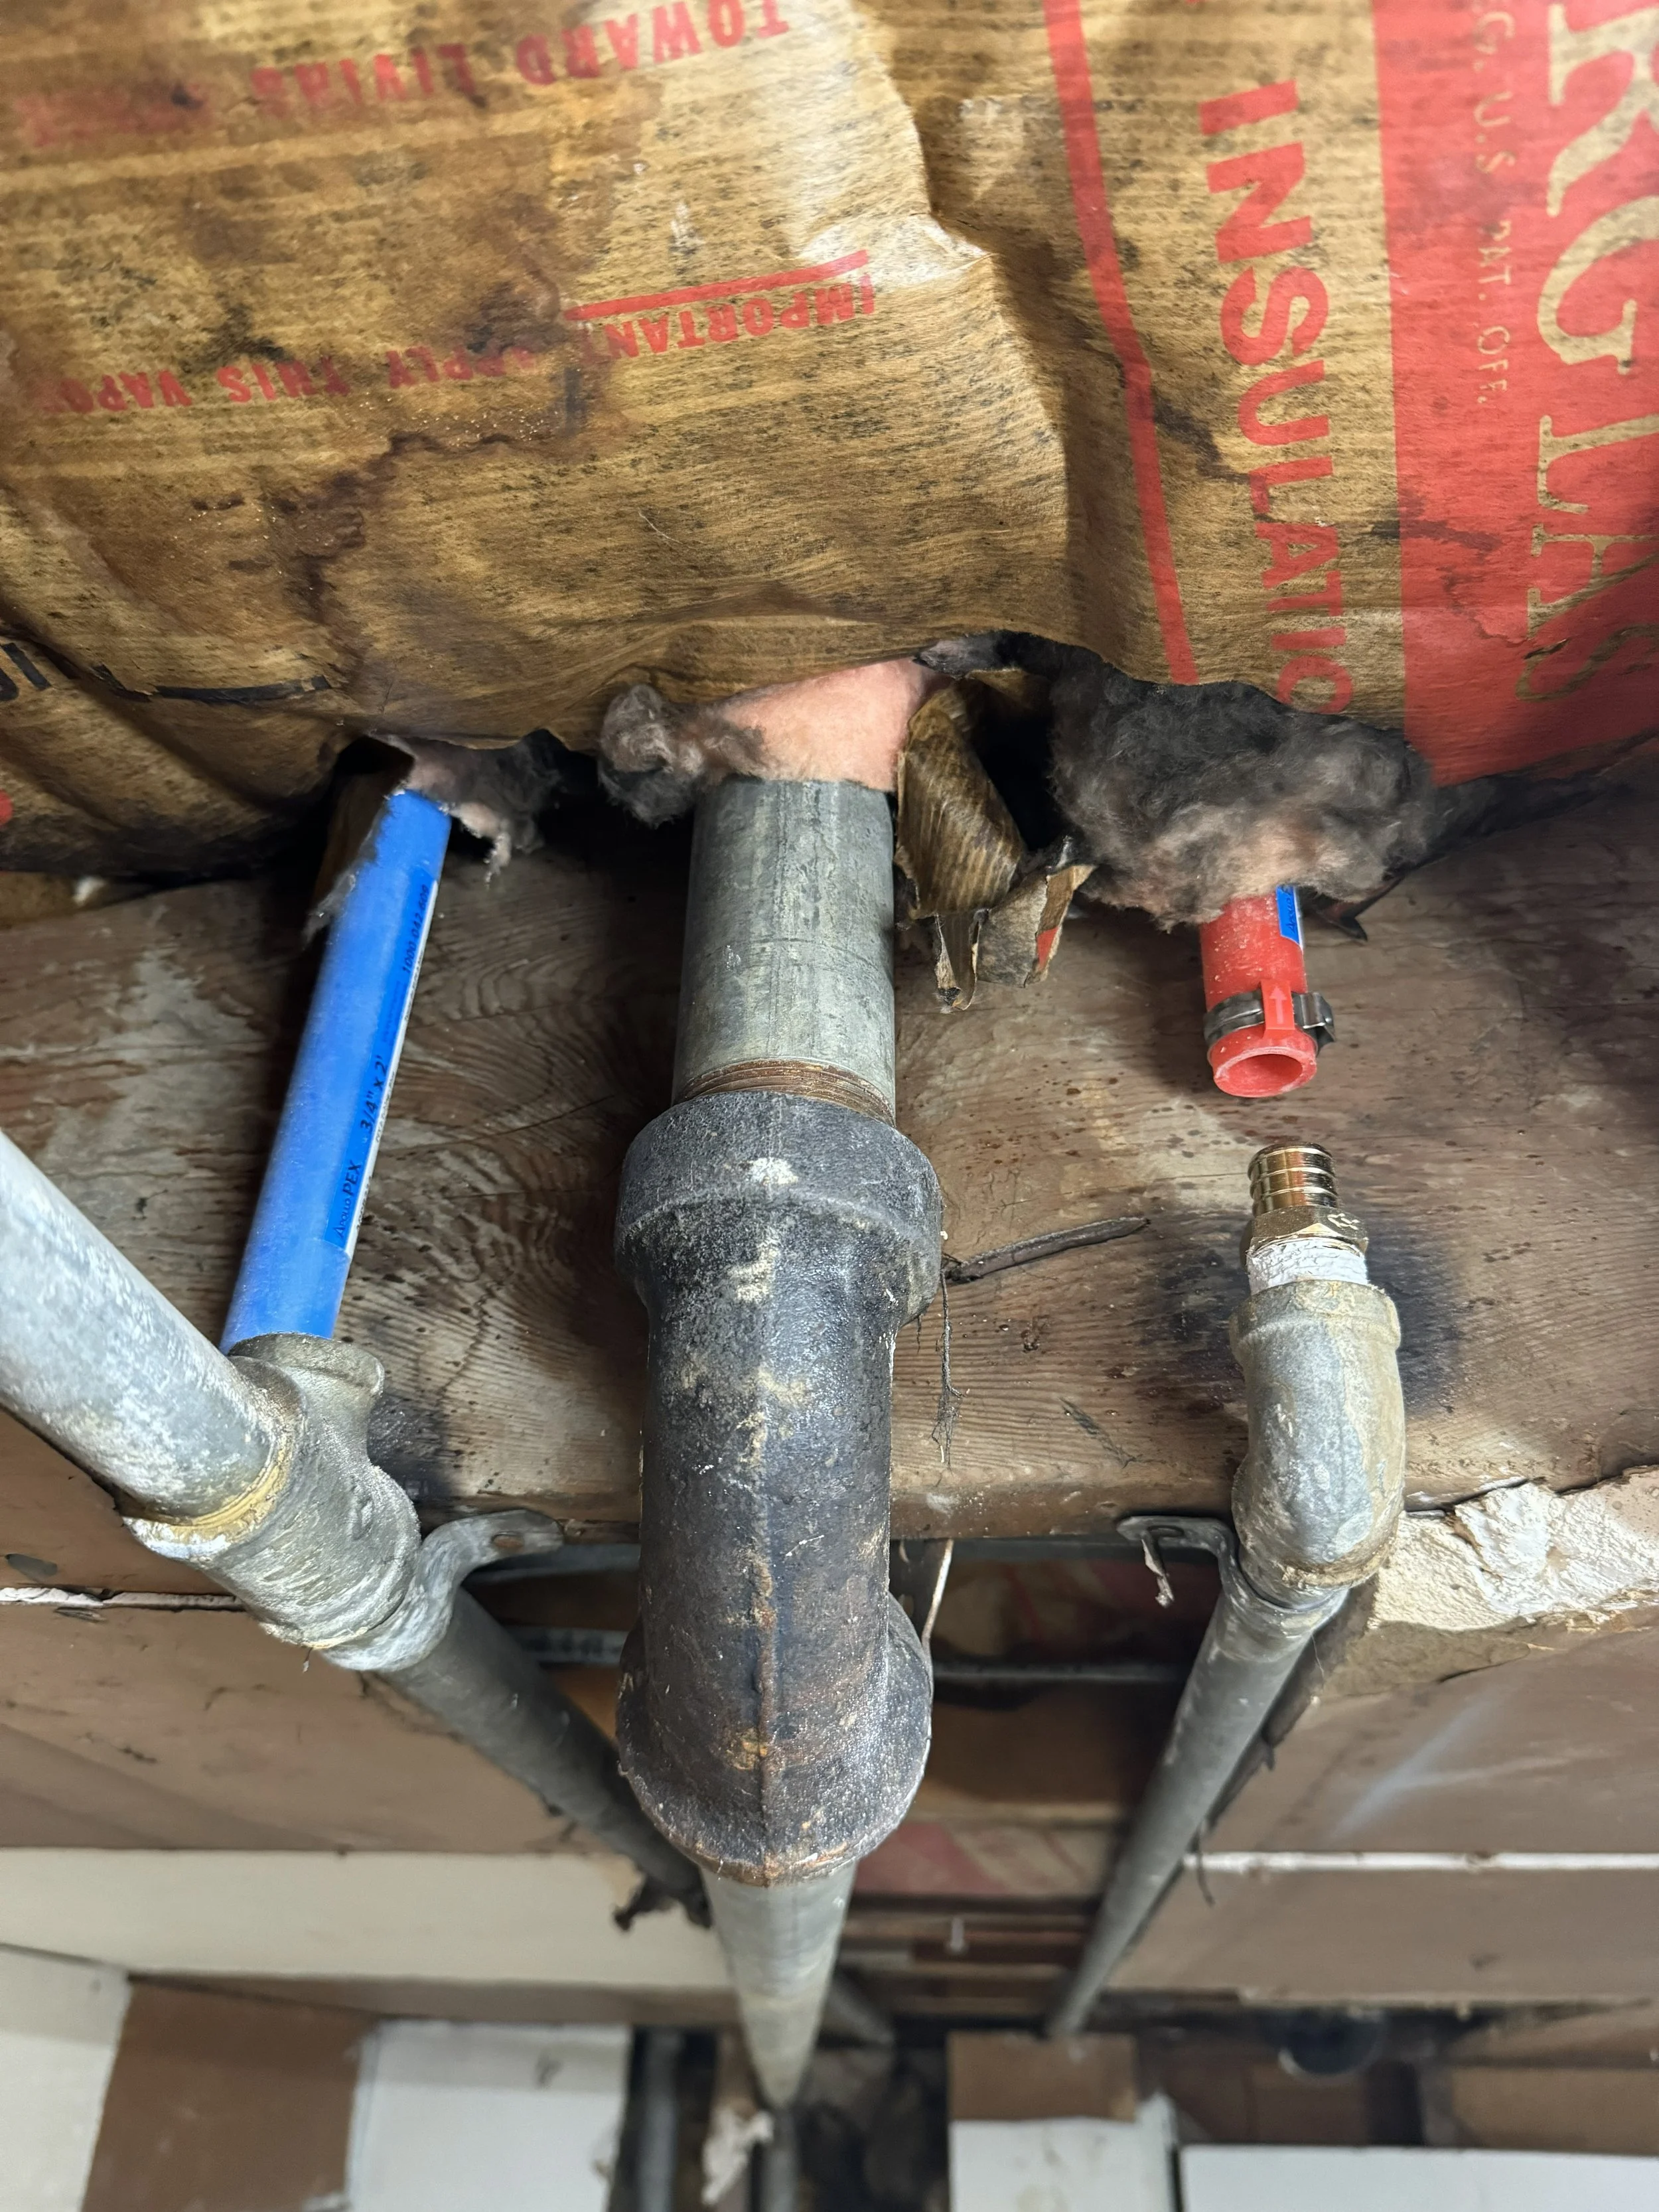
CONNECTING TO OLD PIPES
Back to the hard part of connecting to old rusted galvanized supply lines. I finally pried each pipe loose with a plumbers wrench after a little heating of the pipes.
PEX IN PLACE
Once all PEX tubing is in place with all the clamps aligned, then it’s time to tighten. I opted for PEX clamps that would pop the red plastic piece off indicating that it had been tightened. It was a little more money, but helpful so that you know what has and hasn’t been tightened. Otherwise you might find out the hard way when you turn the water on.
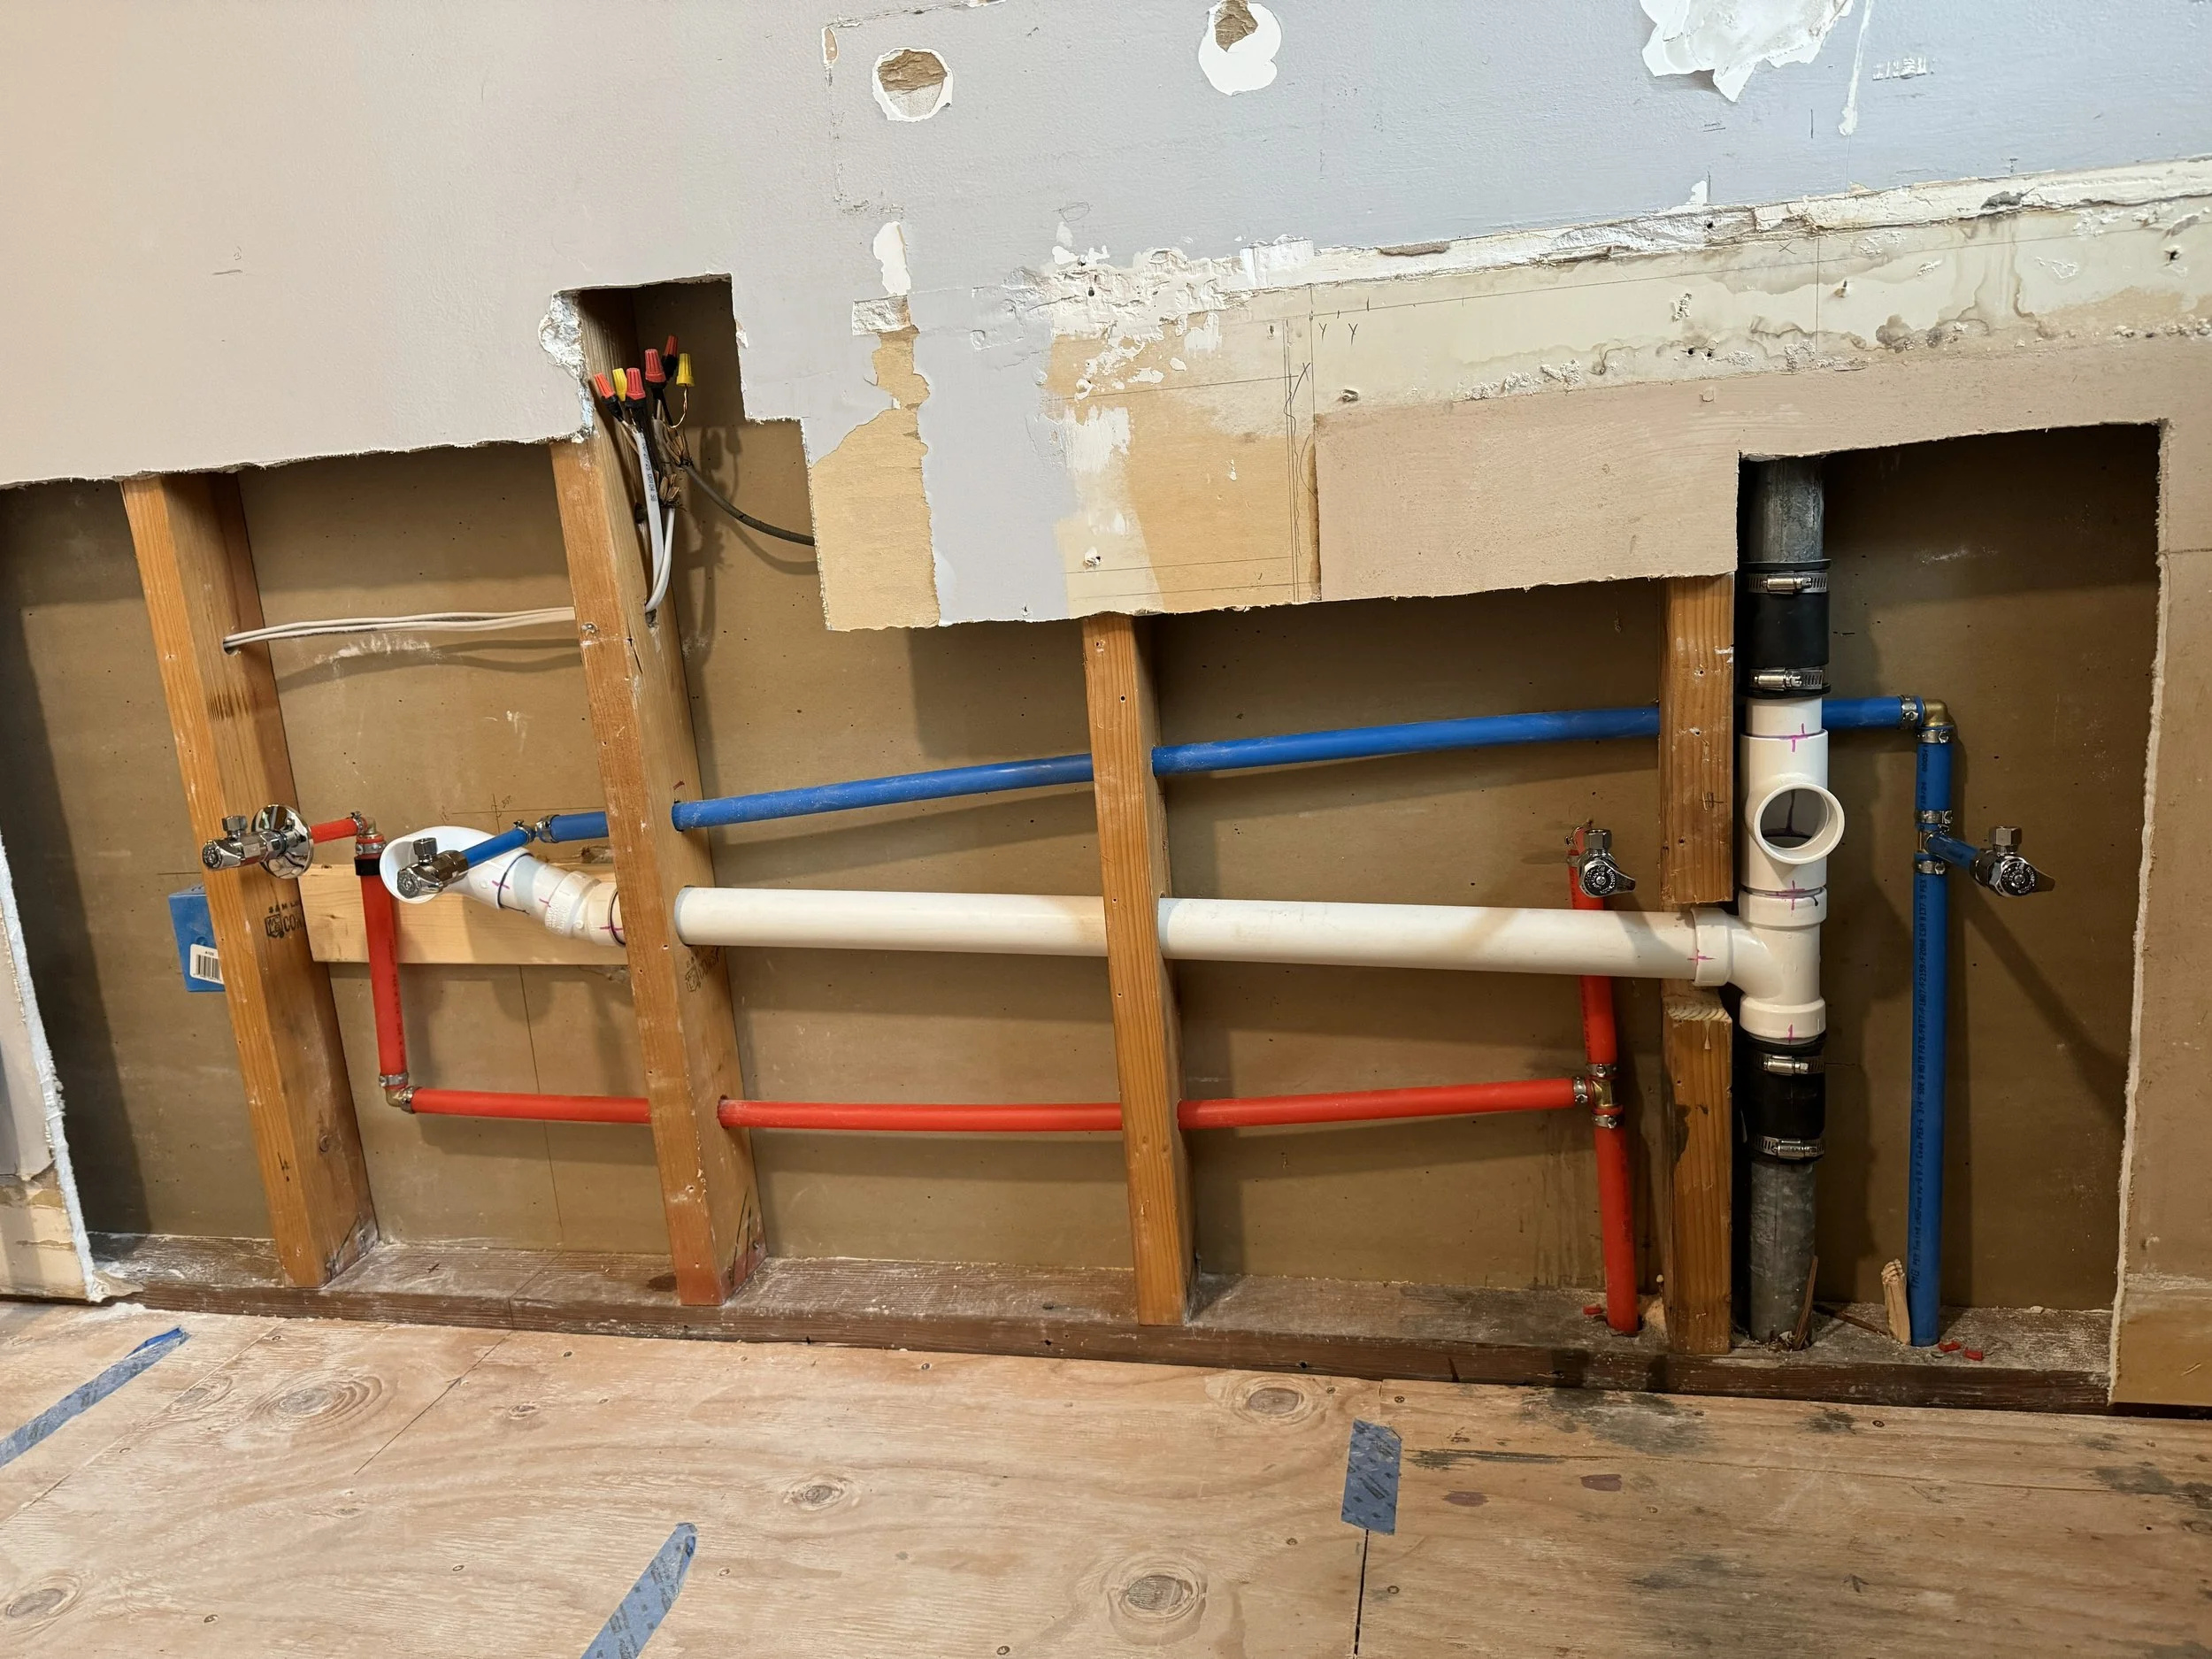
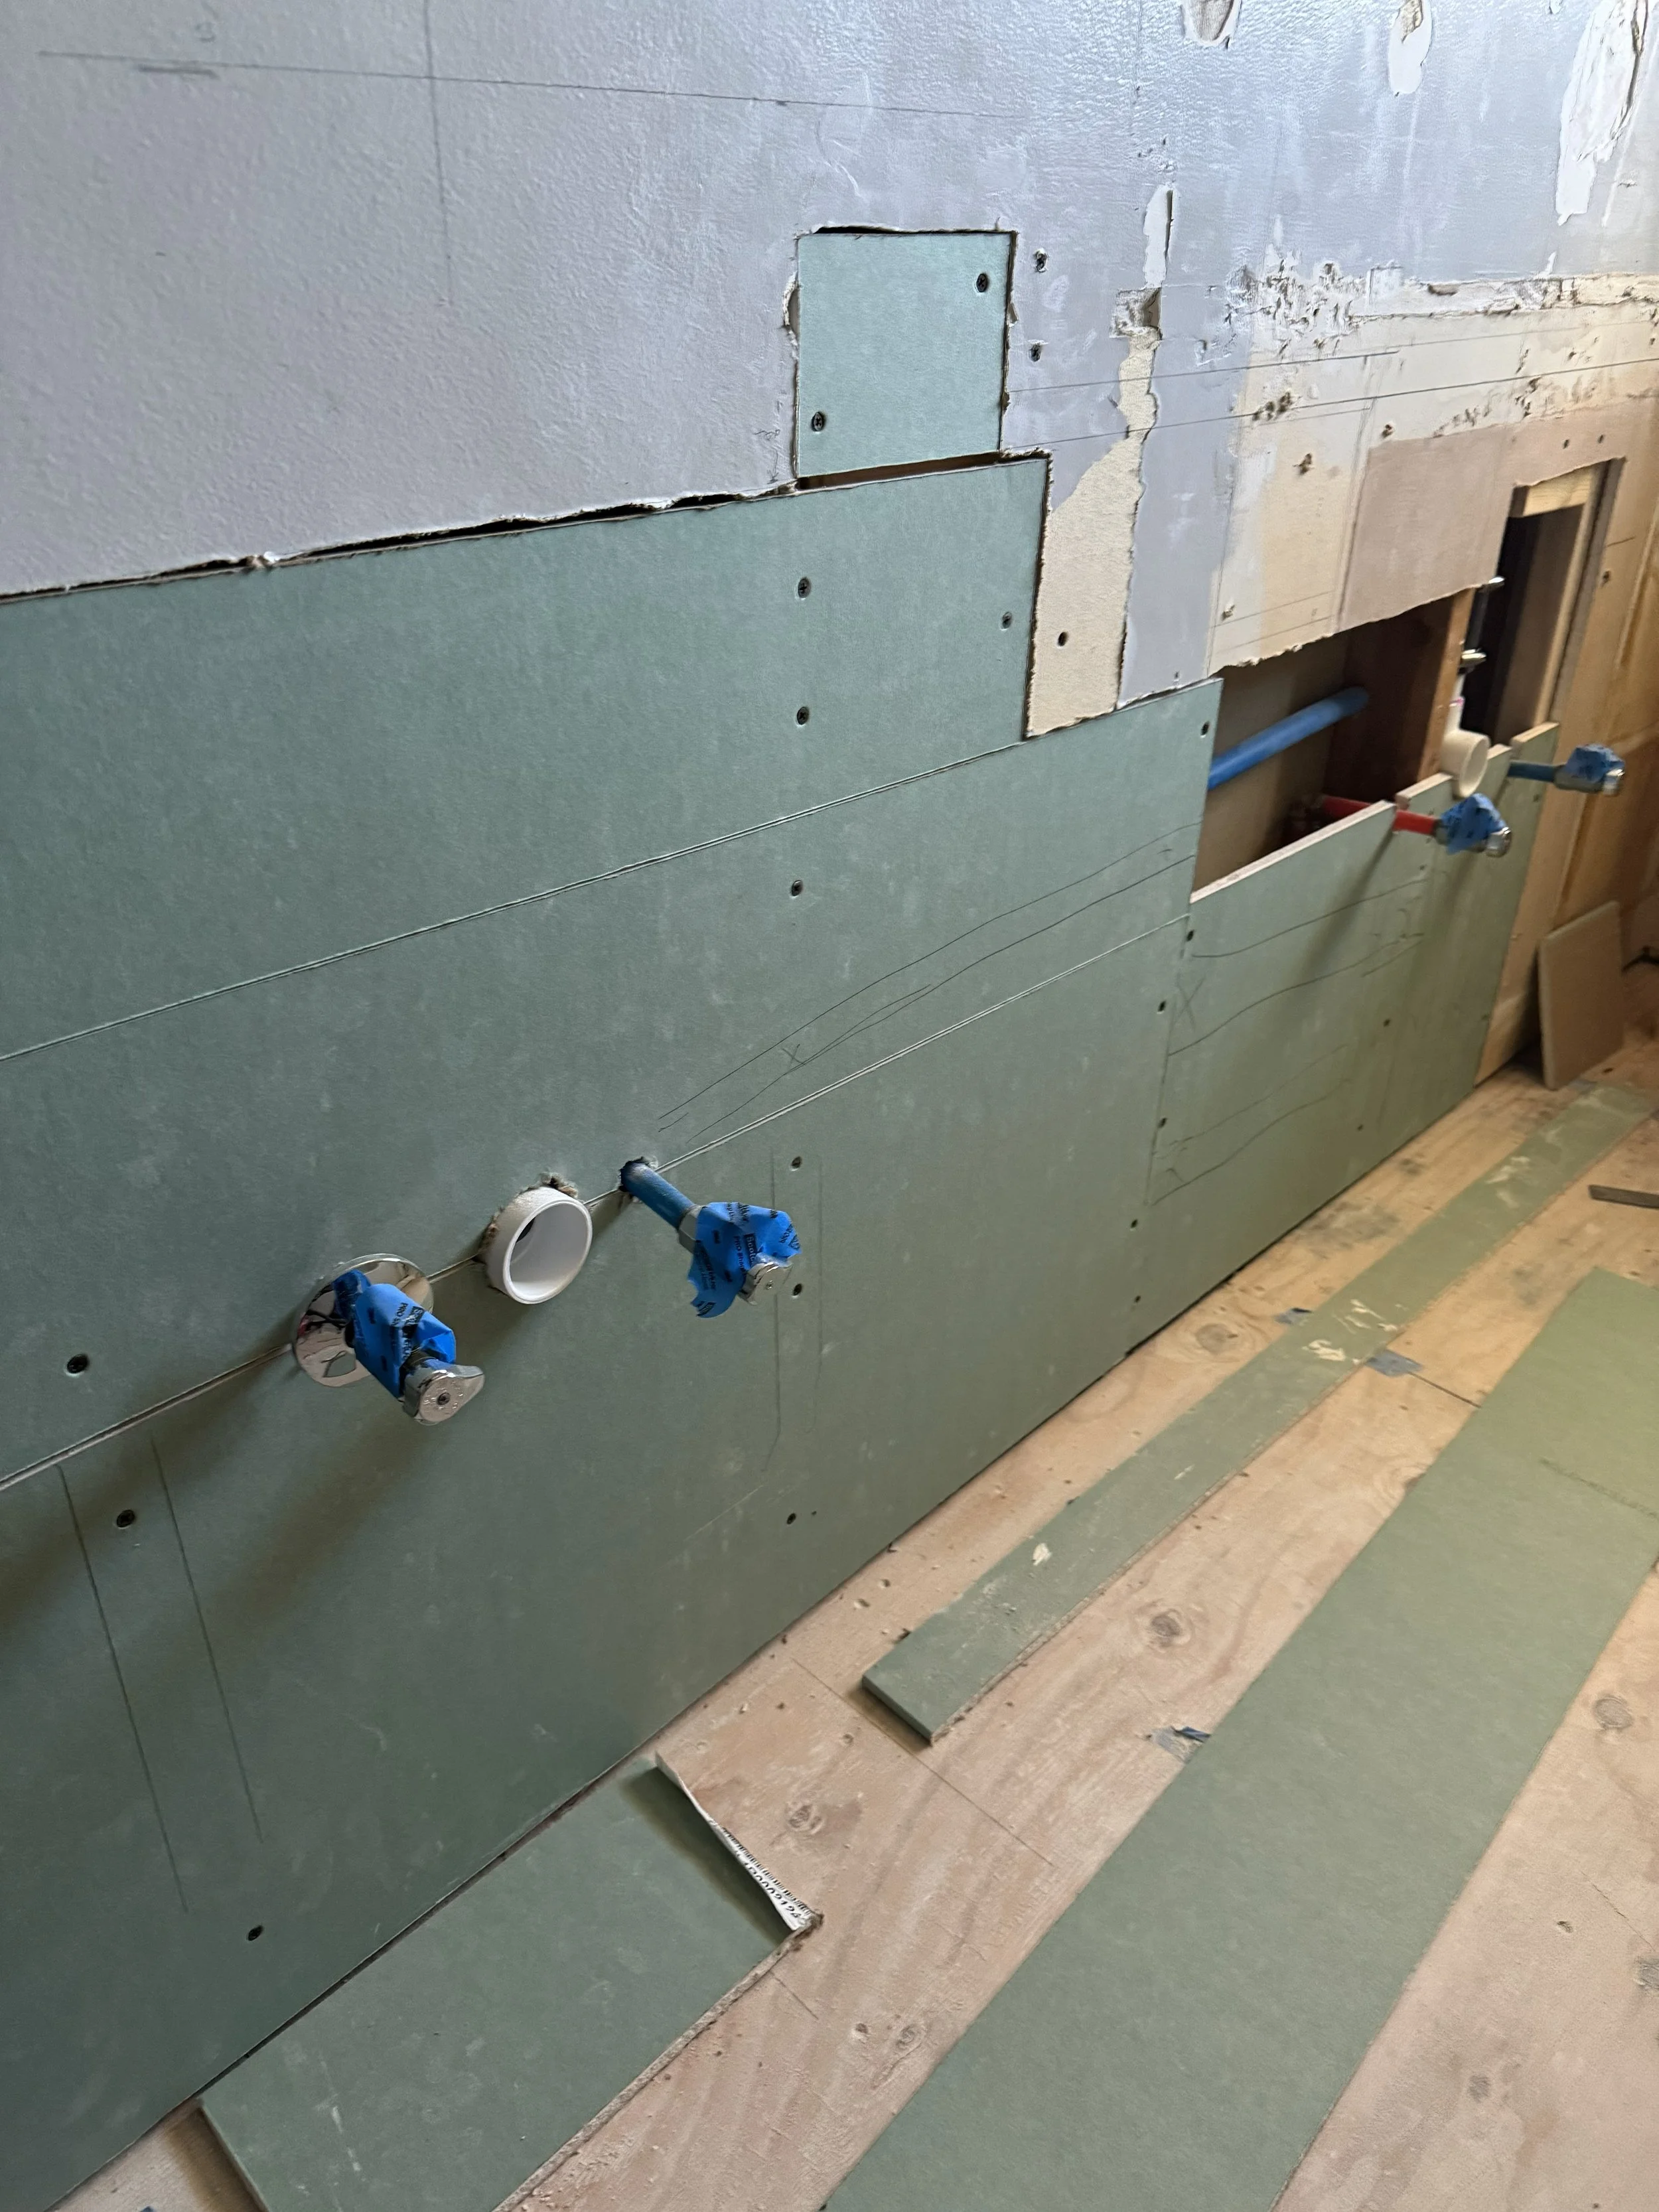
WATER SUPPLY AND DRAINAGE SET
Here is the full run of the cold water supply in blue, and the hot water supply in red. The white PVC is the drainage line that is also connected to the existing stack vent that will remain in place for now.
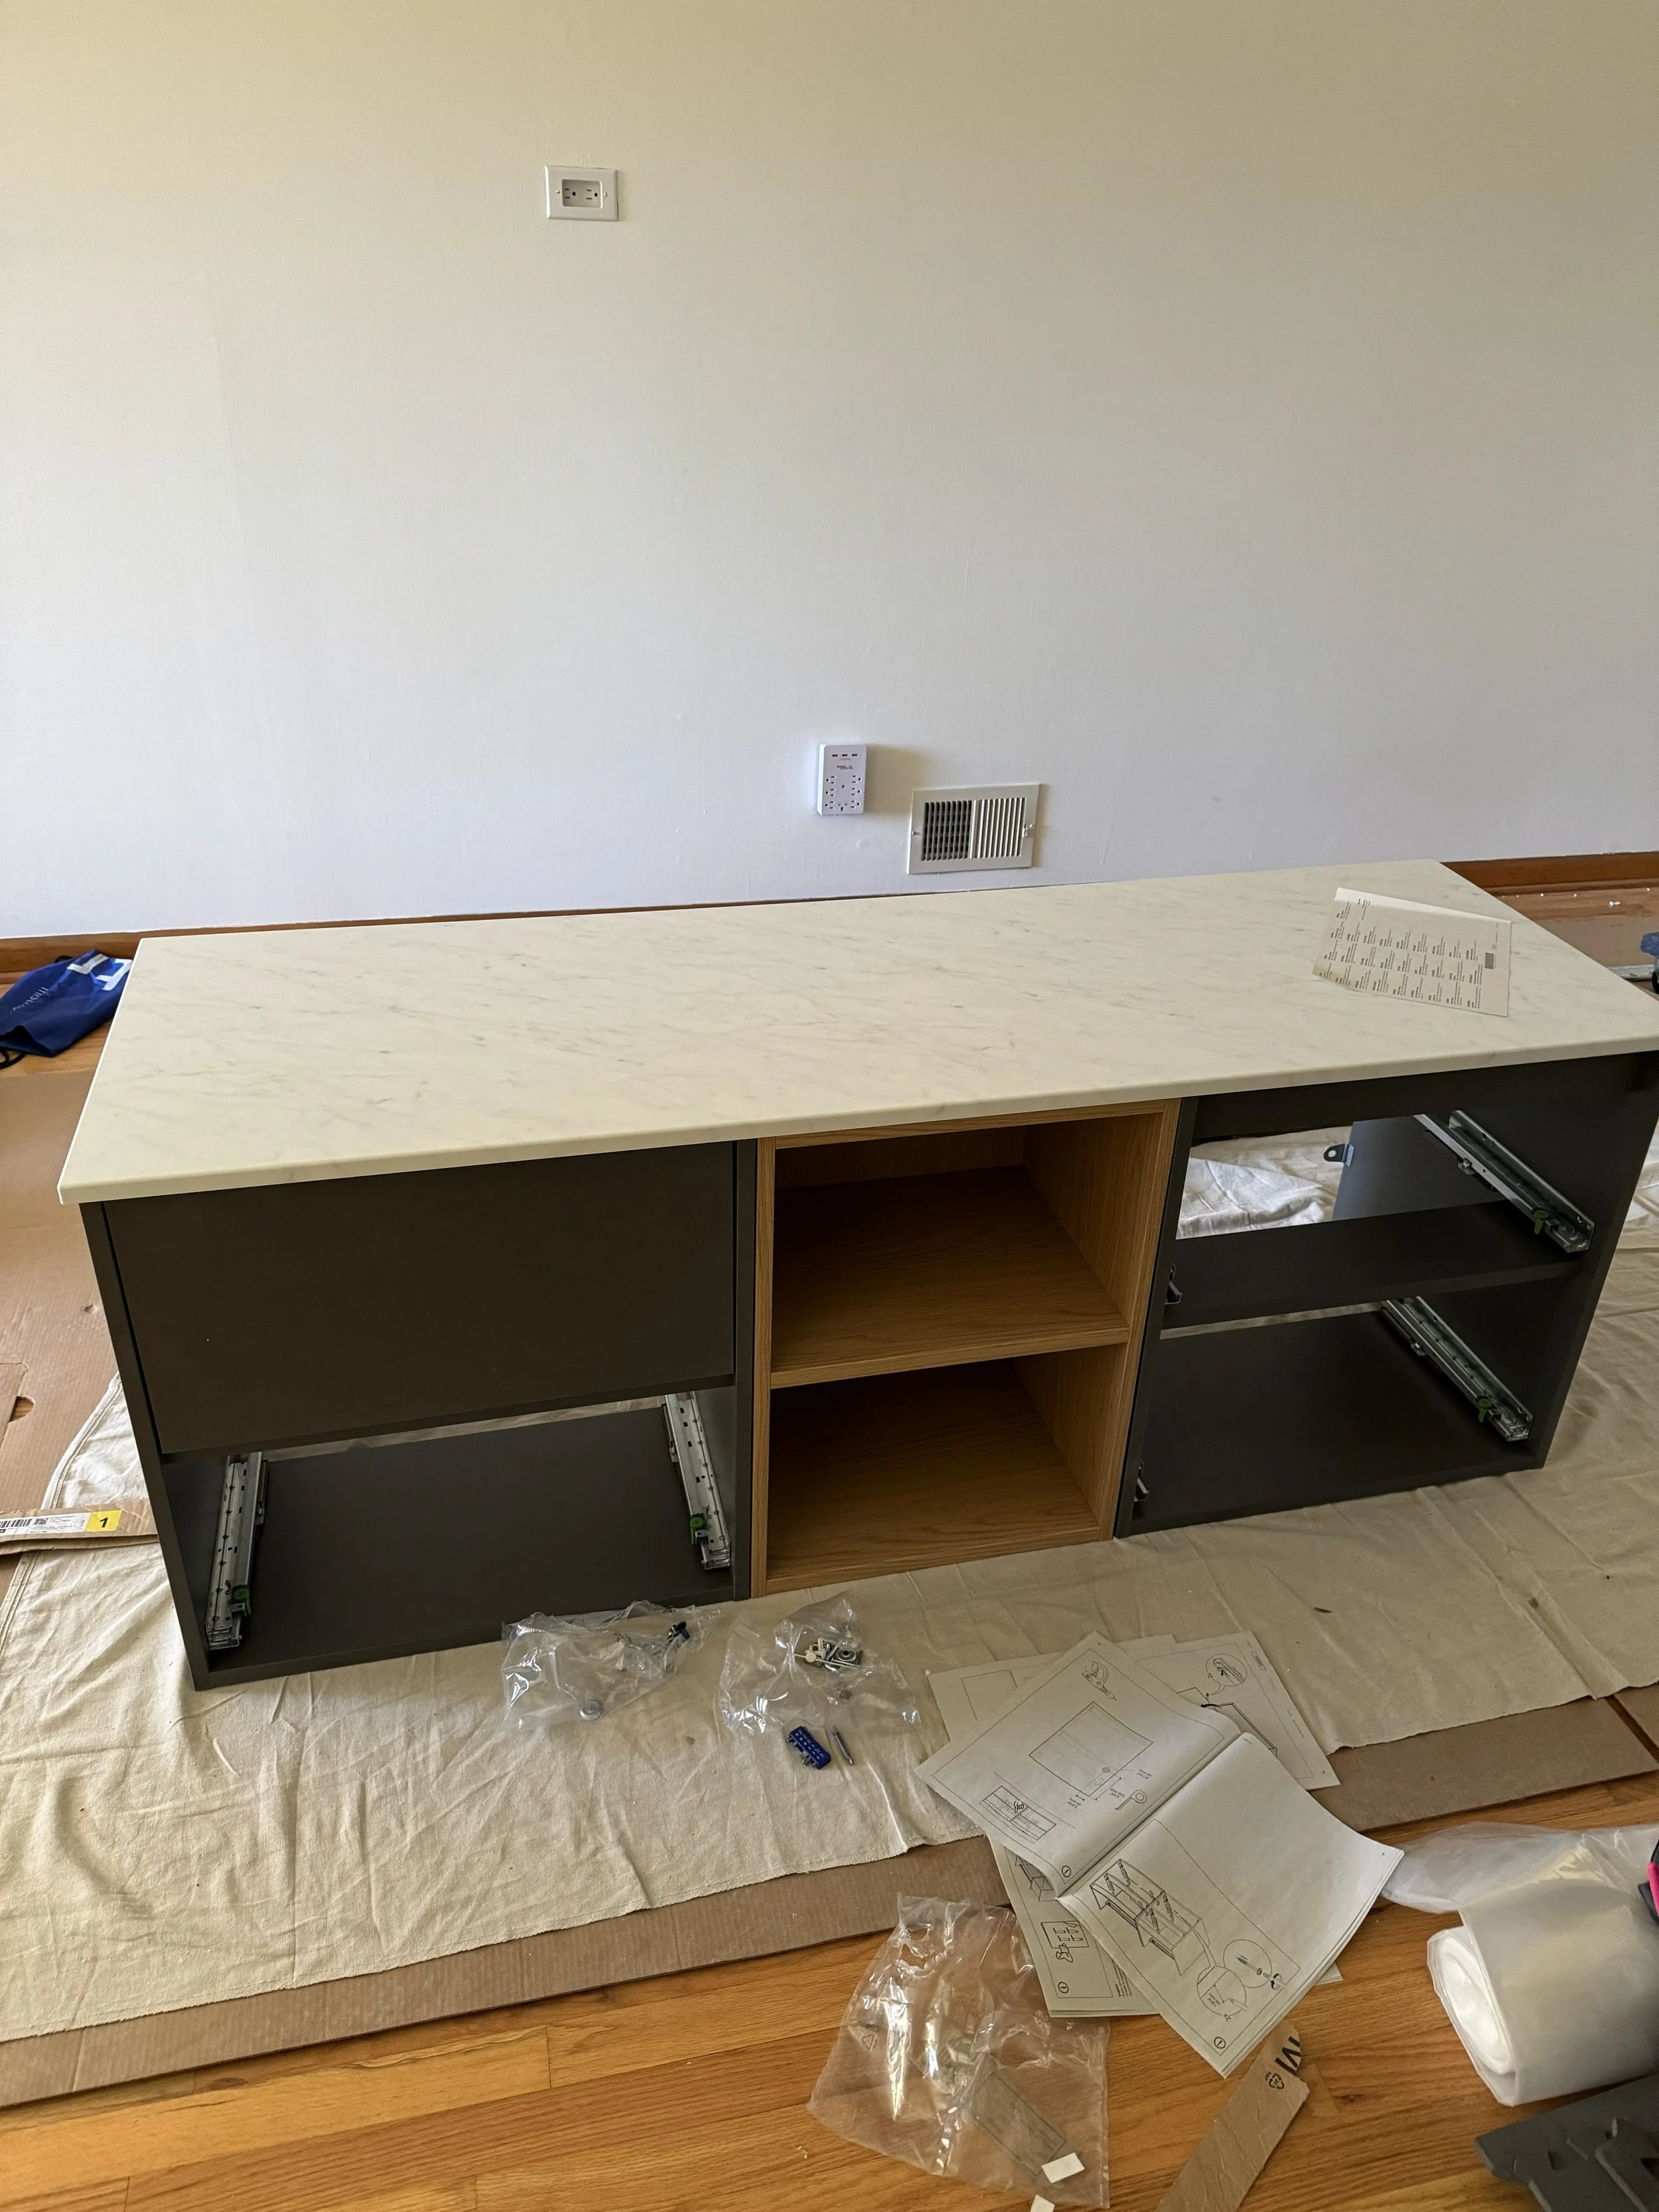
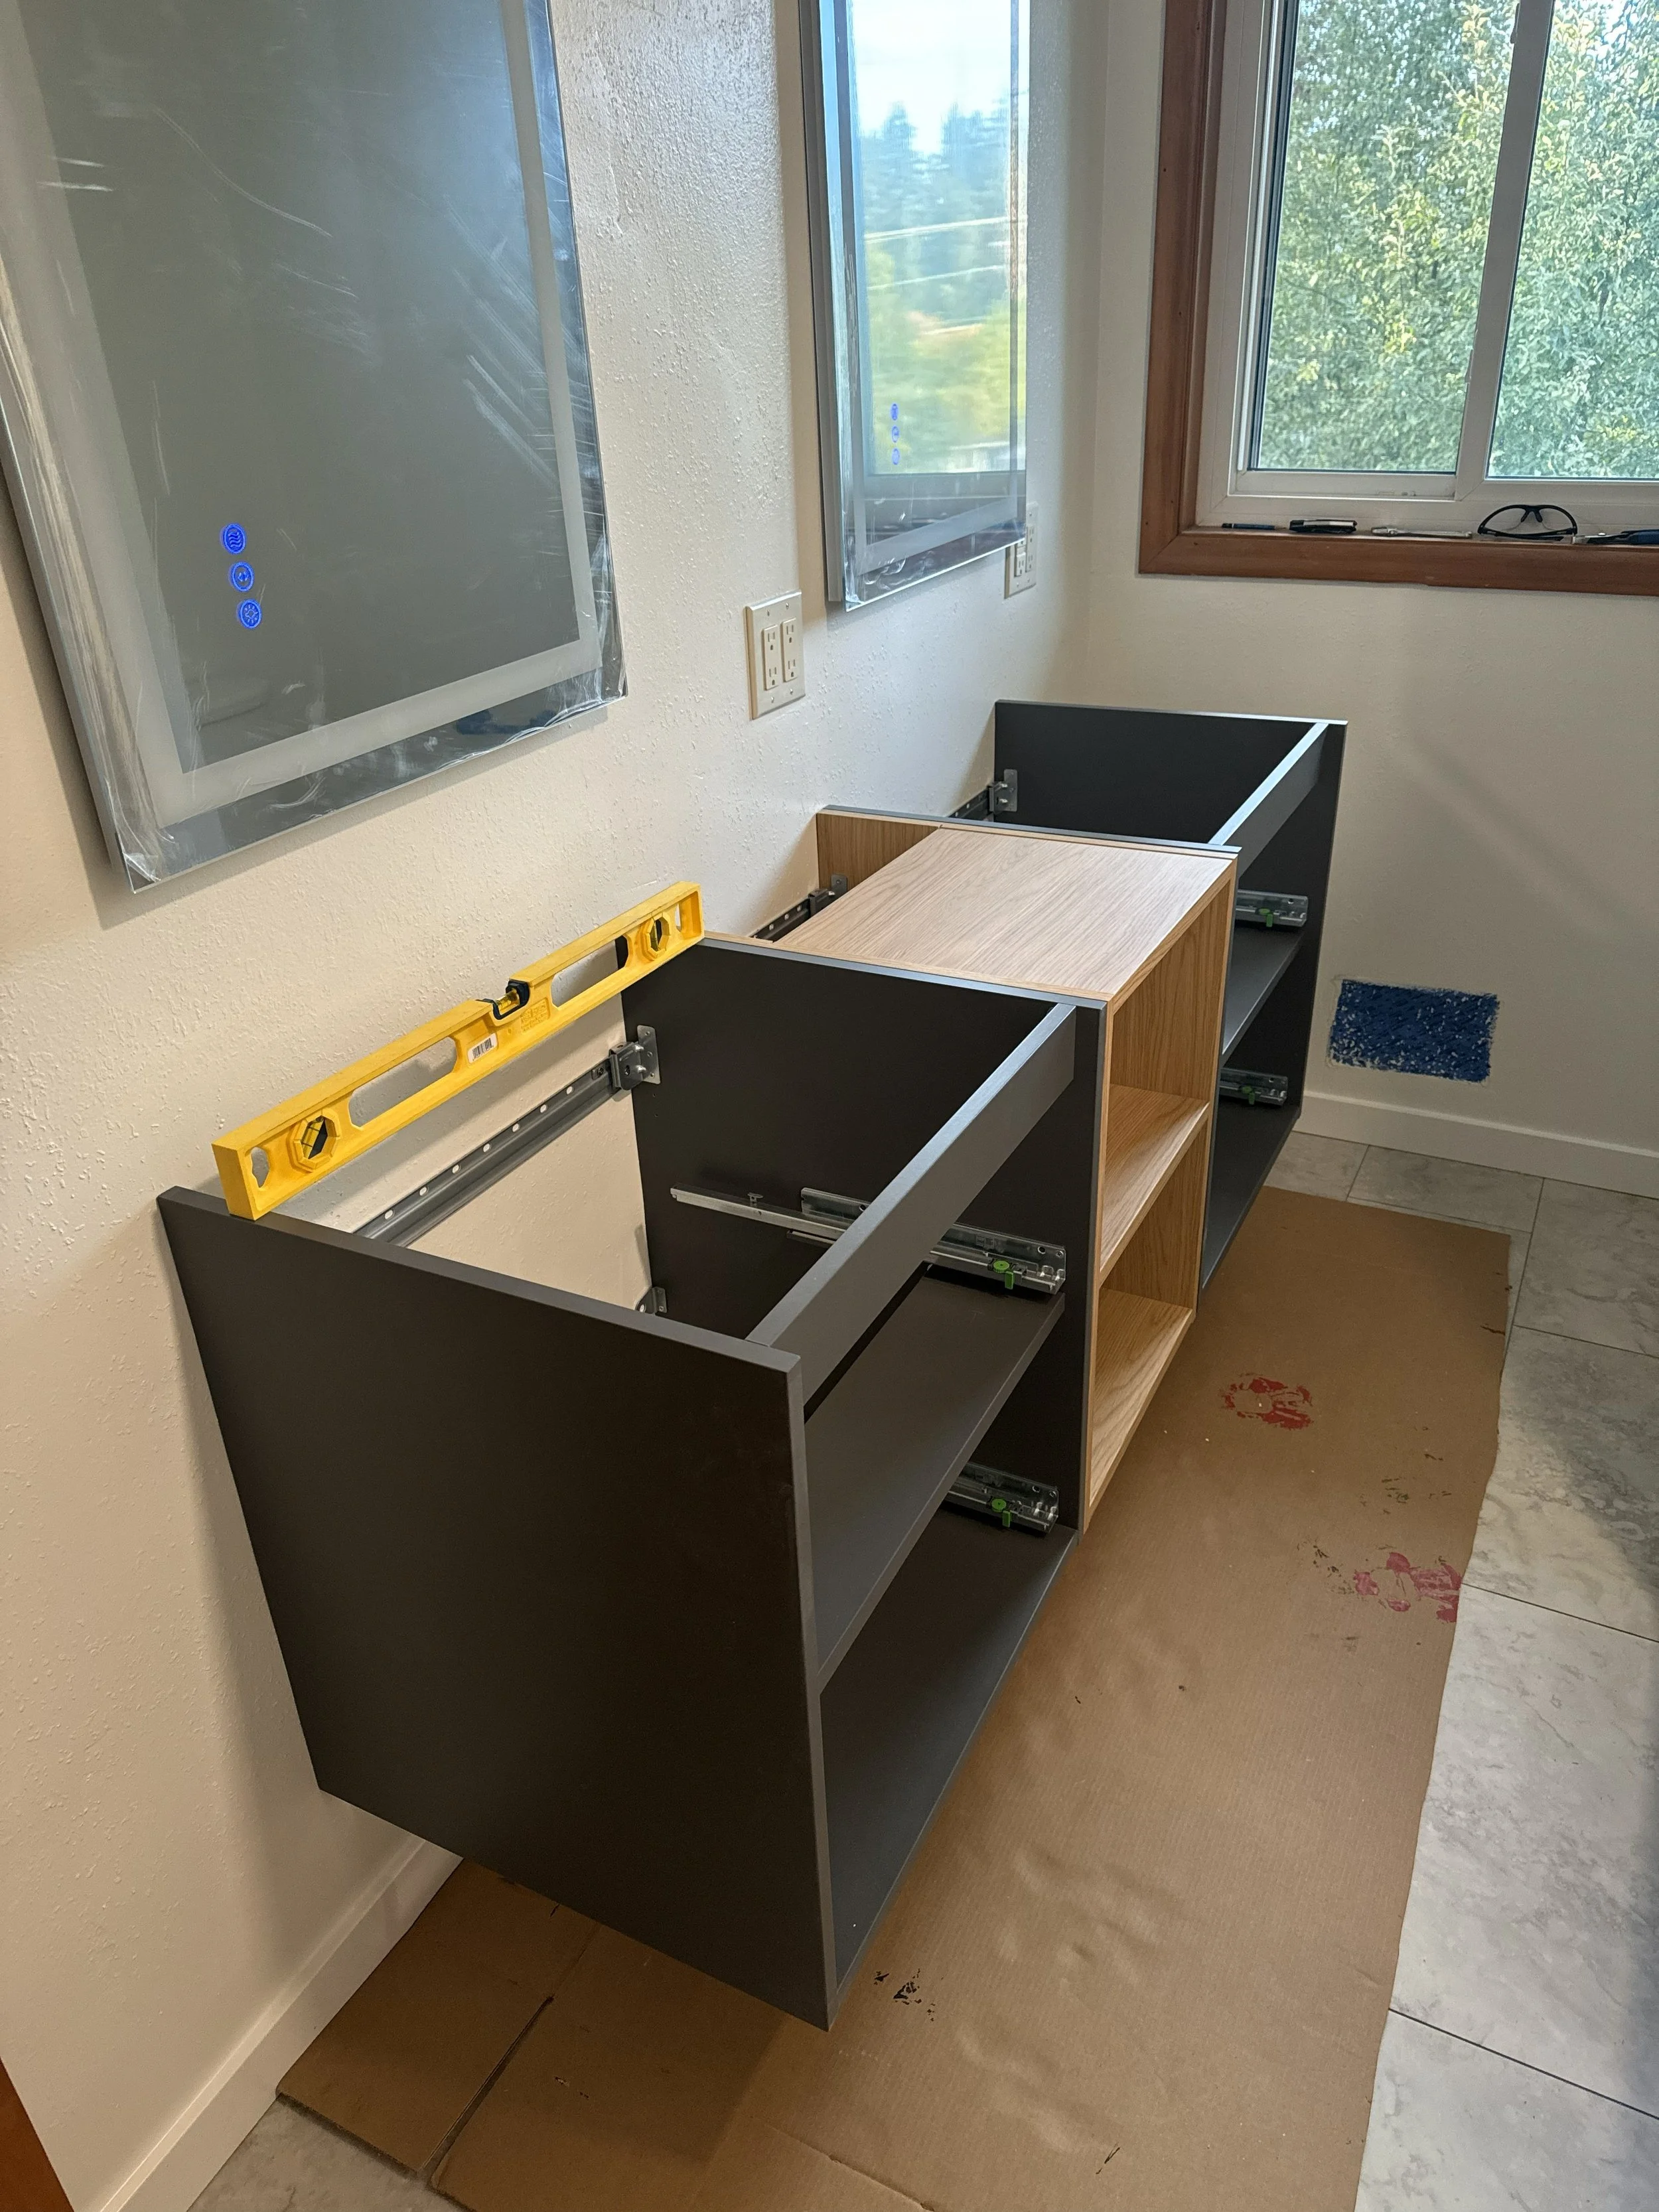
CASEWORK BUILD
Before I started patching up the drywall, the next step was to build the casework and make sure my original floor outline was correct. I had already double, triple checked this, but it’s all about making a plan and then checking yourself every step of the way.
INSTALL BLOCKING
With the casework complete, I was able to determine exactly what height I wanted the countertop and where the blocking needed to be installed. This was a little tricky because I didn’t want to remove any more drywall, but I made sure to keep note of where studs were and added blocking based on the casework location.
INSTALL DRYWALL
Carefully! This is where I almost made a huge error in my haste to make progress. I started cutting drywall pieces to match the openings and only took into account where studs were - and not the new piping in the wall! After several screws, including one that squeaked while going in I realized that I almost penetrated the PVC. I quickly stopped and started drawing on the gypsum panels approximately where the pipes were when I held it in place. Again, think forward and backwards for each step. Lesson learned!
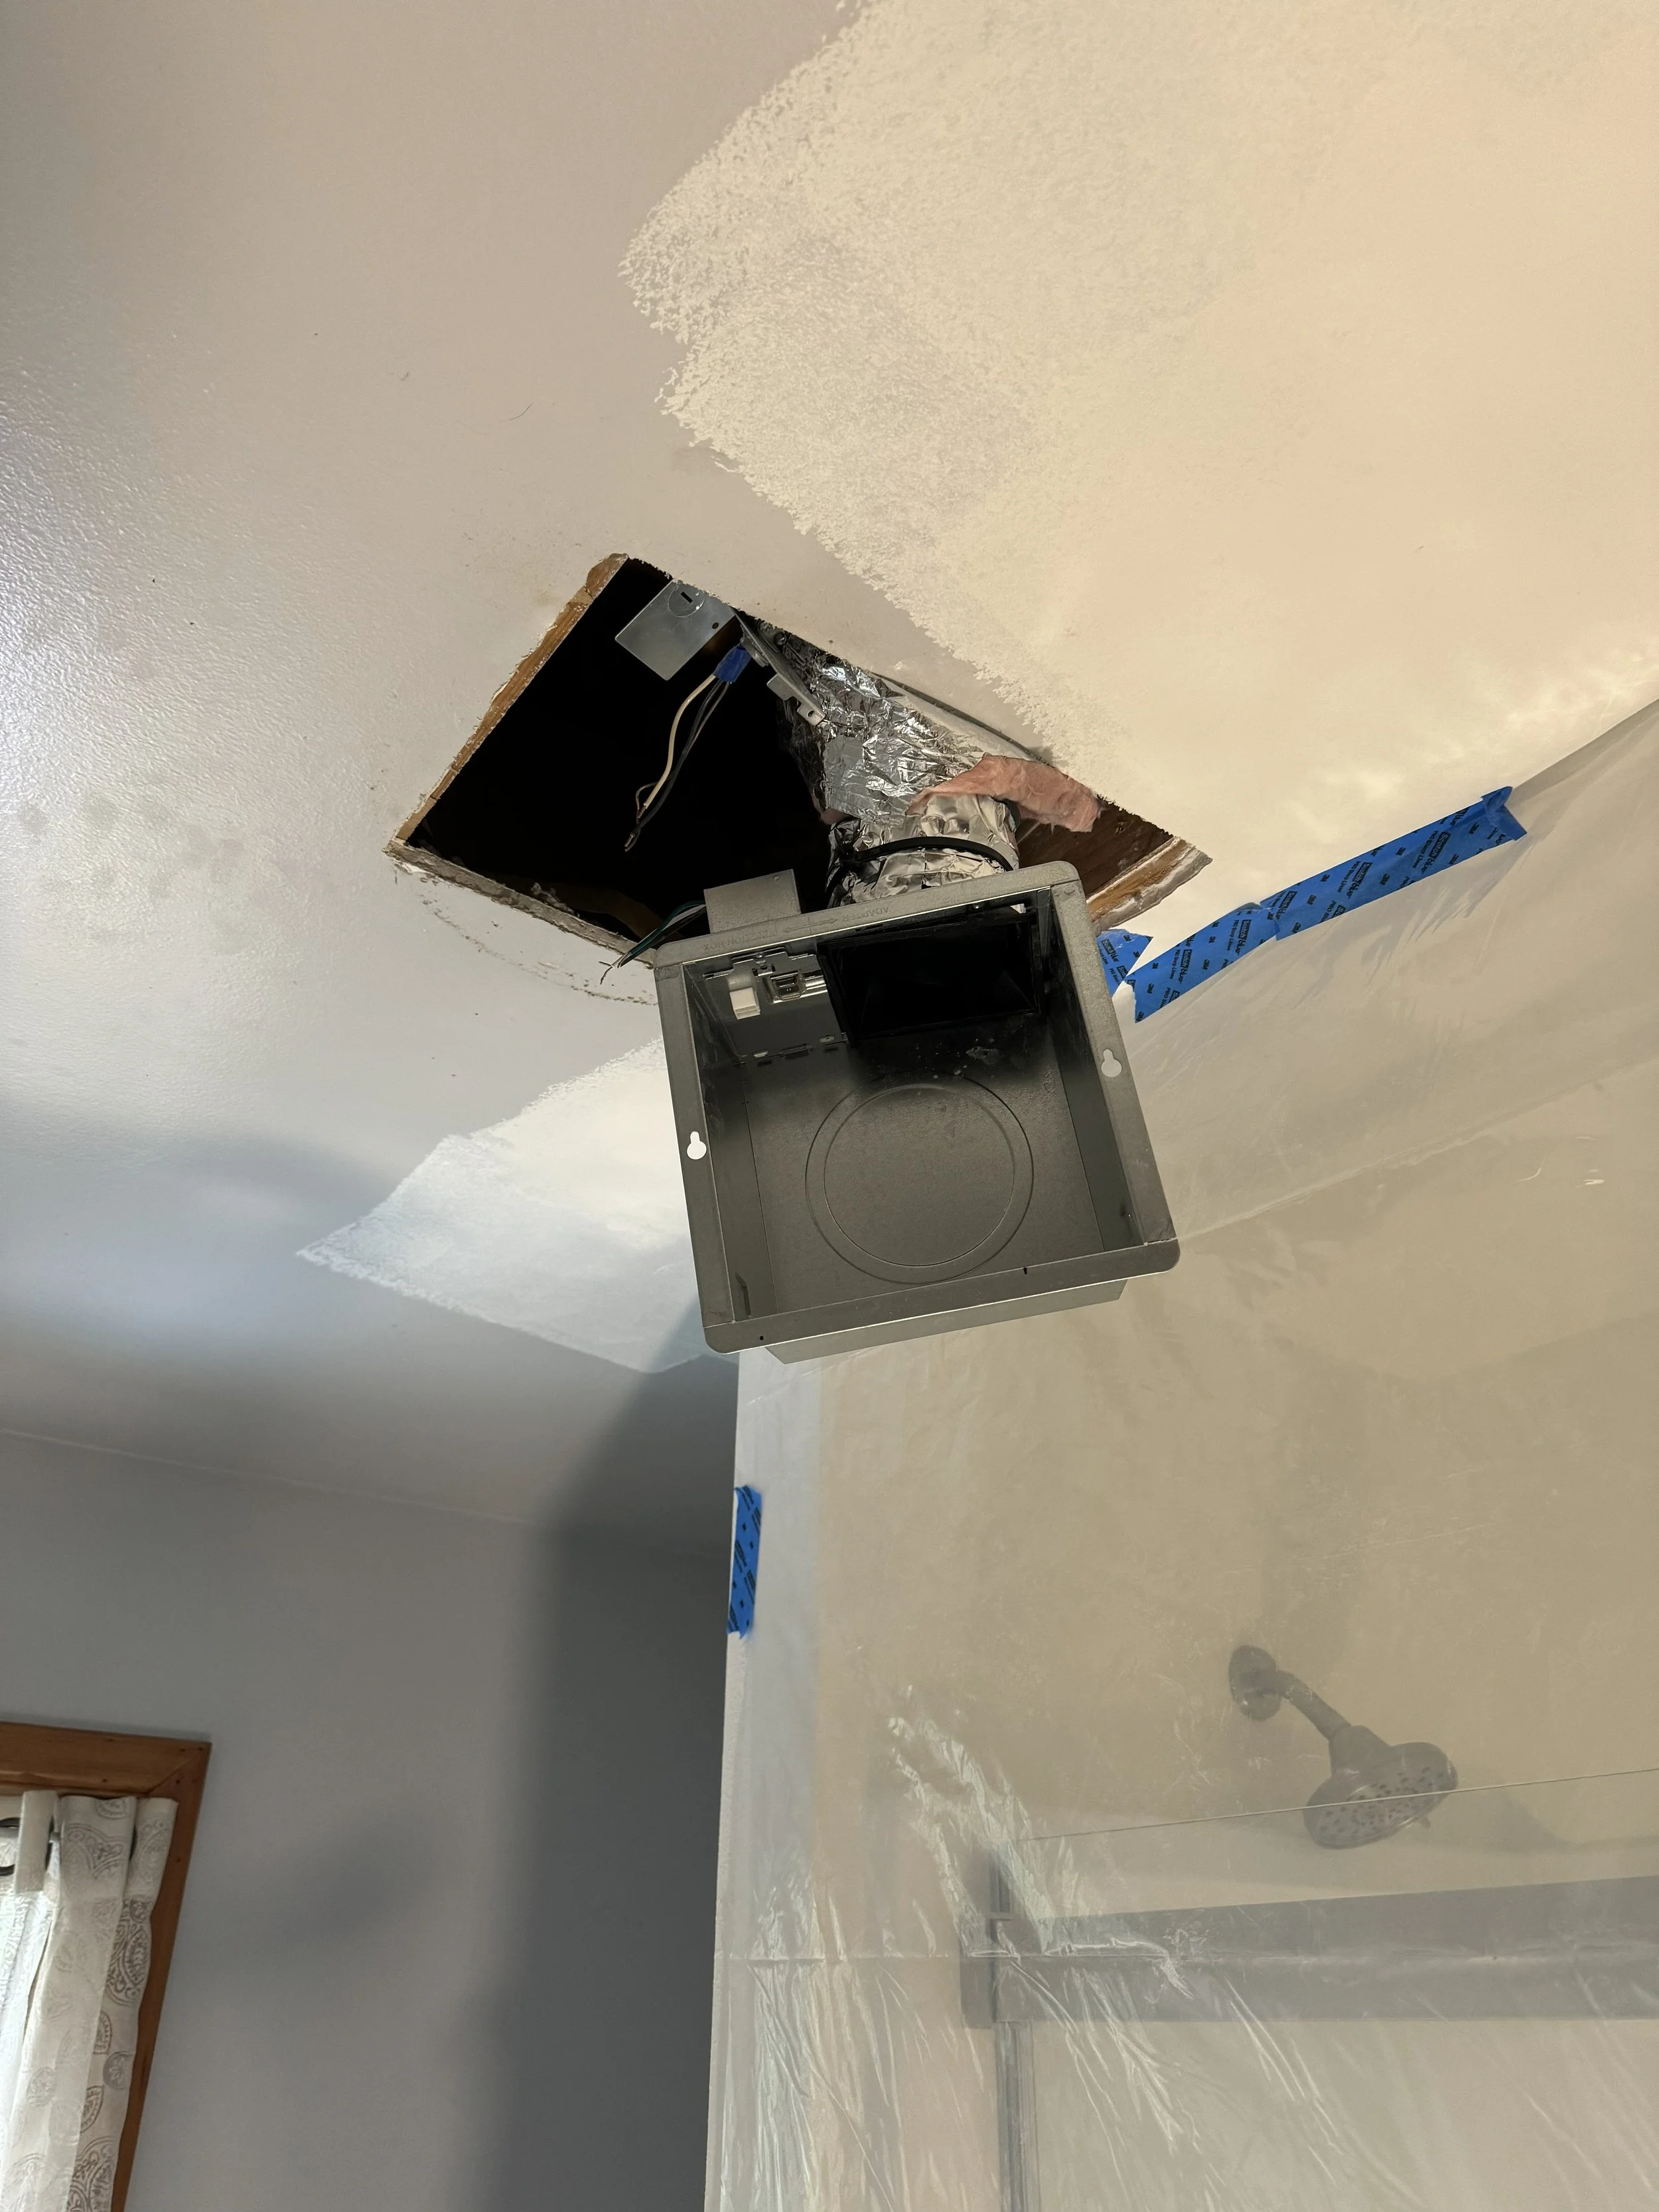
REMOVE OLD FAN
The process of removing the old fan was tedious and cumbersome. For some reason the fan box would not budge and this forced me into the attic for the first time. A scary proposition, because who knows what’s hiding in the attic! Luckily no bodies or creepy clowns. In the end, the attic was too low for access to the fan location. I ended up having to cut a larger hole in the ceiling for access below to the metal housing that was screwed sideways into the ceiling joists. This image shows the smaller fan box.
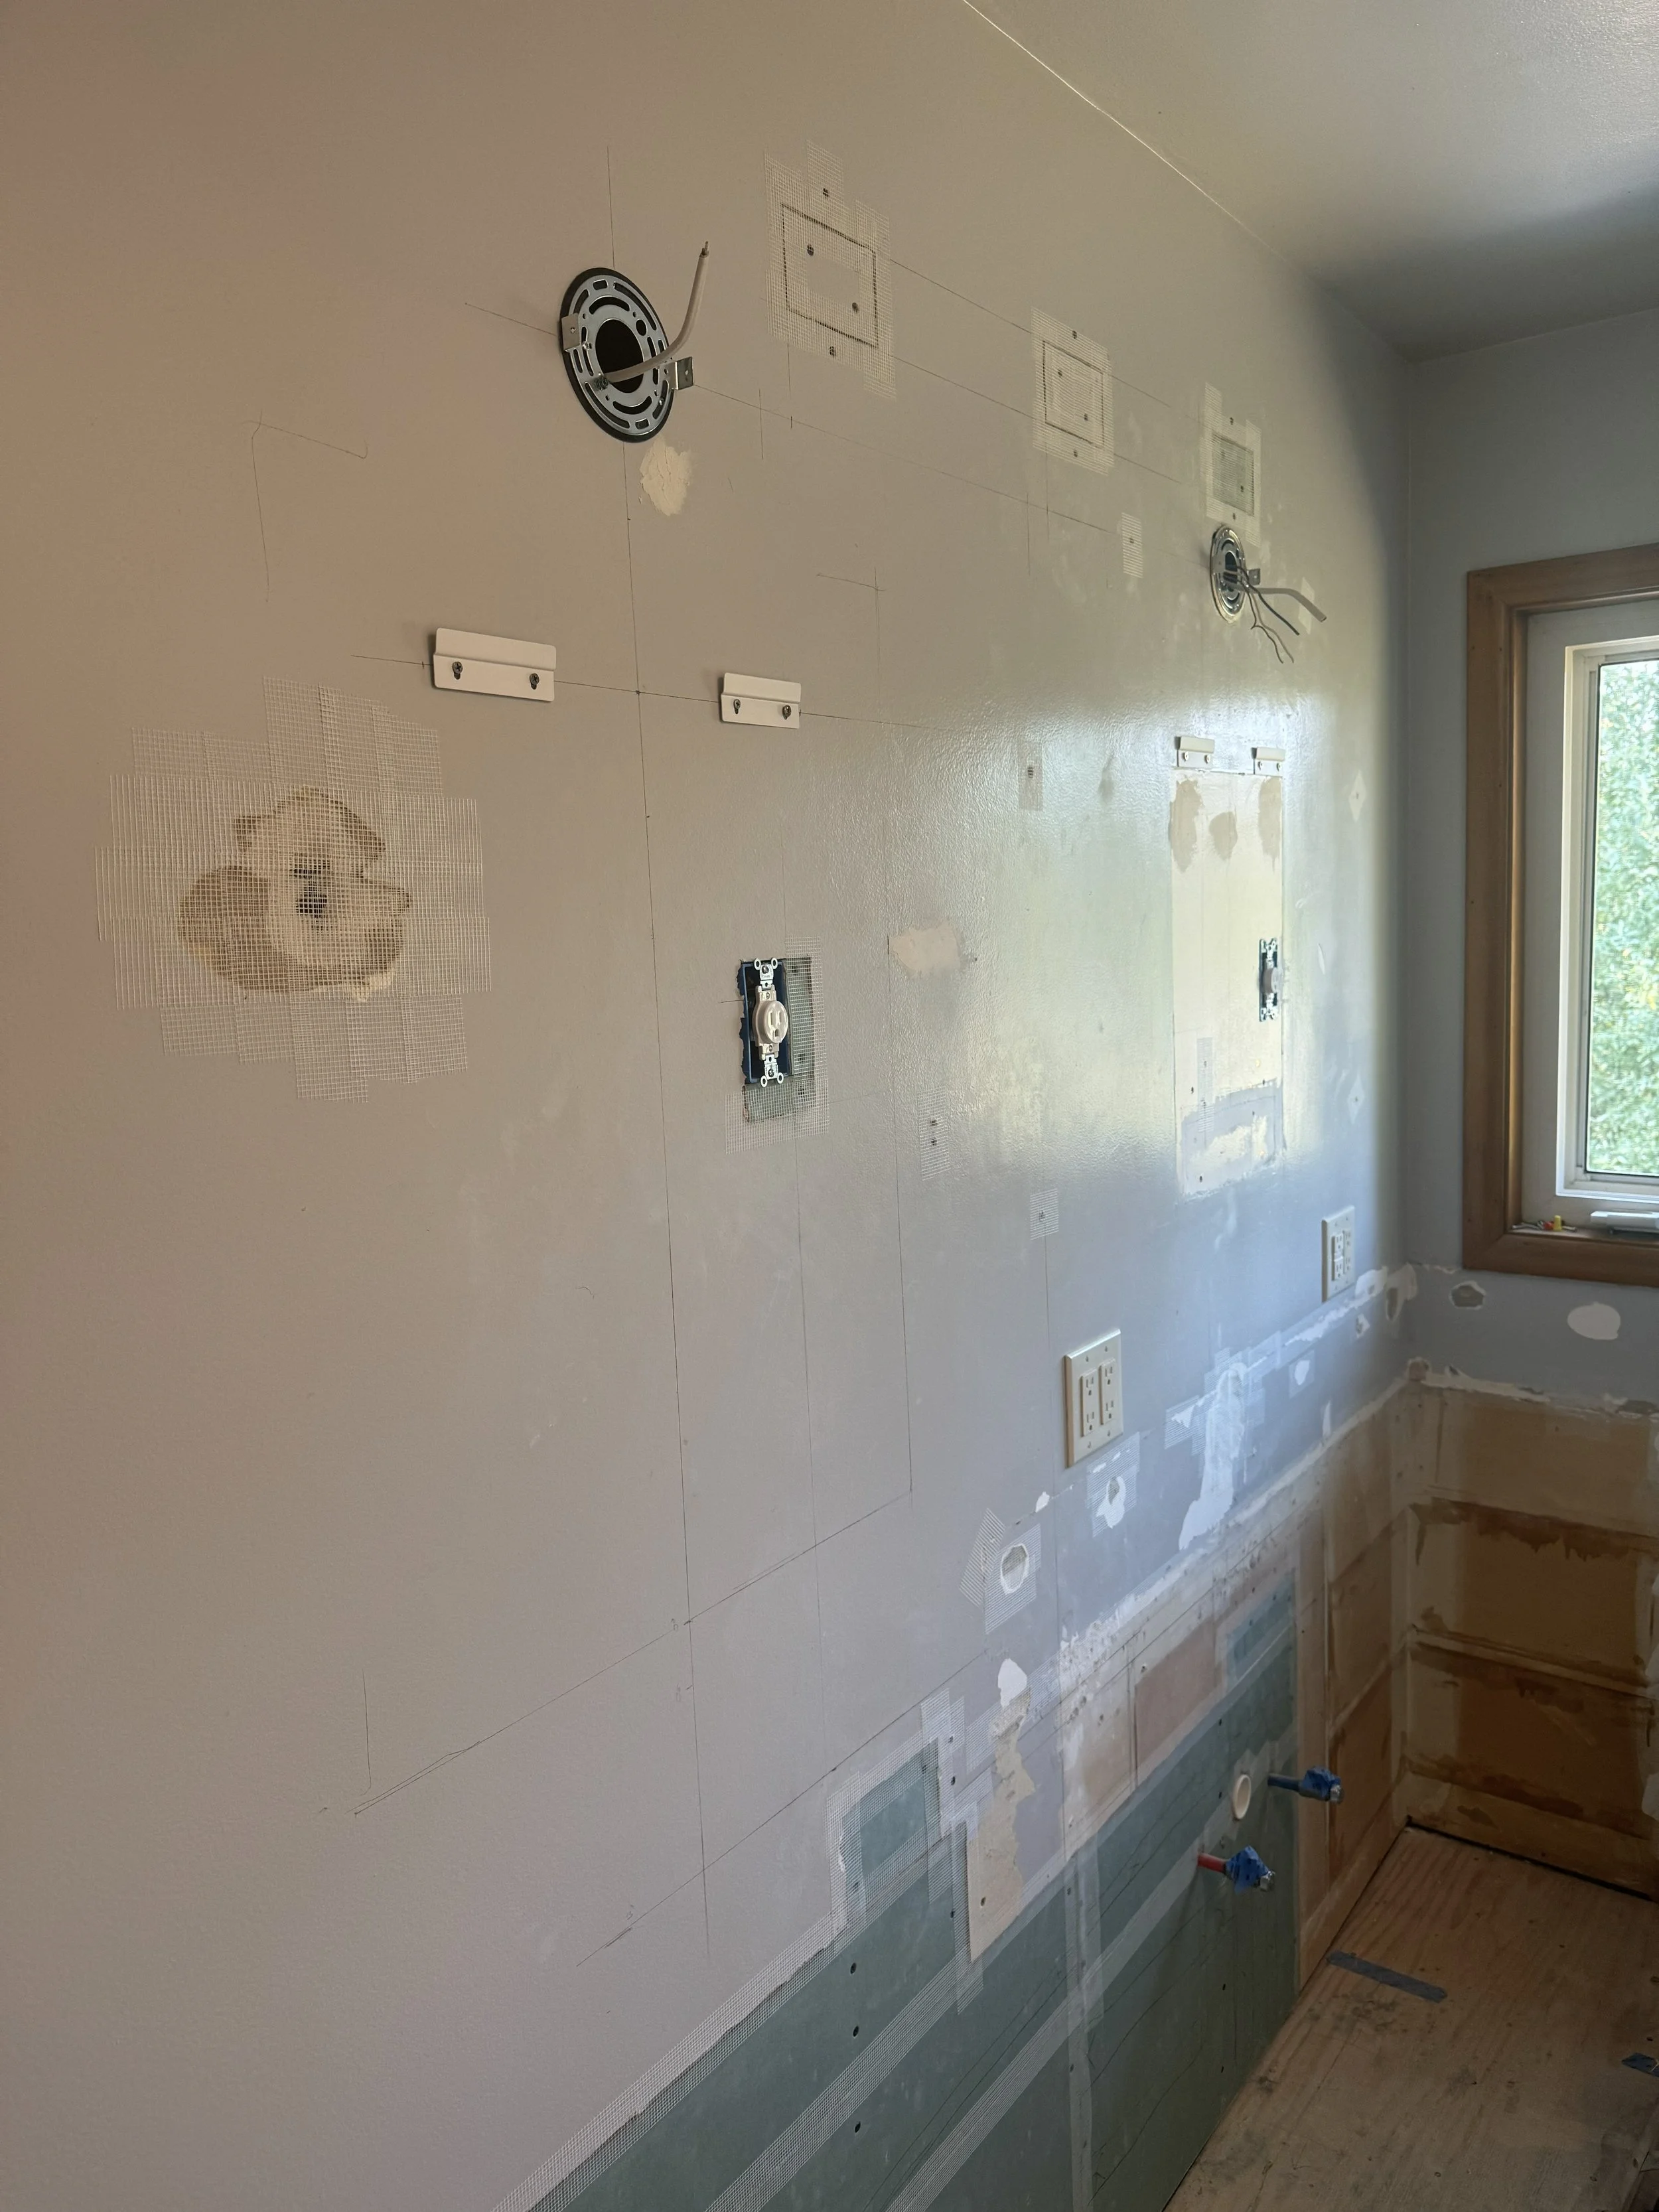
NEW ELECTRICAL
When the plumbing was done, I had one additional wall sconce added that would be over the second sink, including an outlet to the LED mirror. Once the gypsum was in place, lots of mud taping was needed to patch the holes, edges, and rough patches of the wall.

MUD COAT
A lot of mud work was required for patching the extensive damage to the walls. This image shows the first mud coat that was heavier in application in order to penetrate and coat the mud tape. It also took longer to dry than normal, but I was ok with the wait. It was already such an improvement.
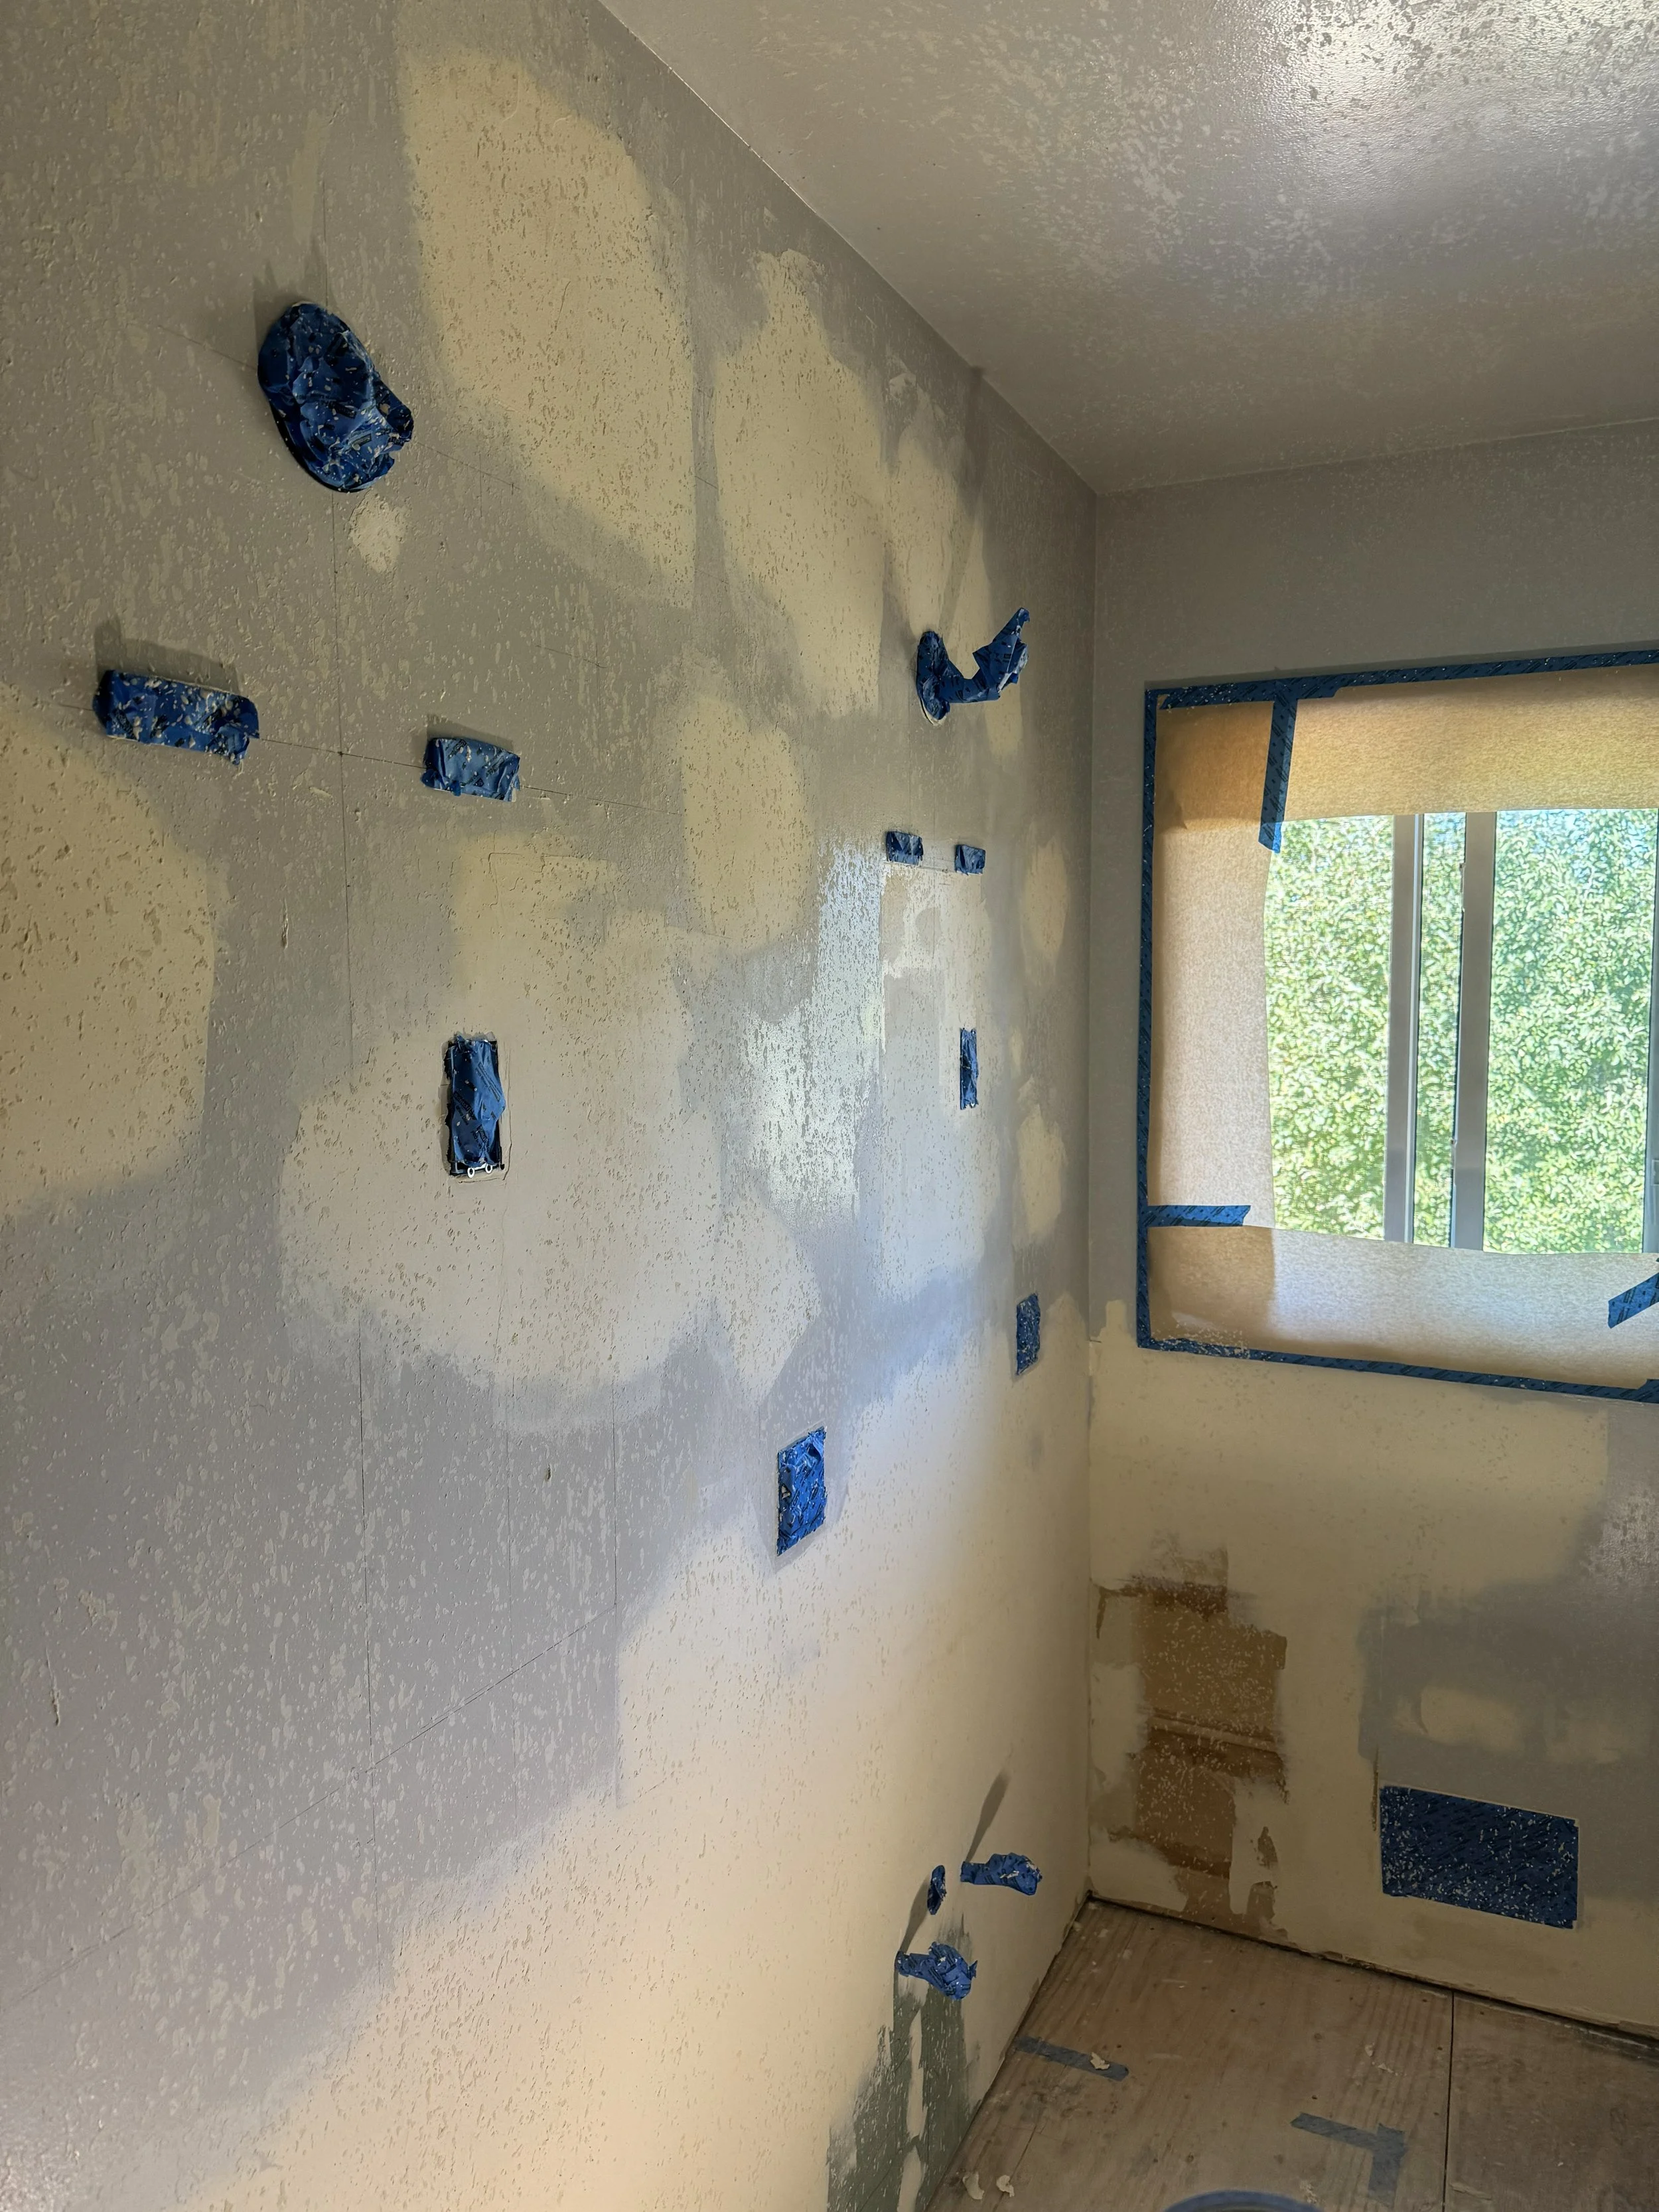
FINAL MUD COAT AND TEXTURE
The second mud coat was lighter and feathered out as much as possible using a wider knife. You can really notice how feathered out it was in the lower left of the image in order to get a smooth and continuous flat surface. Ironically this part would be covered from the floating vanity, but it was still important to me.
TIME TO PAINT
It took 2-3 layers of paint to properly cover the existing blue walls, tan walls, and green coming through on the new gypsum panels. This has to be one of the most satisfying steps because it pulls everything together. The bathroom was a smaller space so I did everything by hand, where some of the larger rooms I was able to use a spray gun.
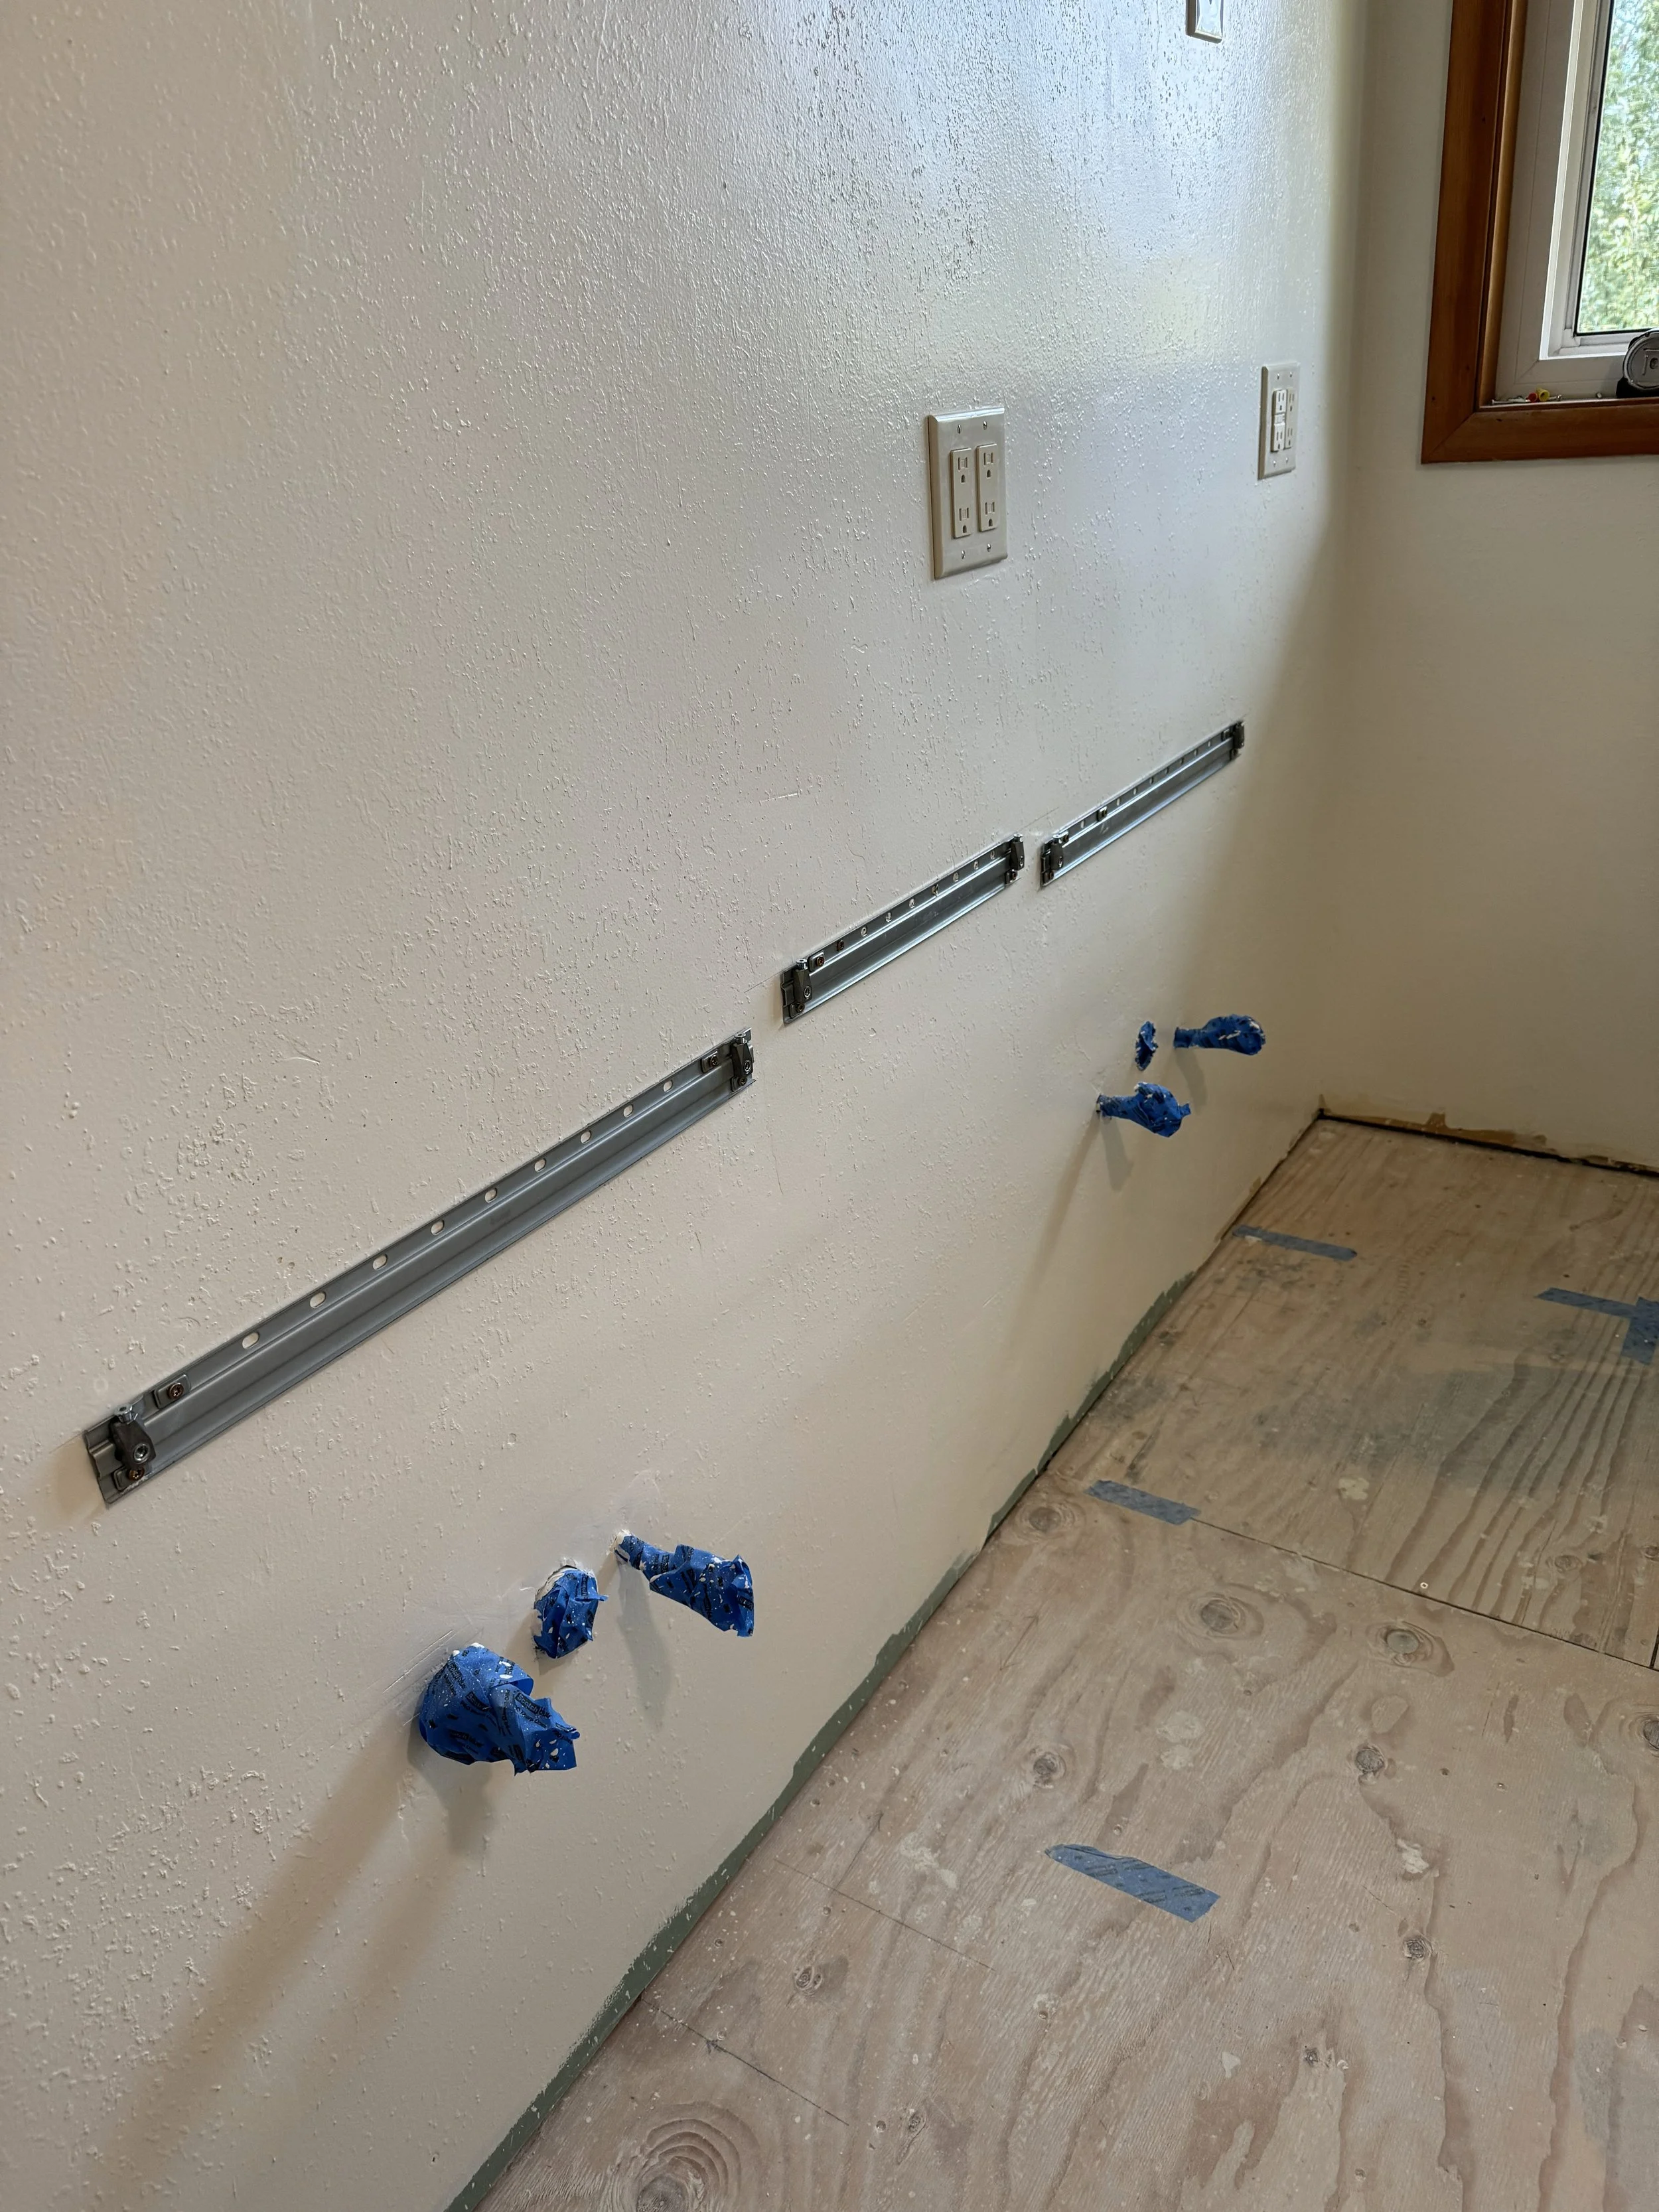
CASEWORK SUPPORTS
Once the paint was dry, it was time to hang the casework supports. Each segment required its own support, and the sink casework was at a different height than the center storage compartment. I had marked on the floor exactly where the studs were and where I could add additional screws into the blocking. I made note of where not to screw based on a previous screw up.

FLOORING INSTALL
The flooring I really wanted was from Canada, but I didn’t want to wait and opted for something available at my local hardware store. The LVT was easy to snap together and slide in place, but I would’ve loved a tighter connection. The most difficult area was at the doorway where the door trim extended to the floor. I wasn’t always able to slide the LVT in place and had to make cutouts exact to the trim shape.
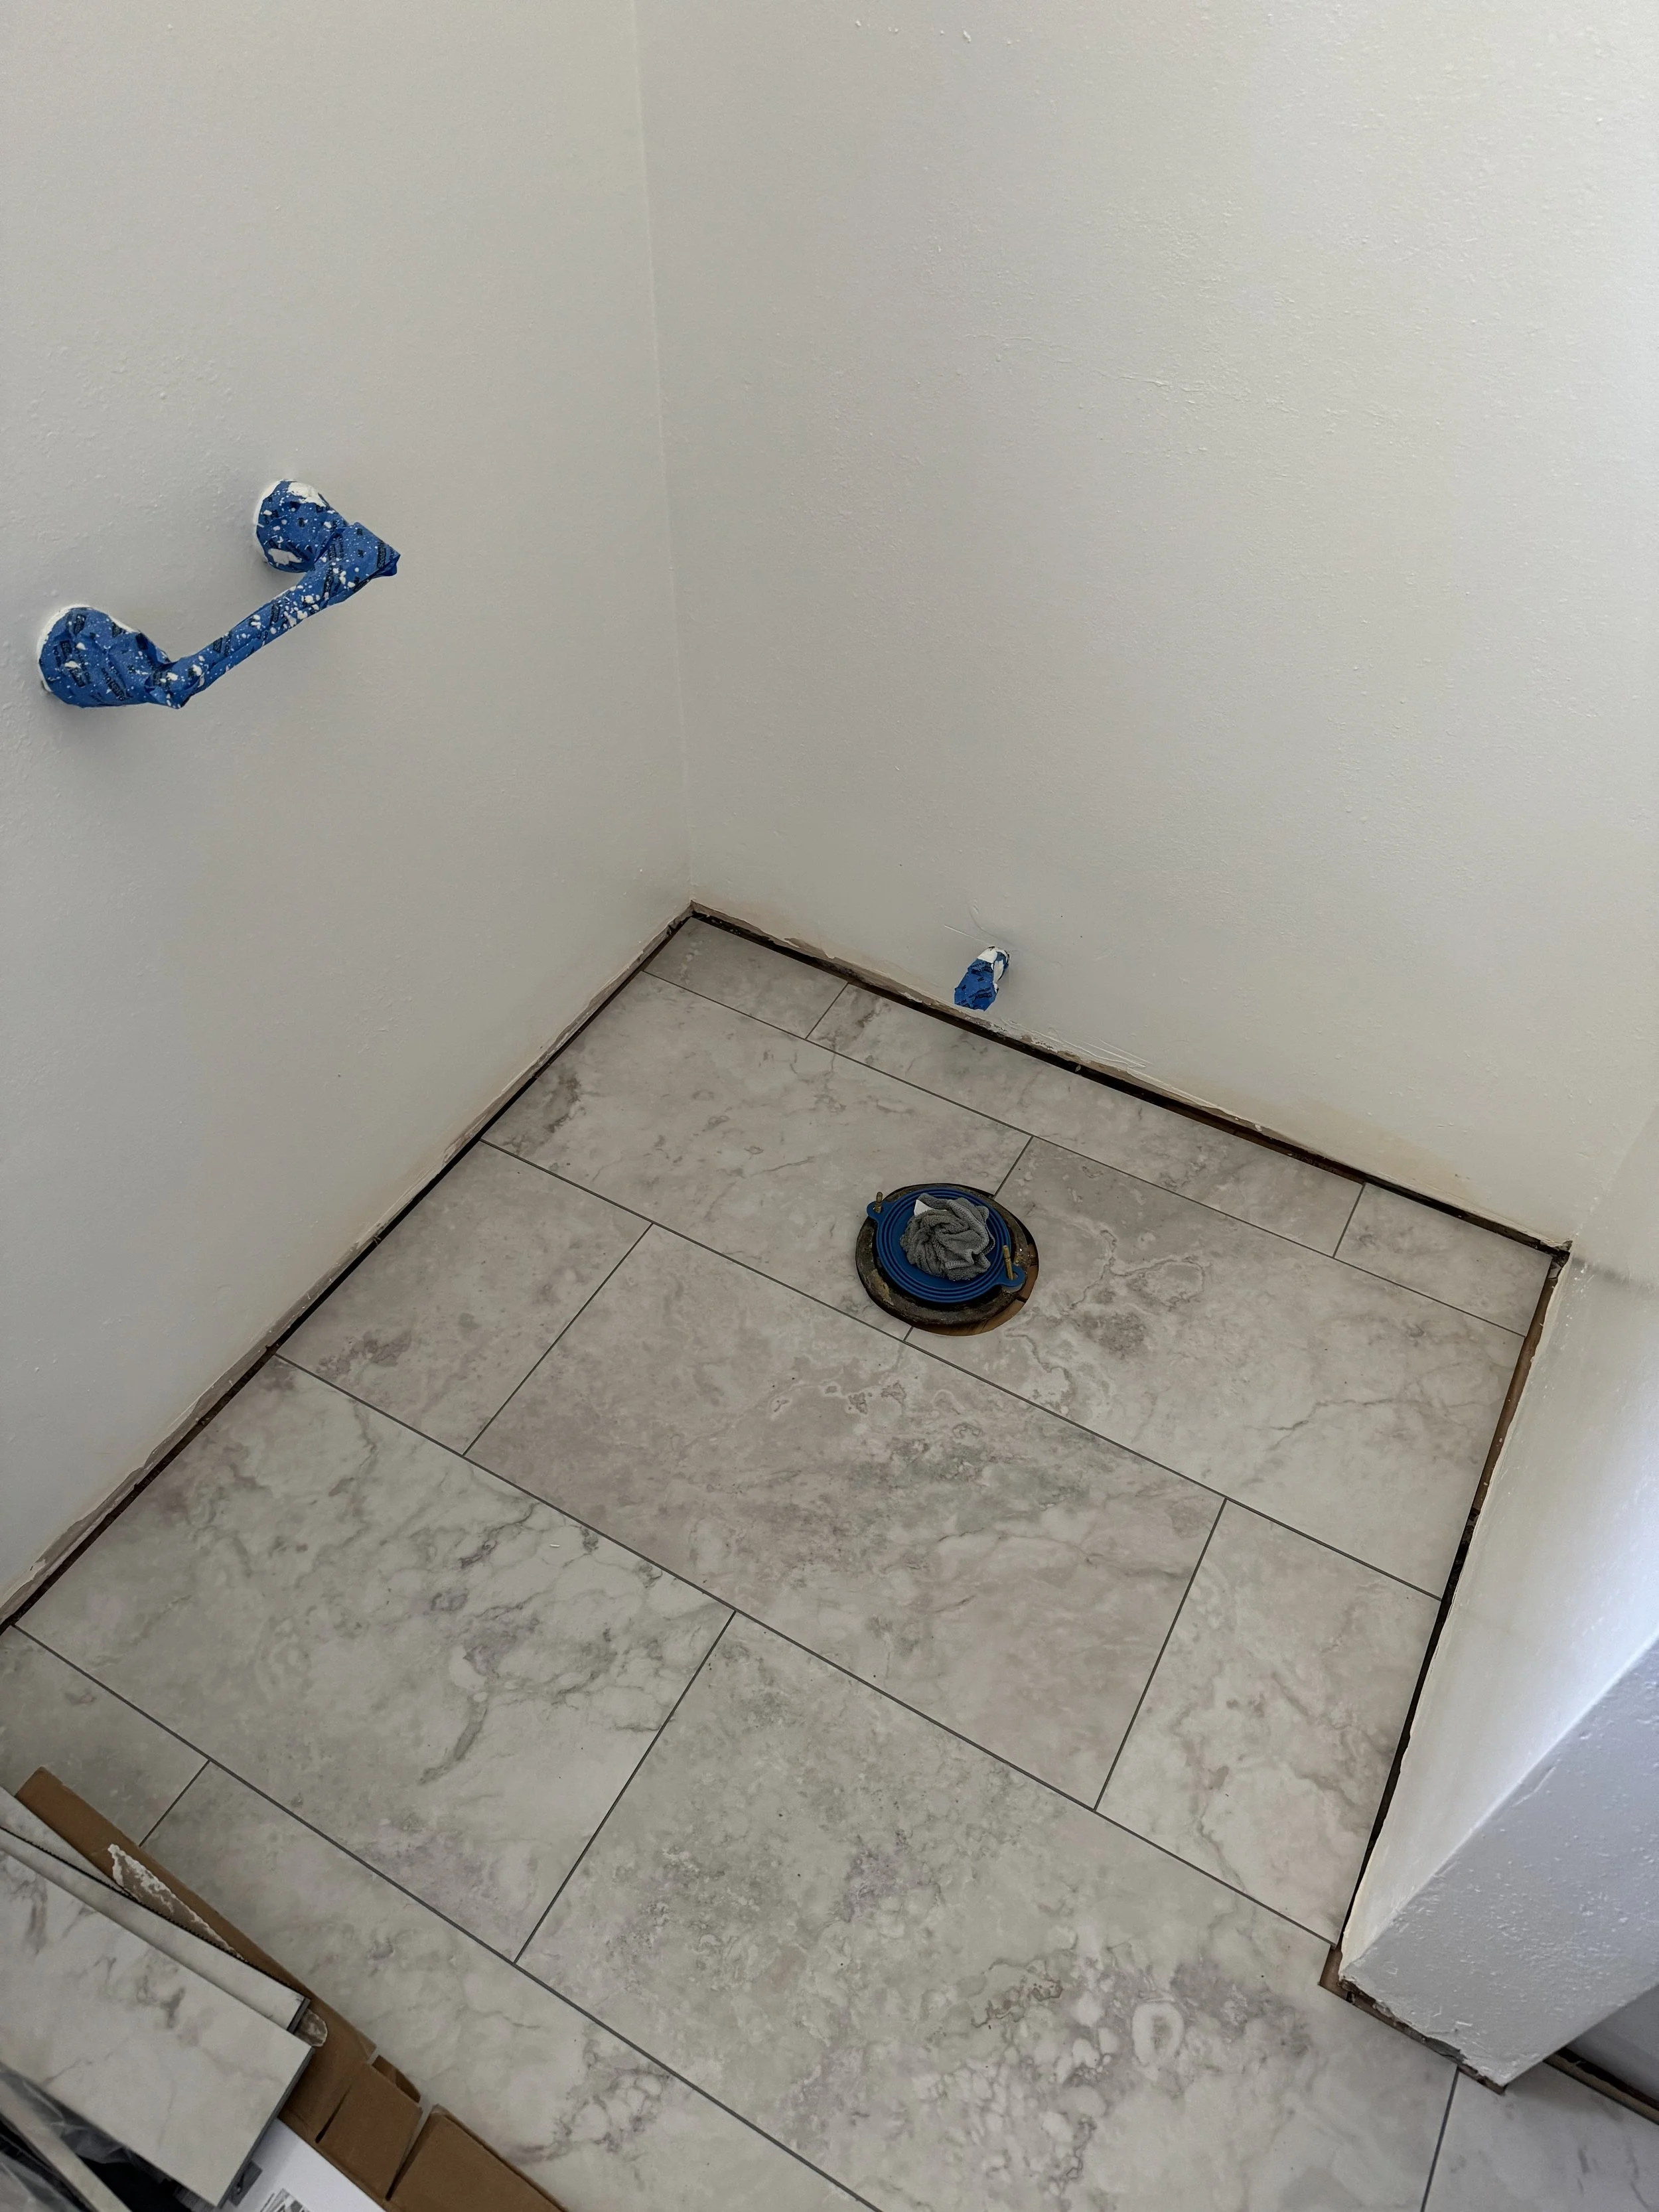
REMOVAL OF TOILET, FLOORING INSTALL
The removal of the toilet was easier than I expected, but also what you expect once removed. Not super fun. I was also stuck with the toilet flange that was there as I didn’t want to replace the entire drainage system. Had it been a better flange then I would’ve opted for a non wax seal, but the flange was uneven and old so wax made sense for a tighter seal.

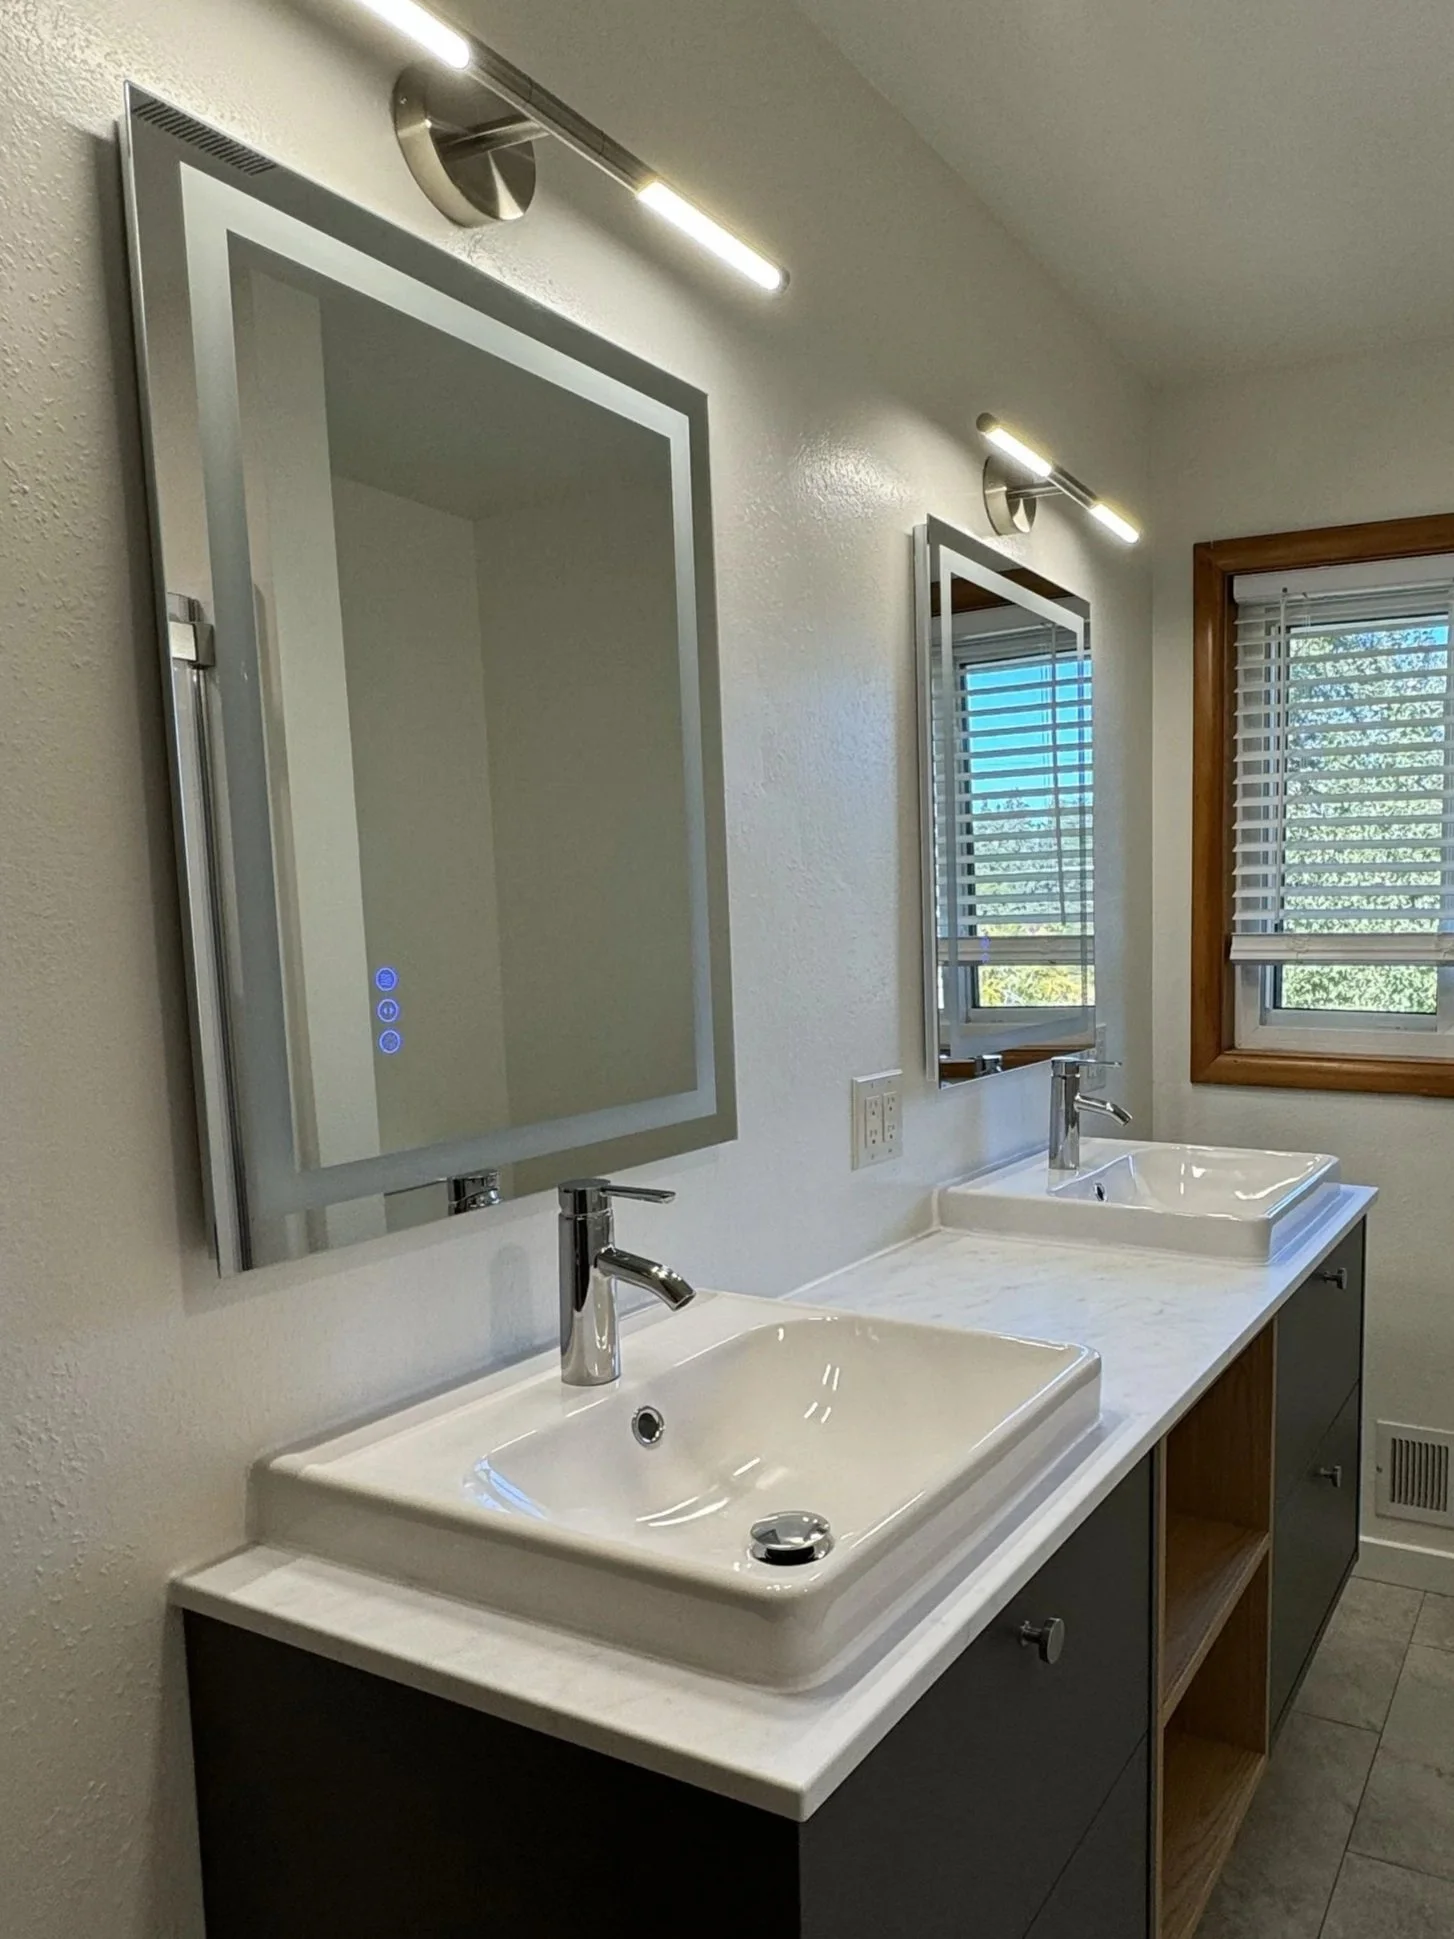
LIGHT AND MIRRORS
When the flooring was finished I decided I needed more light in the room and so I tackled the installation of the new lights and LED mirrors. You can also see the new fan that was installed, smaller but just as powerful as the previous. This also required a new wall switch and I opted for a timed fan to be energy conscious. The previous fan switch had a button for night lighting, music, mood lighting, and an on/off.
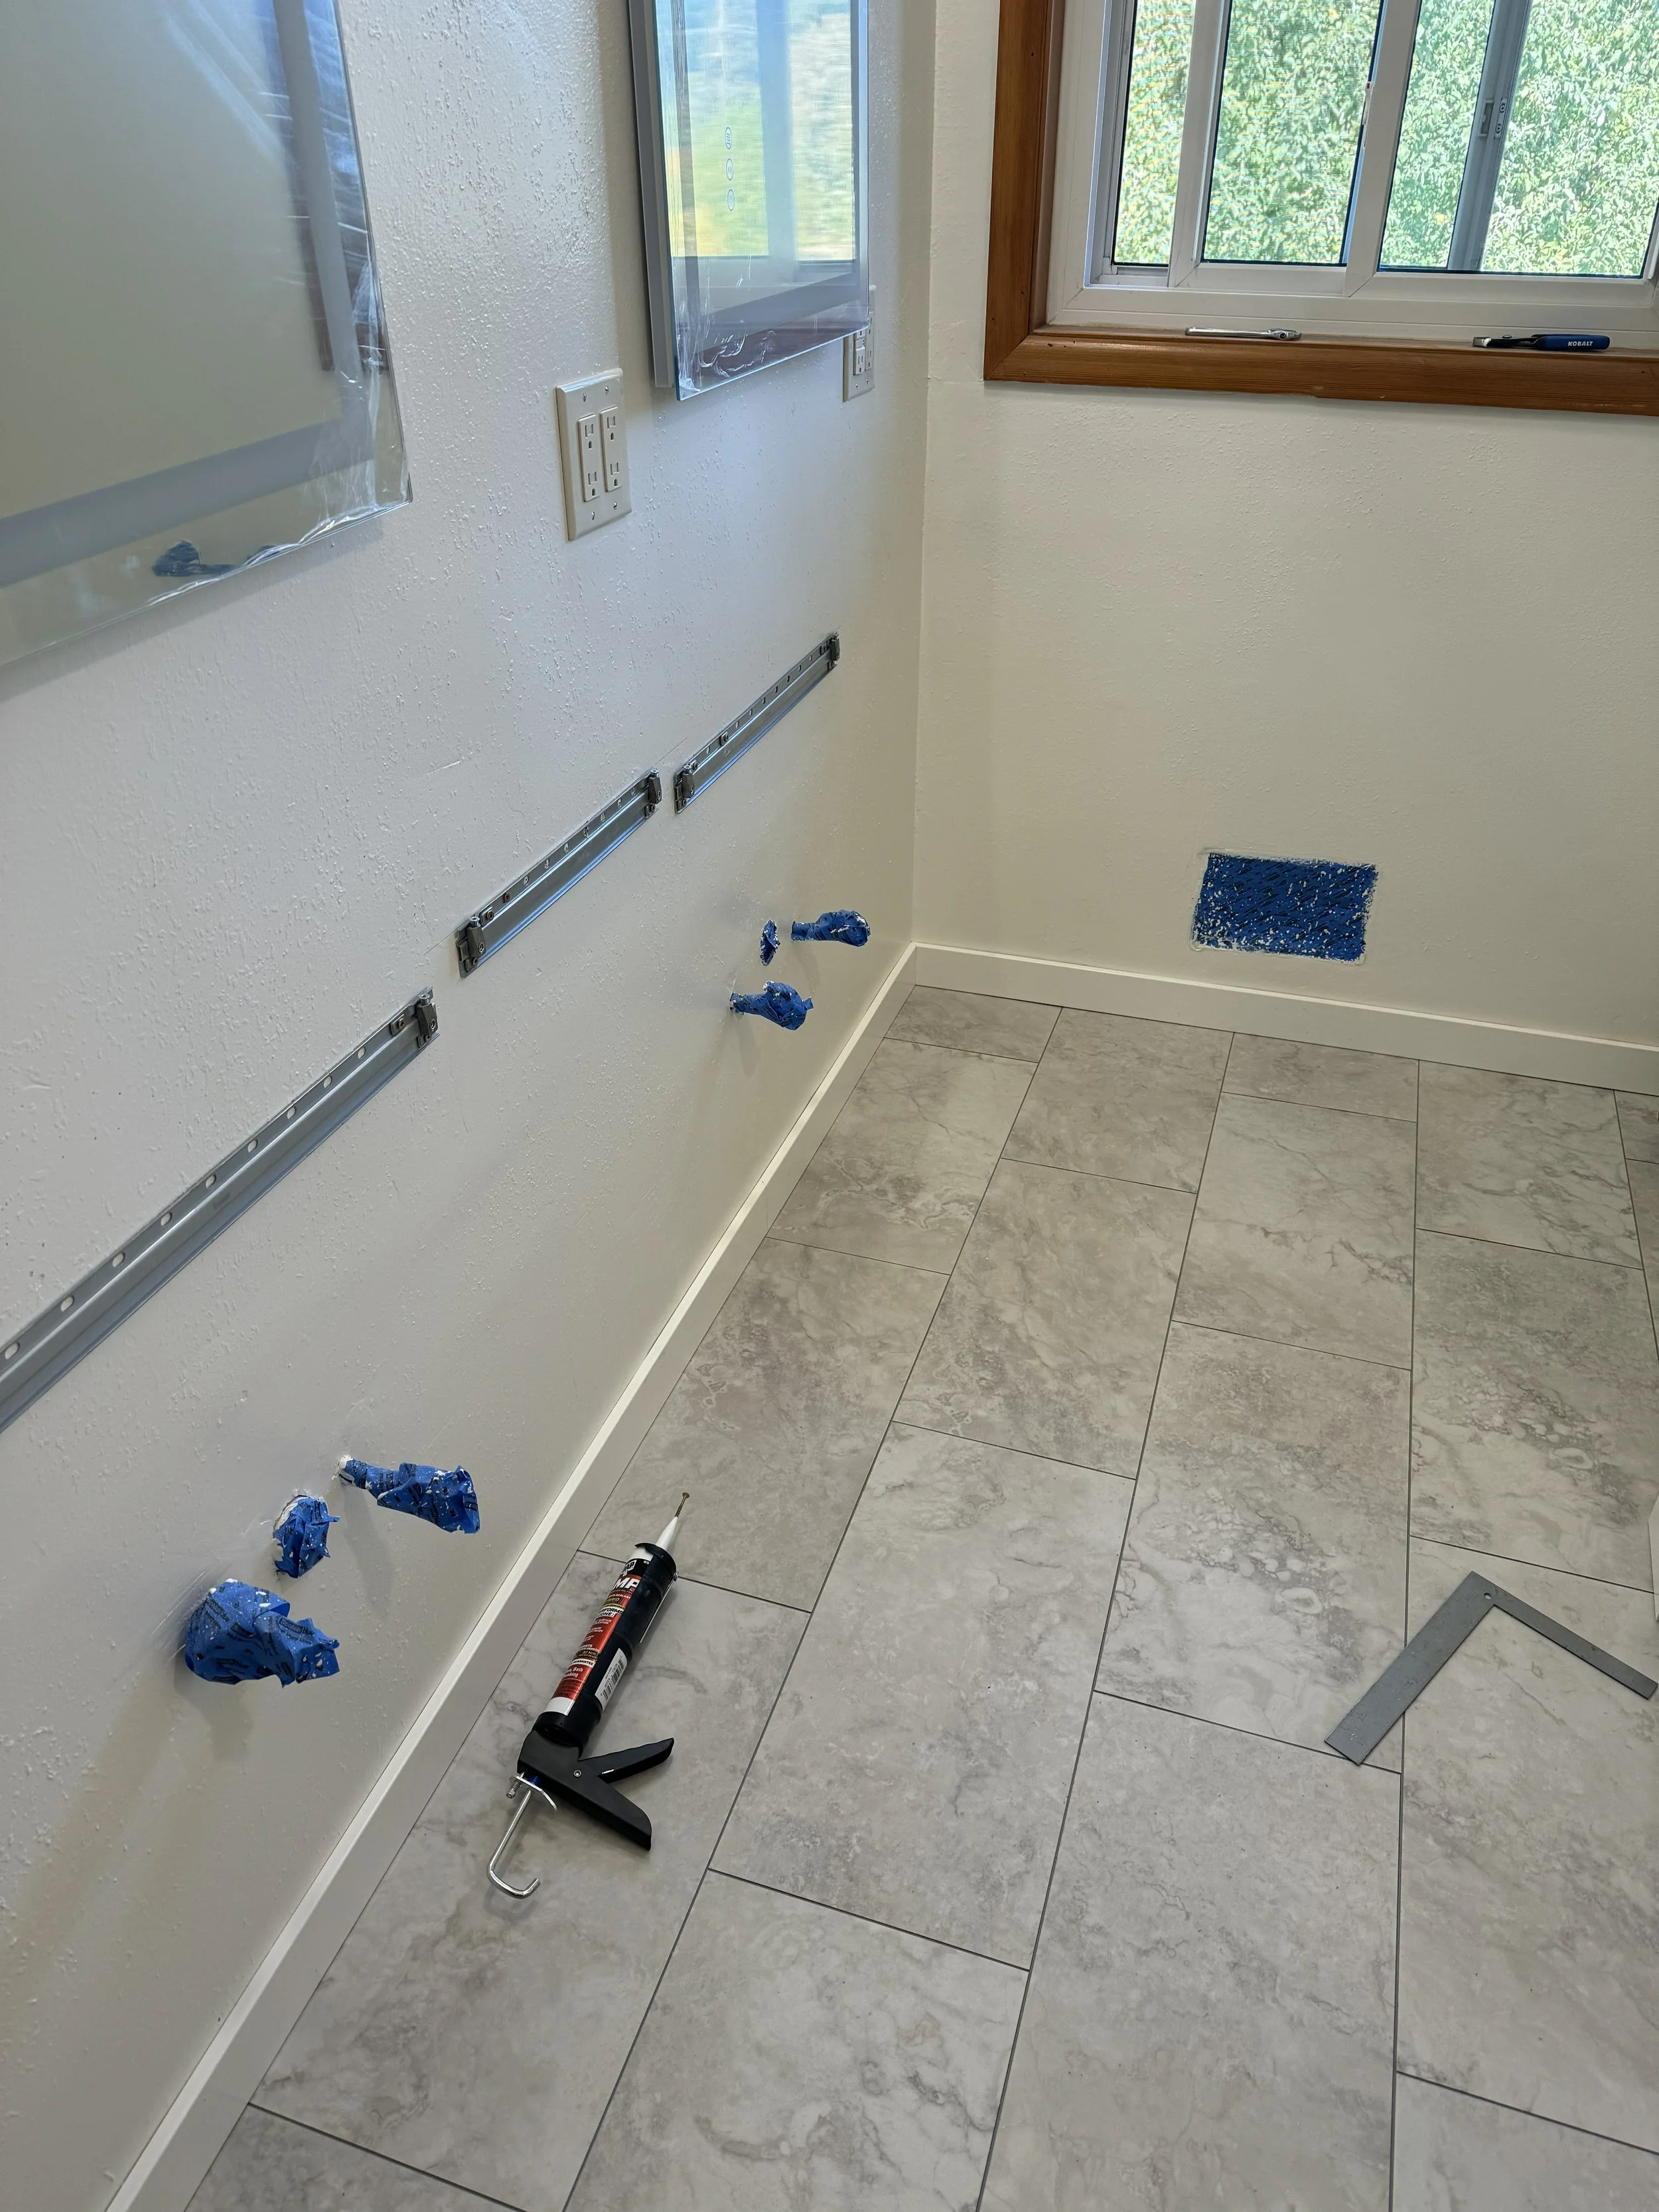
BASEBOARD INSTALL
Back to measuring twice and cutting once, the baseboards took longer than normal and were quite costly. I chose a PVC baseboard over wood or MDF because I wanted durability and resistance to moisture.
CASEWORK INSTALL
It was important to install the baseboards first before hanging the cabinet because I knew access would be difficult. I had to caulk the baseboards as the walls weren’t perfectly straight in most areas. Plus the caulking gives a clean finished look. The cabinets each hung from their own supports that came equipped with leveling screws. Once leveled, screws were added to fix the segments together from the sides.
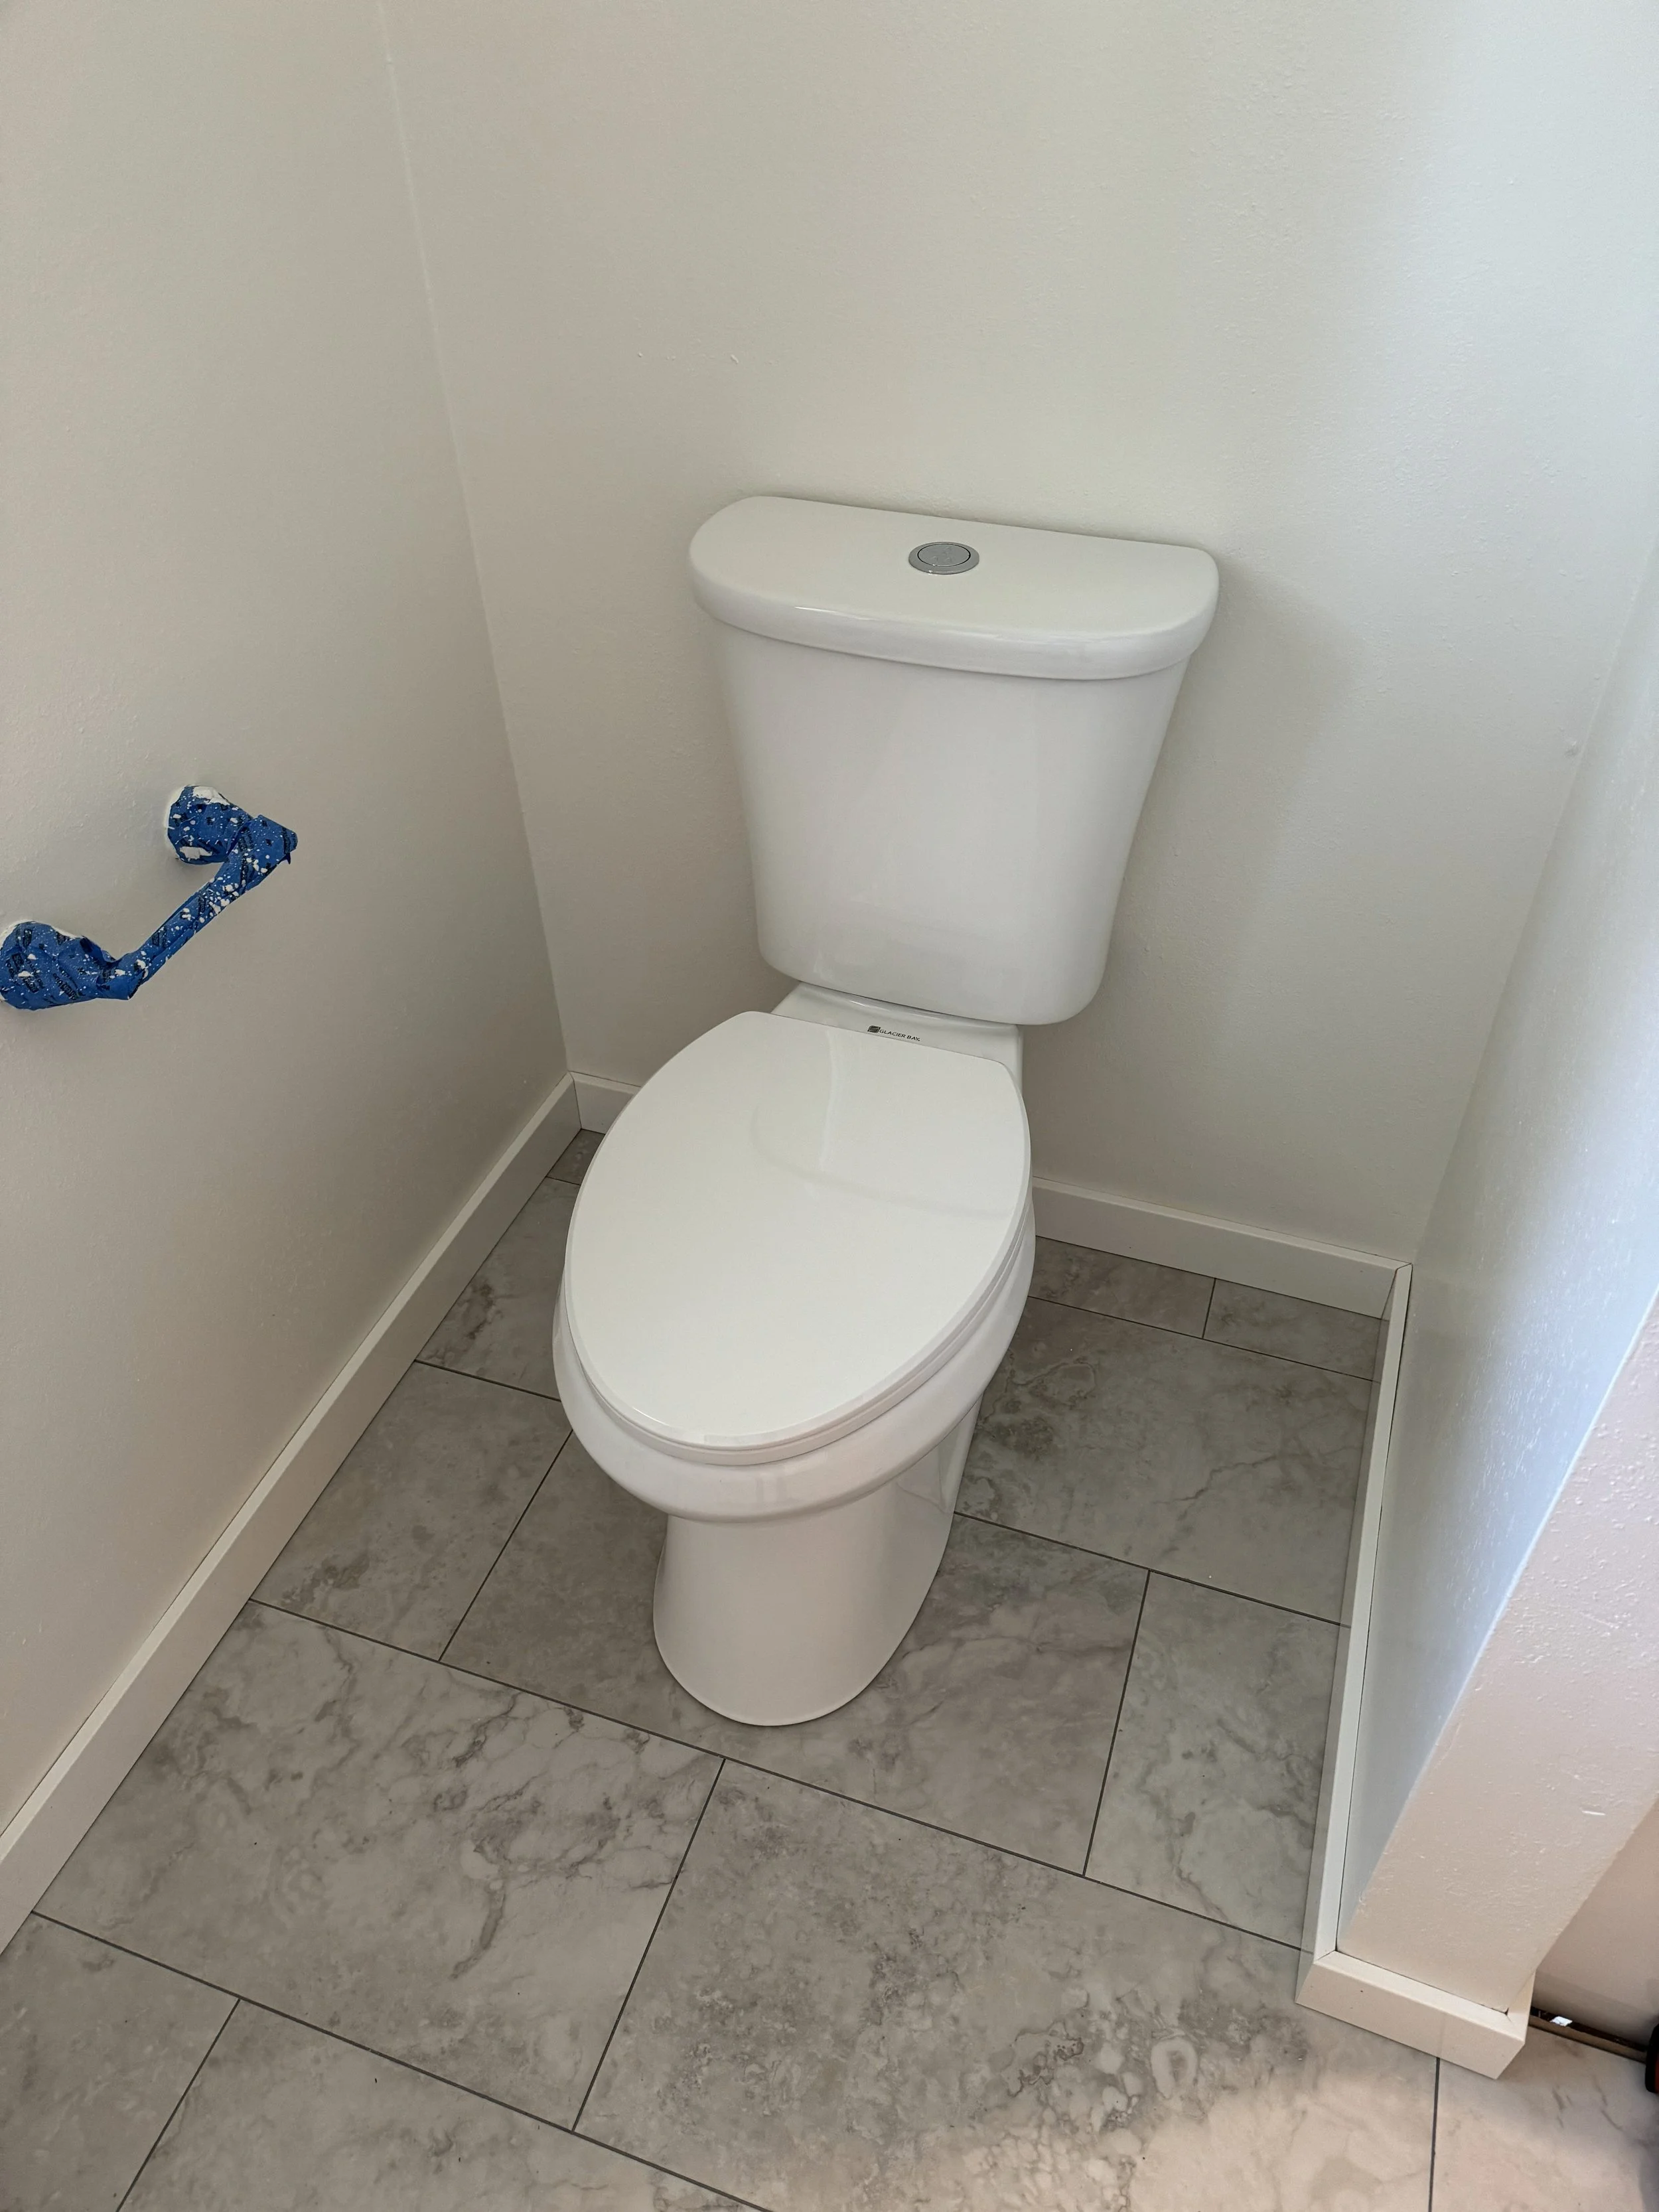
TOILET INSTALL
What isn’t shown here is a new water valve as the previous was leaking like crazy once detached. The new toilet came with its own wax seal and we utilized the new screws with the old toilet flange. Easy install. I’m still debating on whether or not to caulk around the base of the toilet. I’m not convince yet.
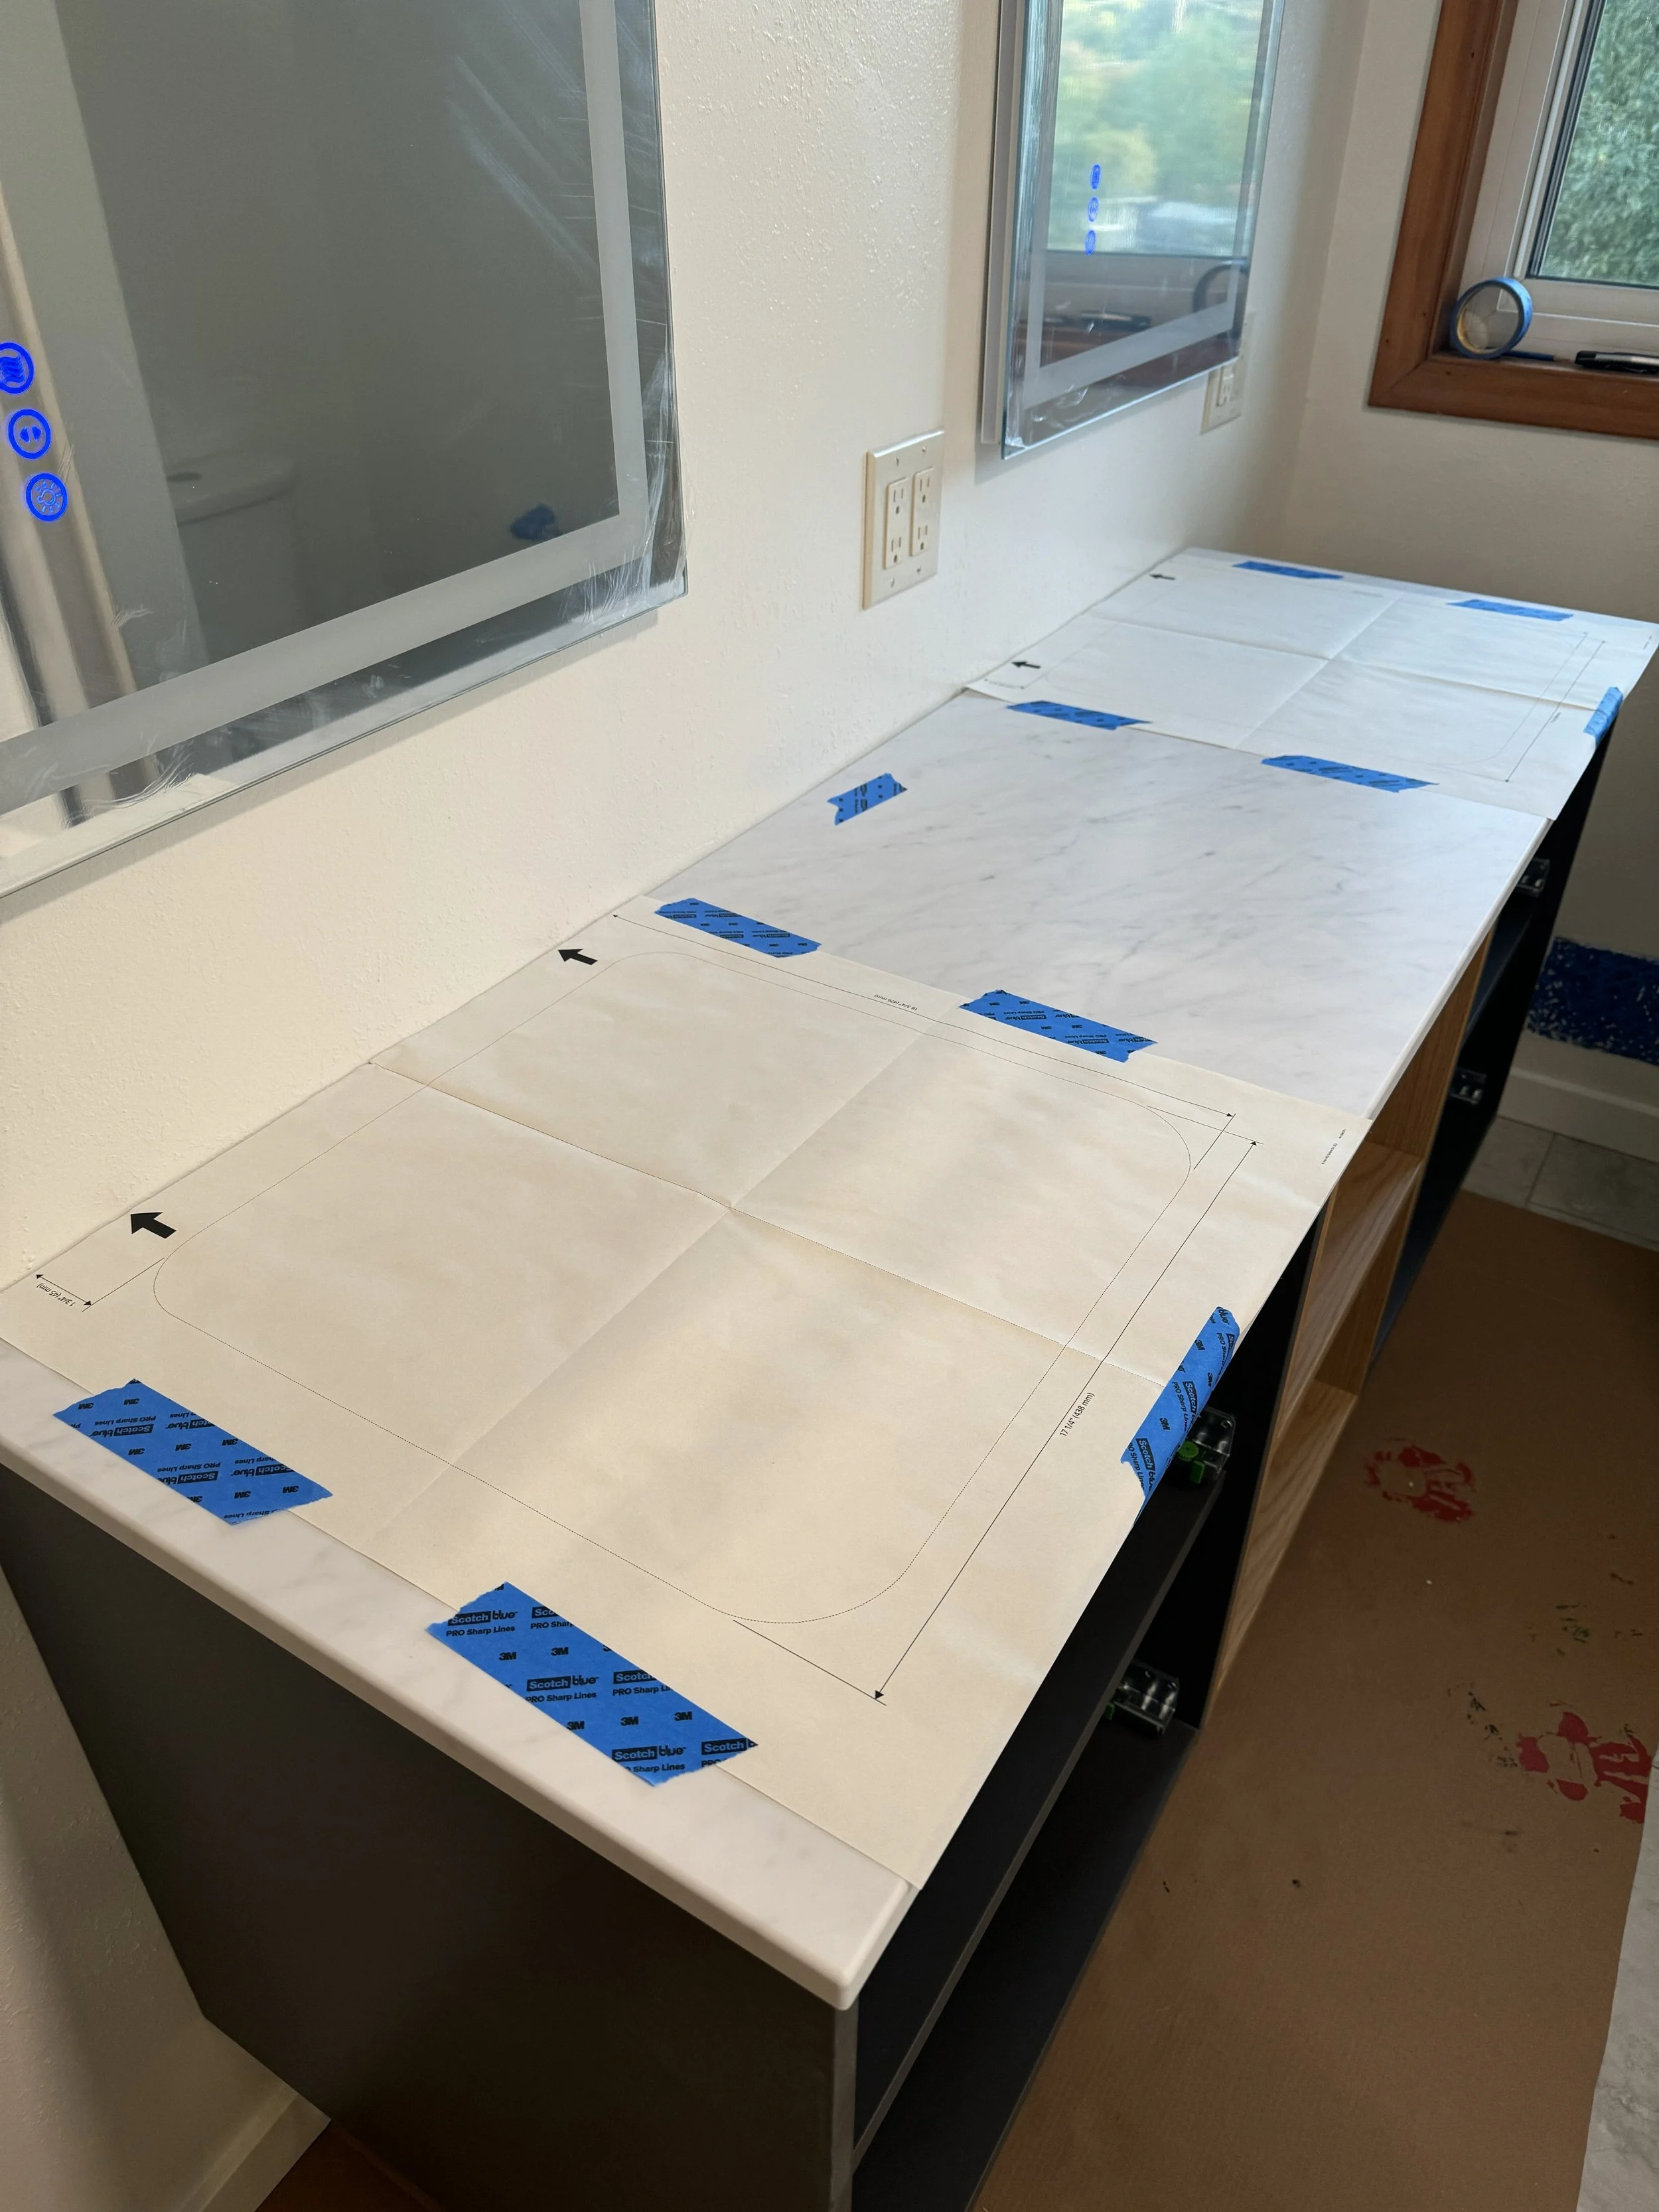
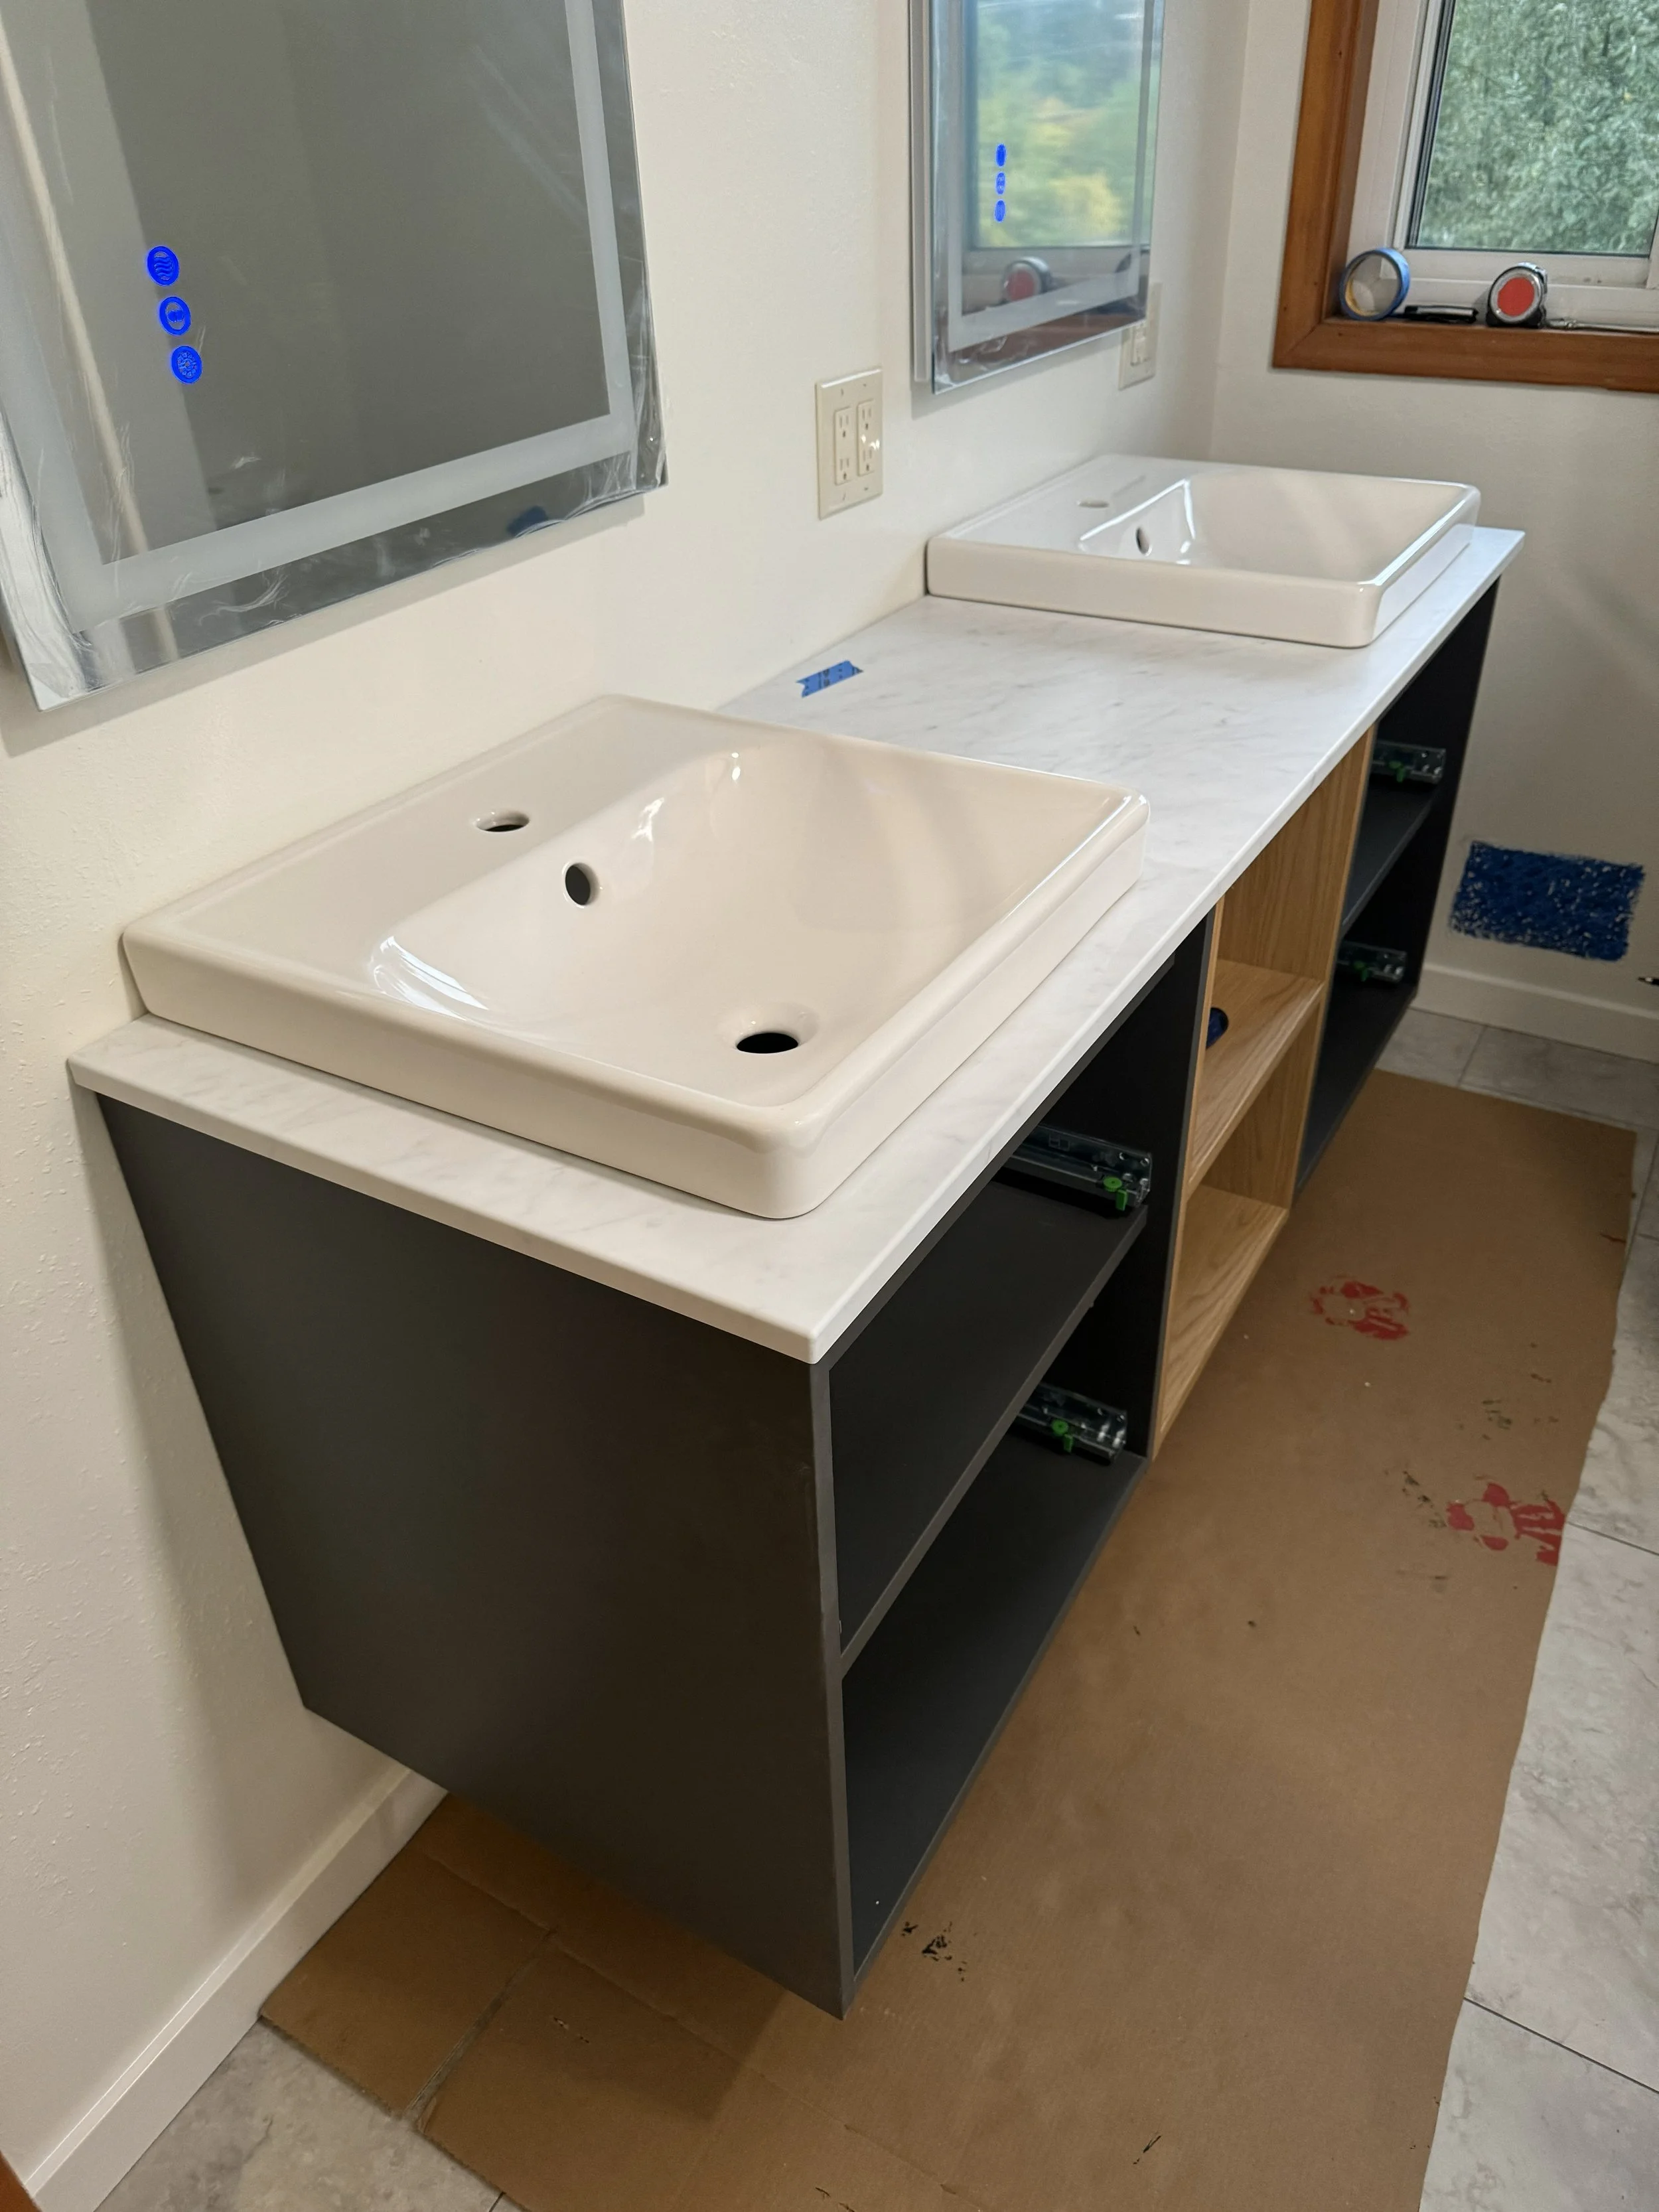
COUNTERTOP SINK ALIGNMENT
The new counter and sink came with a template of where to cut out the holes where the sink would properly site. I had been delaying this process but it turned out to be easier than I expected. I added supports to the countertop and made the cutouts in another room.
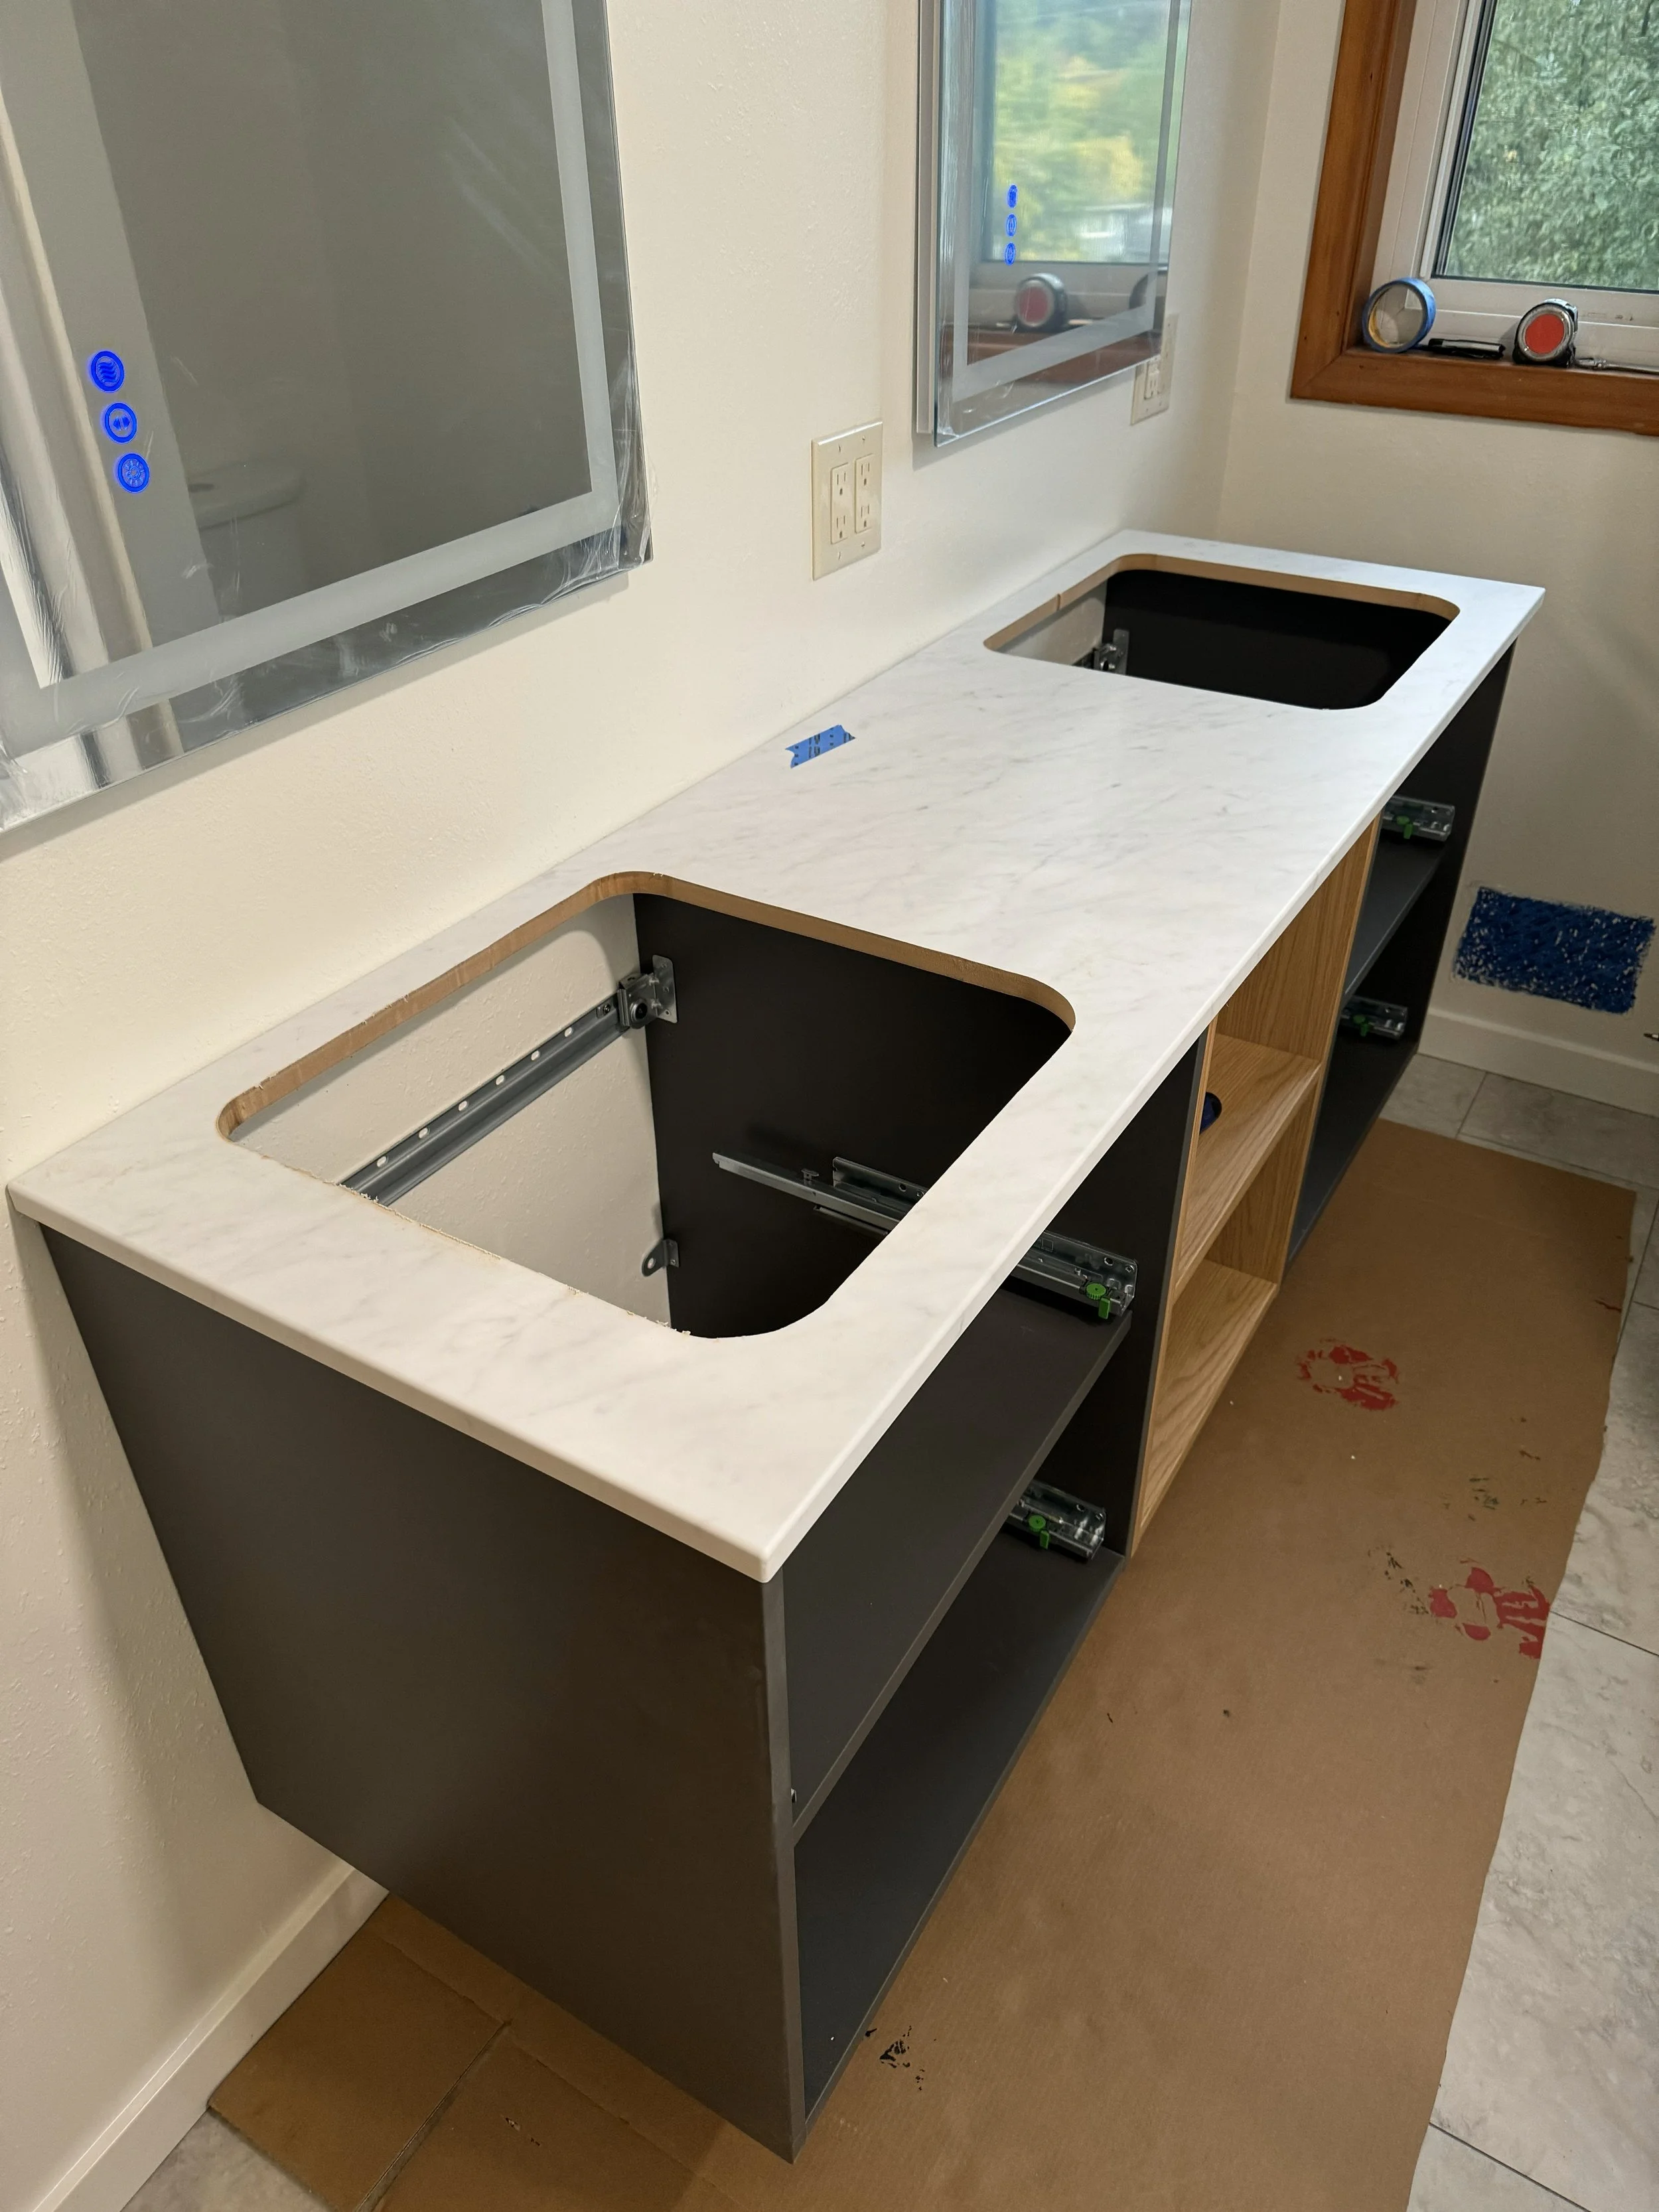
COUNTERTOP INSTALL
Once the sink holes had been cut, it was time to glue the countertop to the casework. I added the sinks to the counter while it was gluing in place before installing the sinks. This helped hold the countertop in place, but also insured the sinks would fit.
SINK INSTALL
Once the countertop was glued in place, it was time to do the same with the sinks. They were quite heavy and so I wasn’t worried about adding additional weight to have them properly set.
FAUCET INSTALL
Once the sink was glued and cured in place, it was time to add the sink faucet and hardware connecting to the drain pipe and water supply lines at each location. After that, it was final touches with additional caulking around the countertop and sink. In the future, I may add some tiling backsplash to help with water damage, but for now I was ready to call it finished.
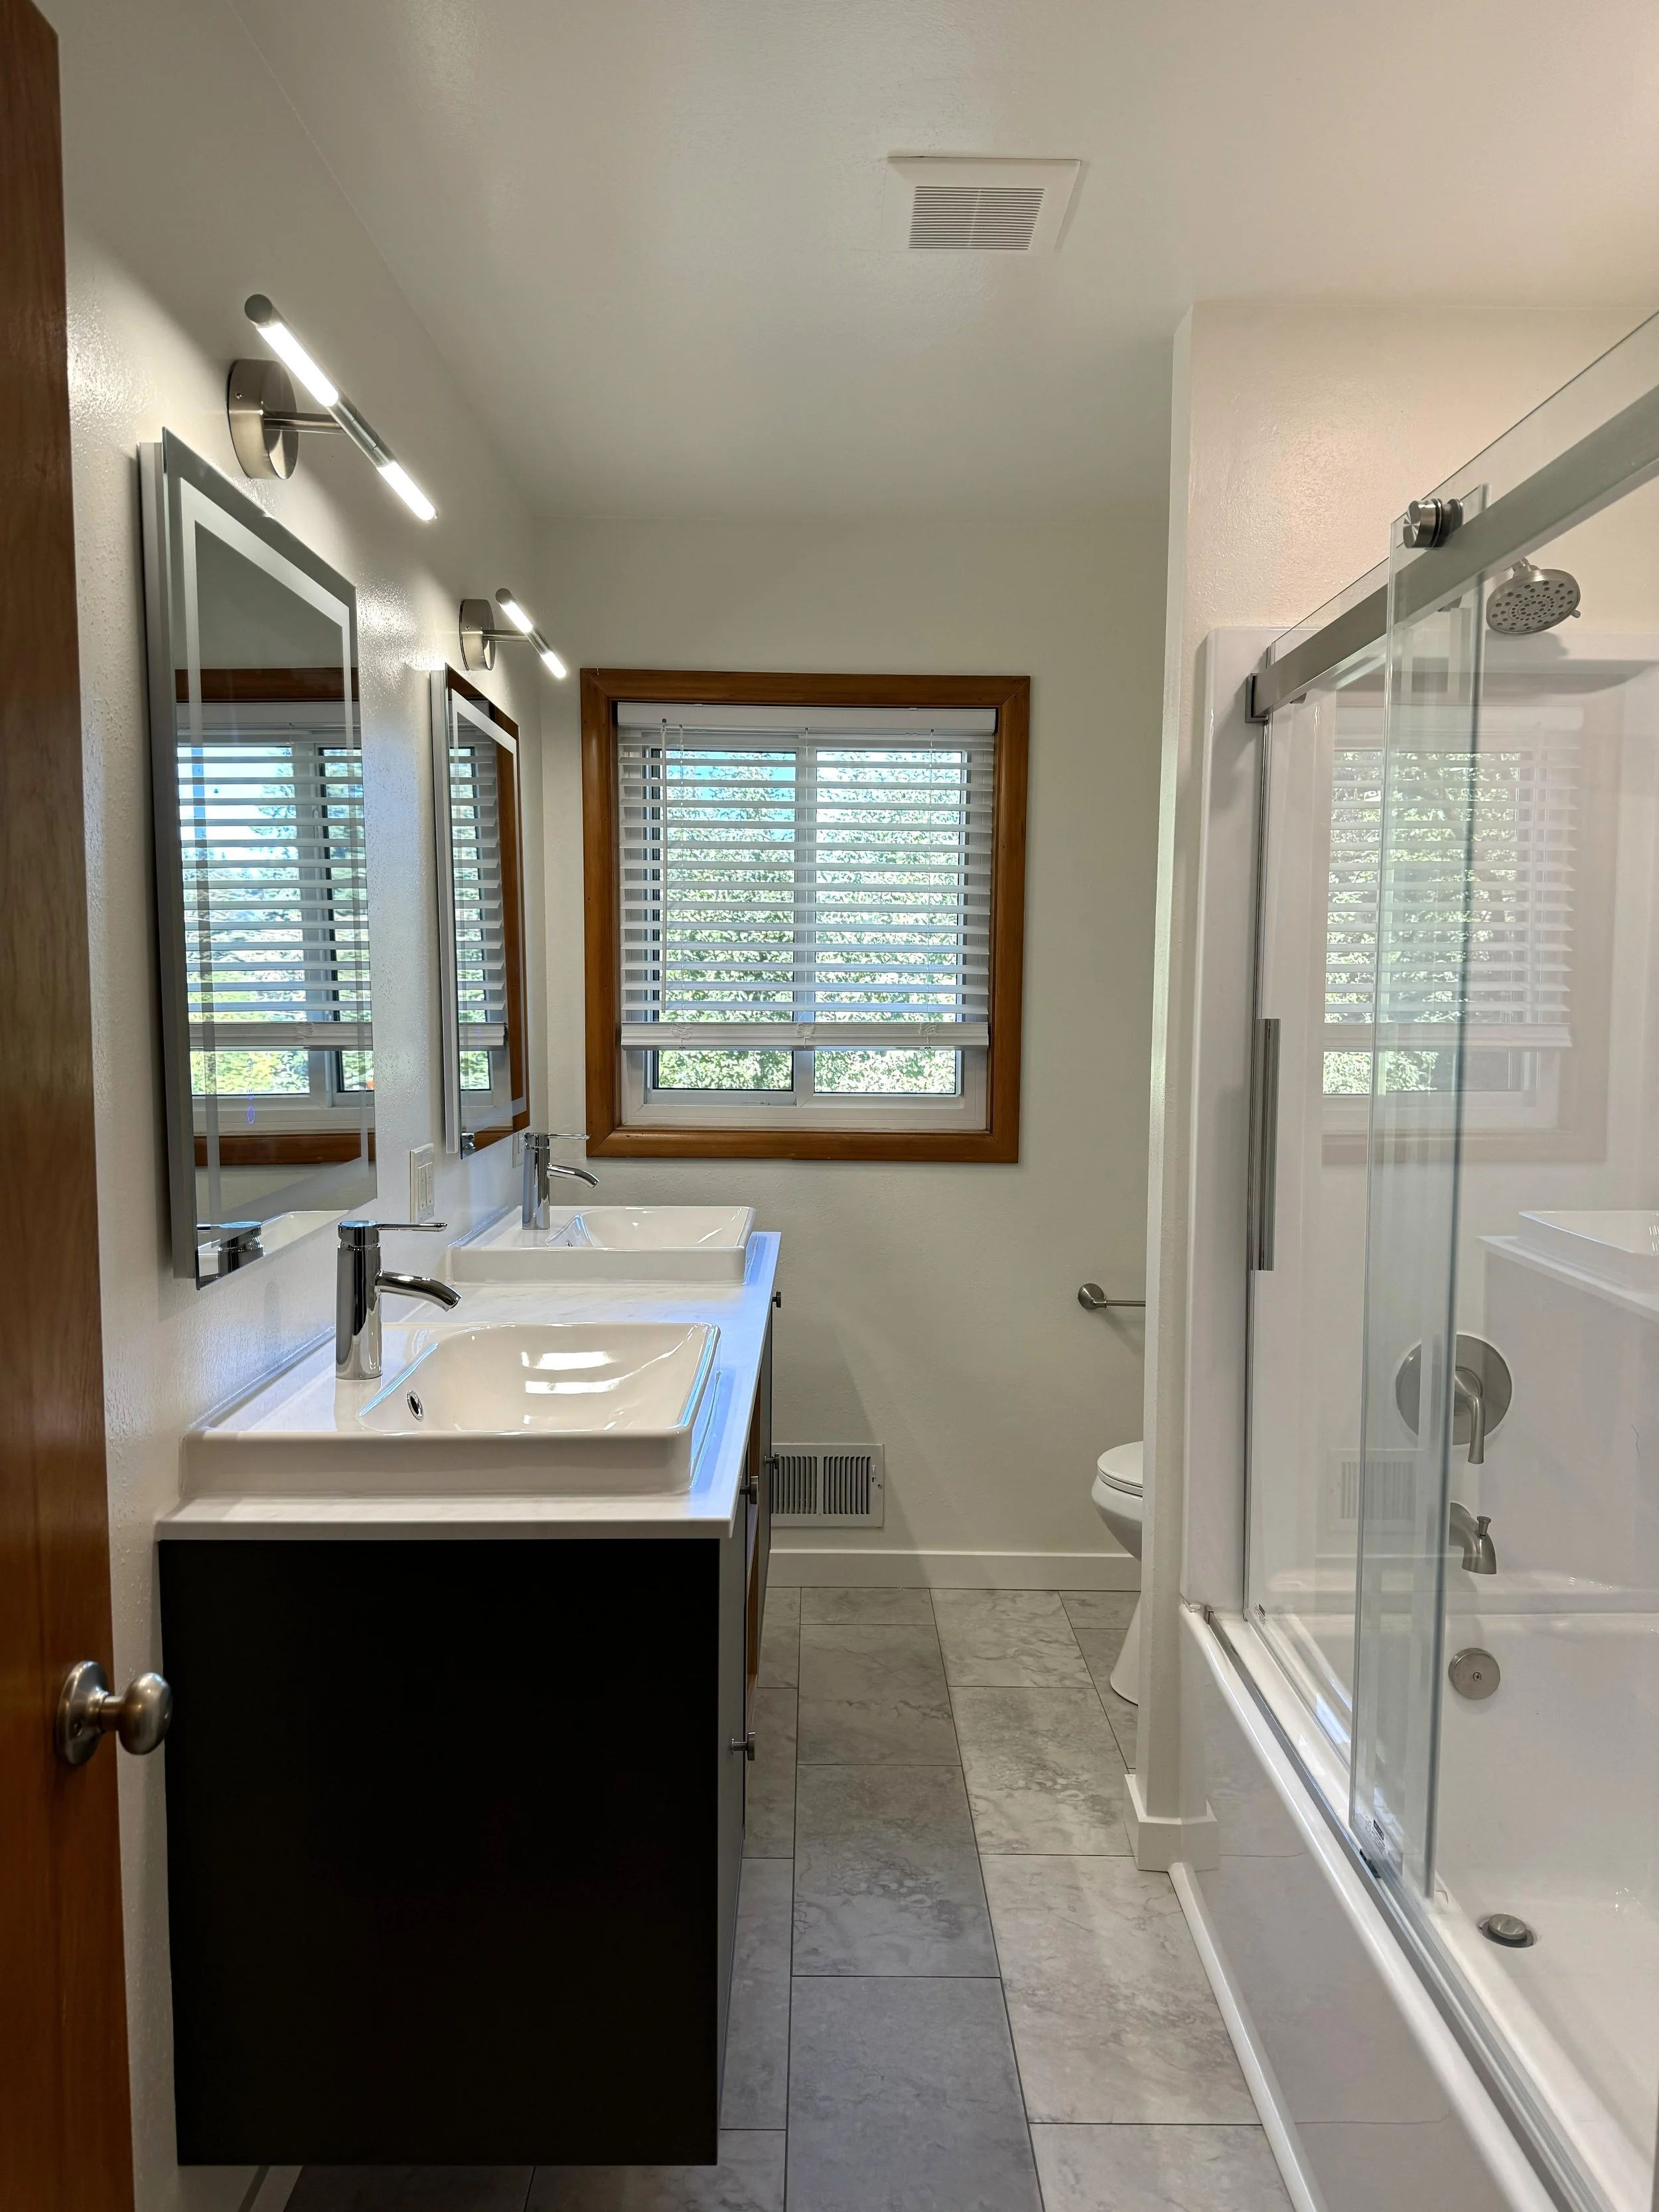
The final AFTER image of the entire bathroom remodel showing the new tub/shower with the rest of the work. It’s bright, cohesive, and maintains good flow within the existing wall parameters. Best of yet, nothing is leaking and all water supply lines work.